

I LOVE a good spin swirl when it comes to slab soap designs. I finally had a chance to make one, and here is how it turned out.
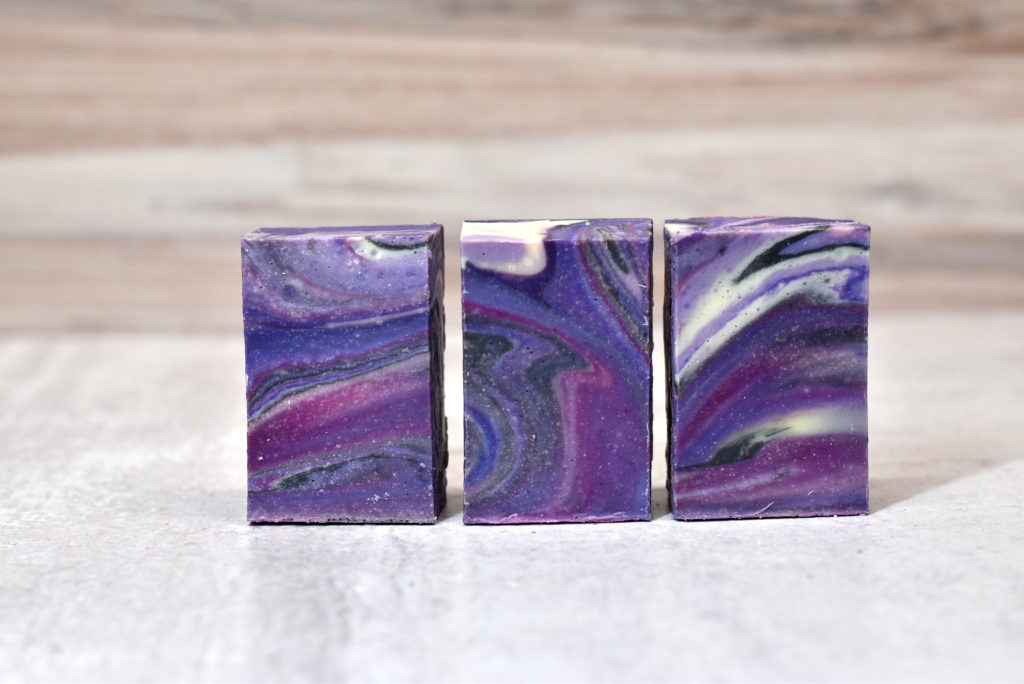
In this tutorial, I’m going to show you how I custom mixed colors and created this beautiful spin swirl soap design.
(Disclosure: Some of the links below are affiliate links, meaning, at no additional cost to you, I will earn a commission if you click through and make a purchase.)
Spin Swirl Cold Process Soap Recipe
I used a 9 bar silicone liner from Bramble Berry.
Basic Body Bar – More Moisture from Lovin Soap Studio Recipe eBook (Grab your copy for 50 cold process soap recipes + 64 essential oils blends!)
Base Oils
- Coconut Oil (76 degree) – 270 grams (30%)
- Shea Butter – 90 grams (10%)
- Olive Oil – 342 grams (38%)
- Avocado Oil – 72 grams (8%)
- Rice Bran Oil – 126 grams (14%)
Lye Solution
- Sodium Hydroxide – 126 grams (5% superfat)
- Water – 252 grams (1:2, lye:water ratio)
Scent
Use your favorite slow-moving fragrance or essential oil blend. I simply used a blend of lavender and litsea essential oils. If you’re looking for a good place to get essential oils, I HIGHLY recommend Appalachian Valley Natural Products. I love their products and their shipping is super fast!
- Lavender Essential Oil – 15 grams
- Litsea Essential Oil – 15 grams
Colors
- Flashdance (Mad Micas)
- I Dream of Purple (Mad Micas)
- Harold’s Purple Crayon (Mad Micas)
- White Mica
- Cosmetic Charcoal
Let’s make soap! If you are new to soapmaking, be sure to download our free guide, How to Make Cold Process Soap! Gear up in your gloves and your safety glasses.
Step 1: Create a lye solution. Weigh the water and lye into two separate containers. Slowly pour the sodium hydroxide into the water while stirring. Stir until completely dissolved and set aside to cool.
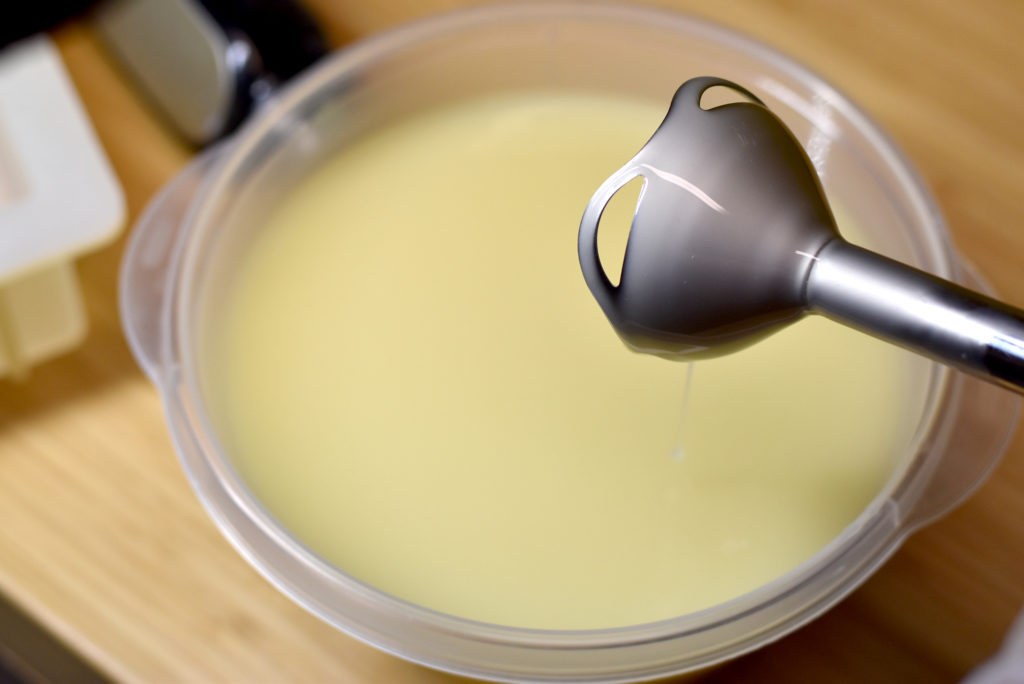
Step 2: Prepare the base oils. First, weigh any solid oils and butters into a container and melt. You can melt using the microwave or low heat on a burner. Next, weigh each liquid oil into the melted oils.
Step 3: Weigh your slow-moving essential oil or fragrance oil into a glass or stainless steel container and add to your base oil.
Step 4: Prepare your mold. If you need to line your mold, line it.
Step 5: Check the temperatures. You should now have a container containing liquid base oils and a container containing lye solution. Take the temperatures using an infra-red temperature gun. Be sure to stir each mixture before taking the temp. You want your temperatures to be between 80-100 degrees F.
Step 6: Once you have reached desired temperatures, pour the lye solution into the oil mixture and mix to emulsion.
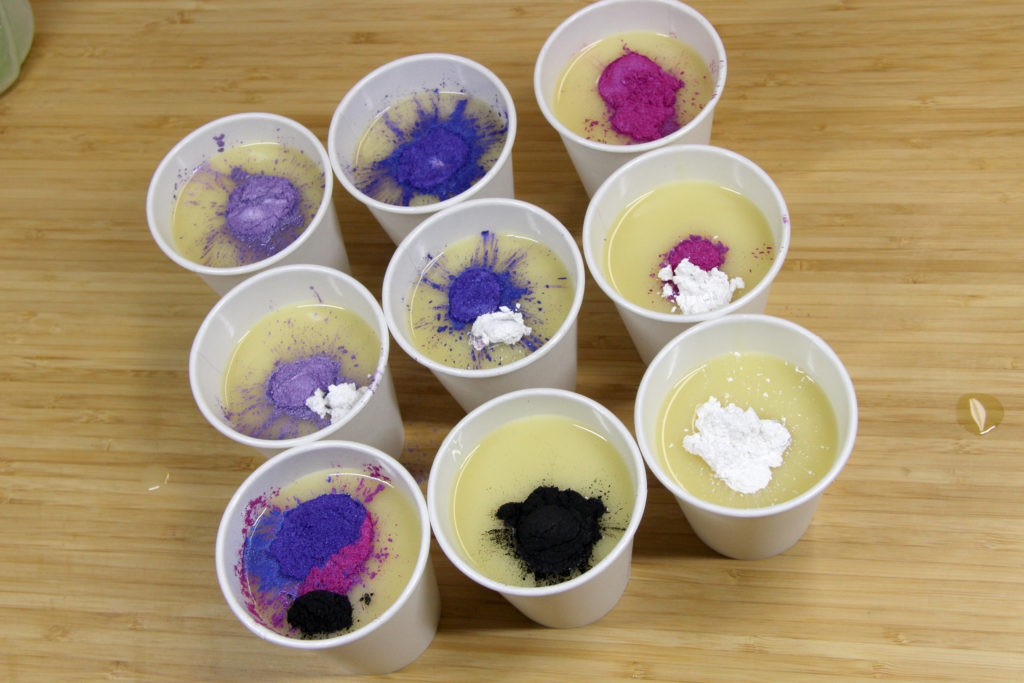
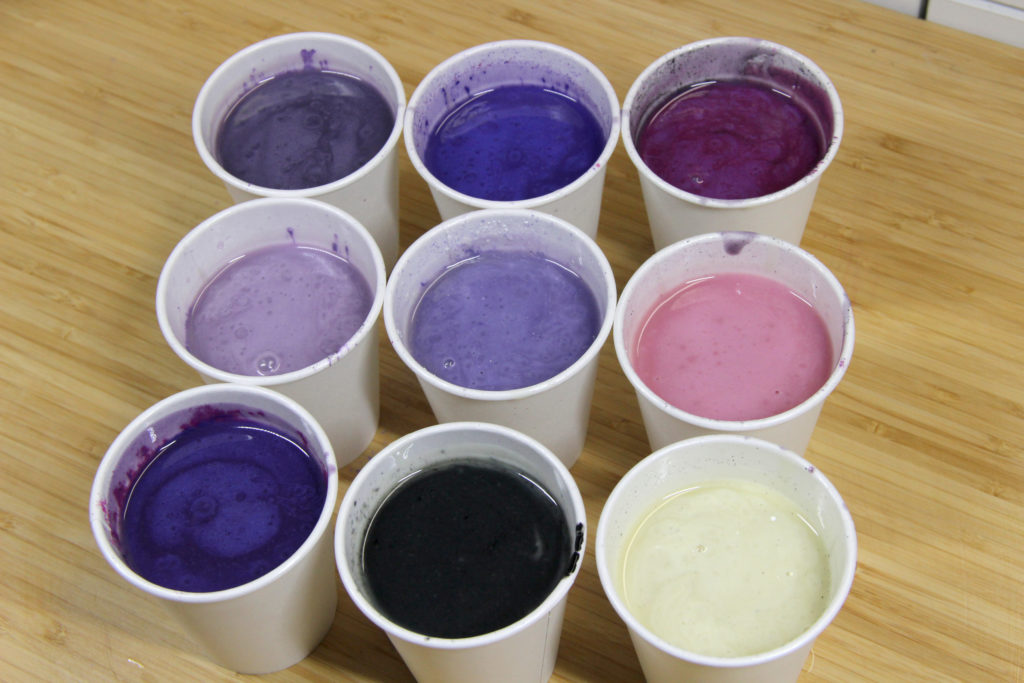
Step 7: Once emulsified, divide your soap to color. I wanted three equal layers, so divide my soap into nine different containers.
Step 8: Add mica/colorant to each cup and blend using a mini mixer. I blended some of the micas with white and mixed Harold’s and Flashdance together with black to get a varied mix of colors.
Step 9: To pour your soap, start on opposing corners and start pouring in one spot, rotating through your colors!
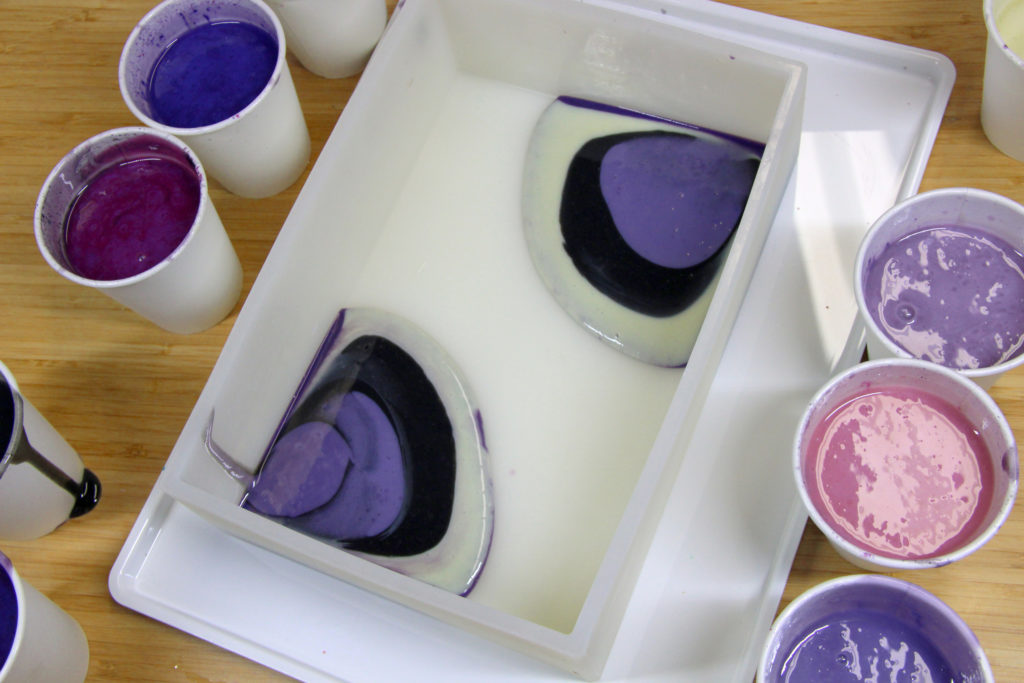
I ended up pouring in four spots, instead of 2! I don’t think it really matters! But, just keep pouring a little at a time, building your soap up.
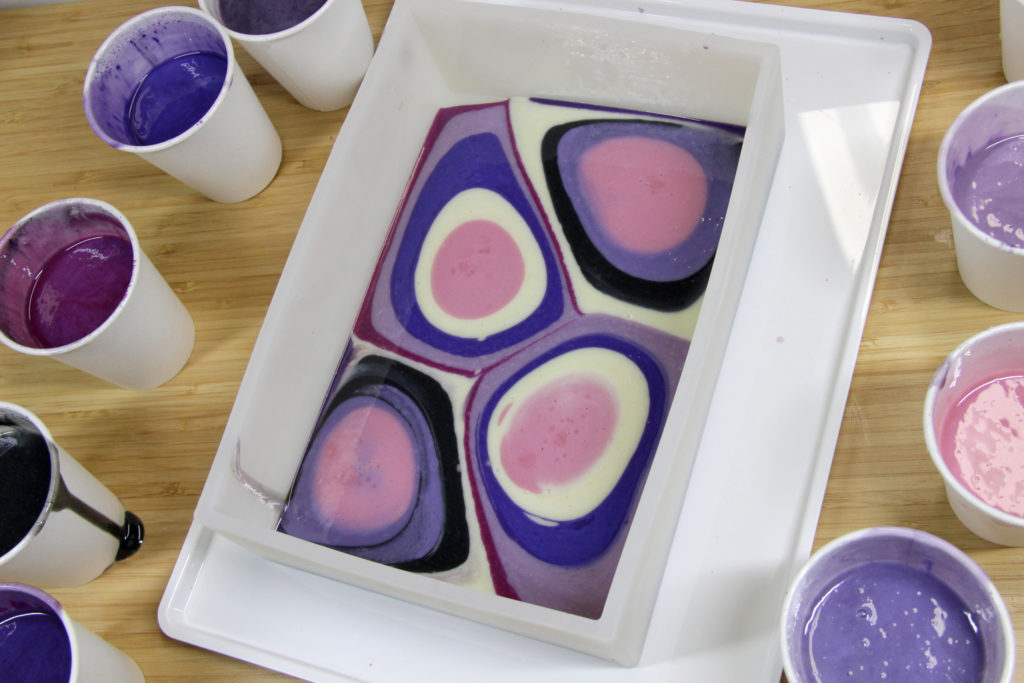
Step 10: Pour until all your soap has been used up.
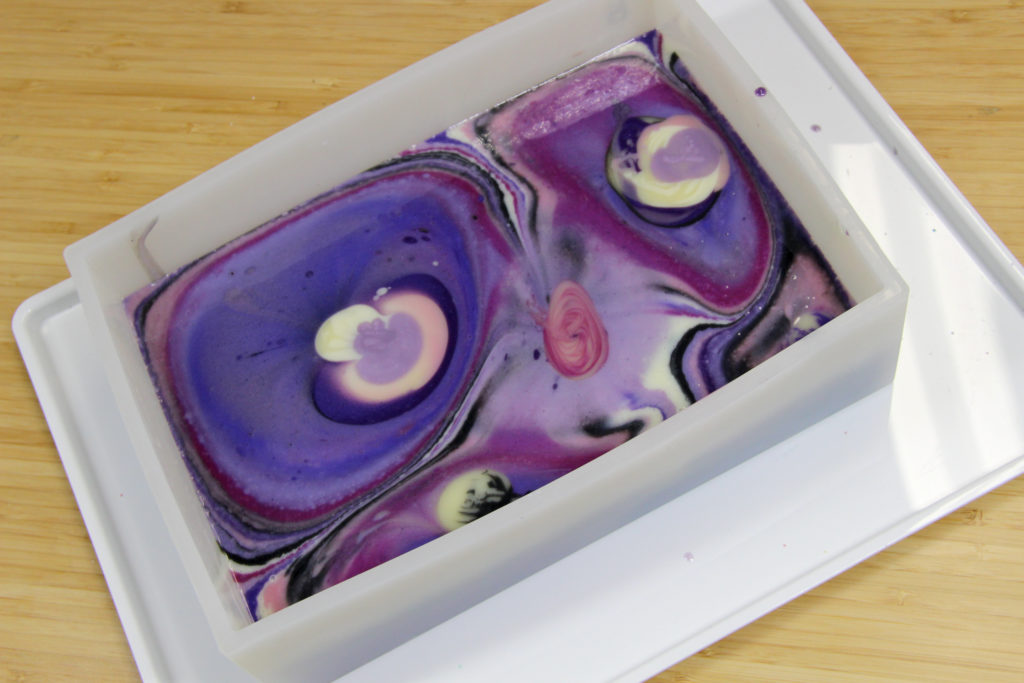
Step 11: Now for the fun part! The spinning! Grab your mold and spin it (yes! with your soap in it!), stopping it quickly. The force of the soap continuing to move in your mold after you’ve stopped the spin is what creates the design. If that is hard to imagine, check out this video from Anne-Marie. You don’t need a lazy Susan, but it does help!

You’ll be amazed at the design that you get! Spin a little or spin a lot, but don’t spin to much that you muddy your soap!
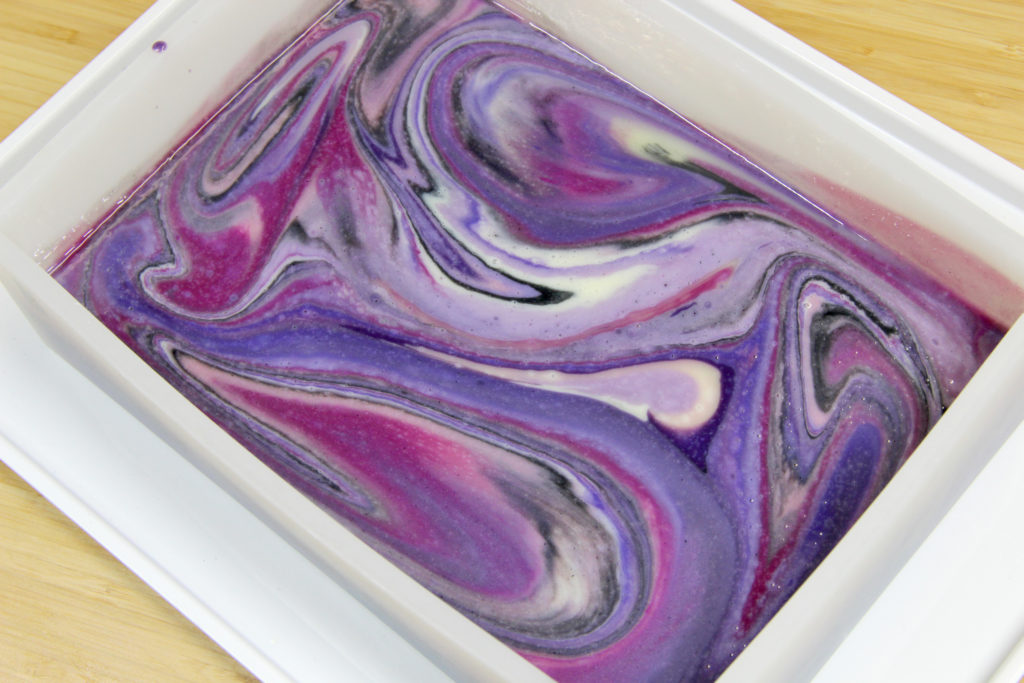
Once you’re done, allow your soap to sit until thickened and spray with alcohol to combat ash.
Step 12: Allow your soap to saponify and harden for at least 24 hours. After 24 hours, you can unmold and cut. Cure your soap for 4-6 weeks.
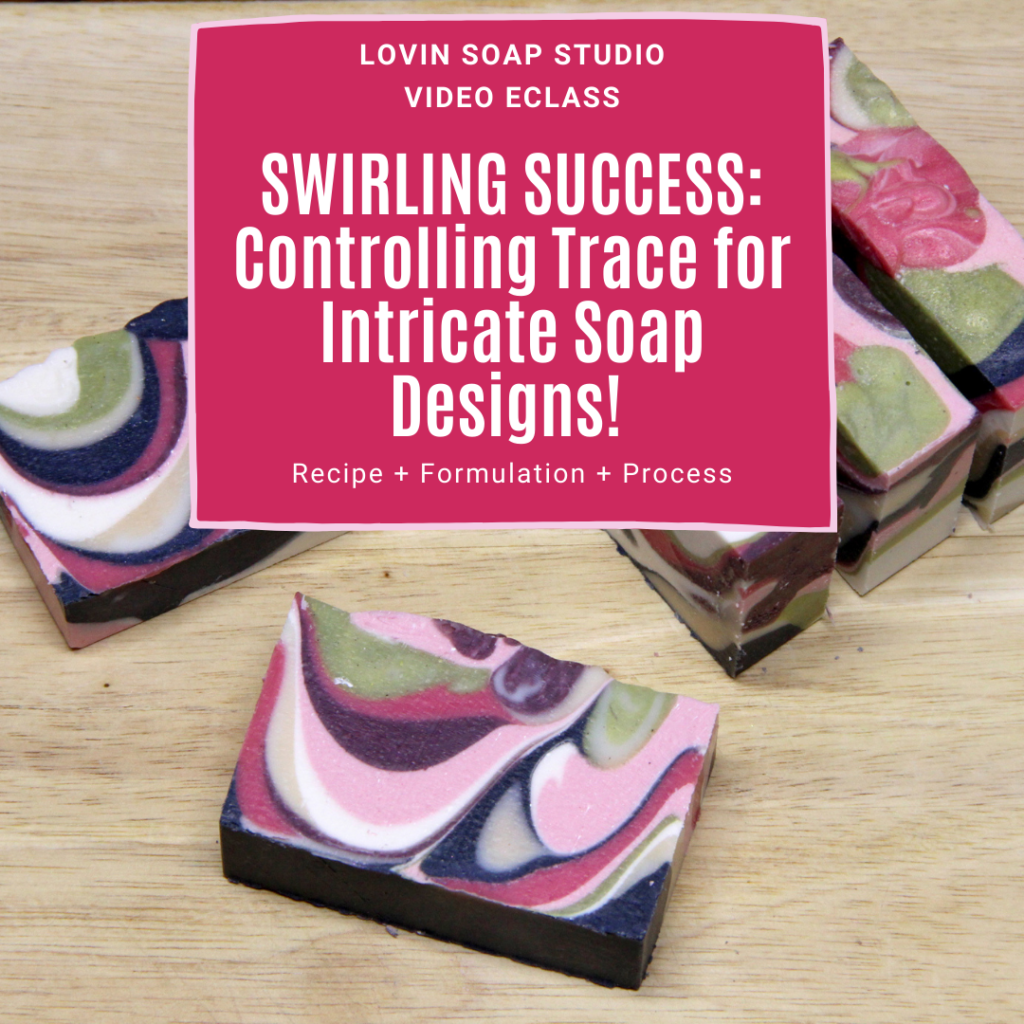
Grab our new eCourse, Swirling Success!
Learn to control trace, so it doesn’t control you!
This detailed video training explores the difference between emulsion and trace, so you know when to stop mixing your soap, allowing enough time to color and execute intricate designs. You’ll leave the eClass with a greater understanding of how water/liquid, temperatures, base oils, fragrance oils, essential oils and additives all affect the movement of your soap to trace.

Loved it, I’m going to try it. Thanks