

If you’ve been in our Facebook Group, Saponification Nation, recently, you may have seen me whip up this festive peppermint soap in a FB Live… because somehow I had zero winter soaps ready (oops). Pumpkin? Always. Holiday peppermint? Not a single bar. So, we fixed that!
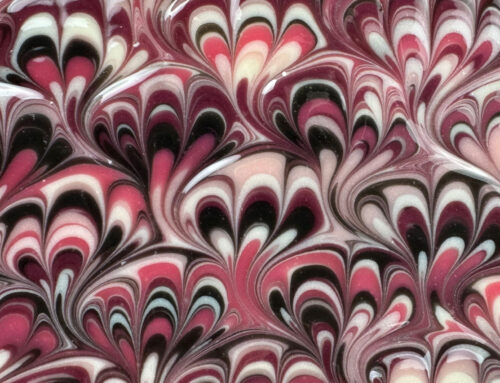
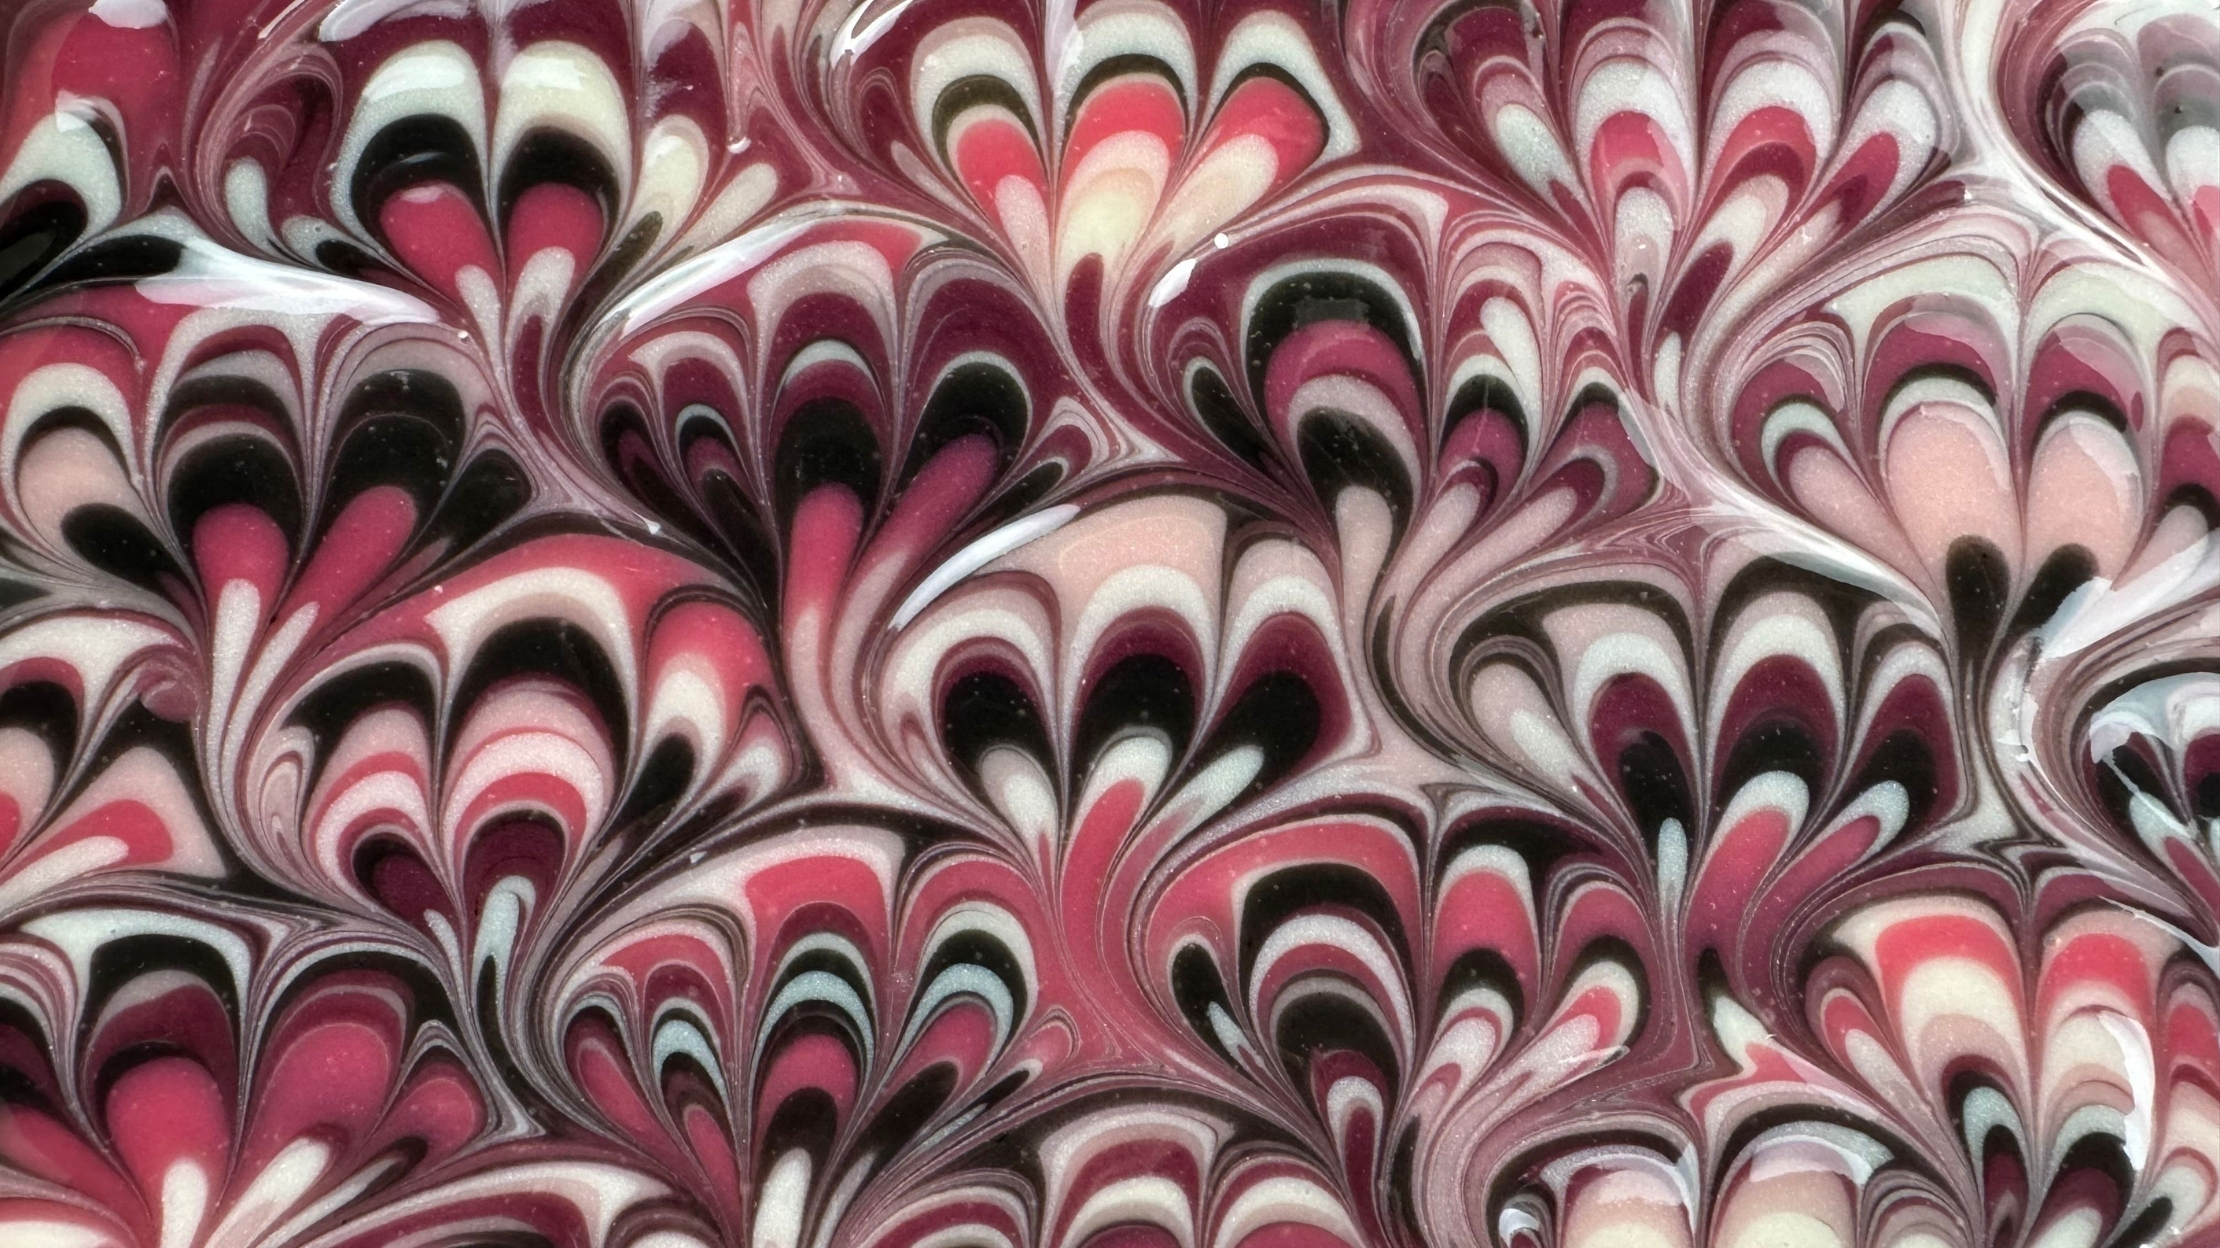
This design uses a simple three‑color swirl in red, pink, and white, scented with sweet, candy‑like Cornmint essential oil. It’s fun, beginner‑friendly, and perfect for the season.
(Disclosure: Some of the links below are affiliate links, meaning, at no additional cost to you, I will earn a commission if you click through and make a purchase.)
Peppermint Swirl Soap Recipe
I used a 12″ Silicone Loaf Mold from Nurture!
Basic Body Bar – More Moisture from Lovin Soap Studio Recipe eBook (Grab your copy for 50 cold process soap recipes + 64 essential oils blends!)
Base Oils
- Coconut Oil (76 degree) – 270 grams (30%)
- Shea Butter – 90 grams (10%)
- Olive Oil – 342 grams (38%)
- Avocado Oil – 72 grams (8%)
- Rice Bran Oil – 126 grams (14%)
Lye Solution
- Sodium Hydroxide – 126 grams (5% superfat)
- Water – 252 grams (1:2, lye:water ratio)
Scent
- Essential Oil – Cornmint EO – 20 grams
I used cornmint essential oil, which smells like sweet candy peppermint. It’s my favorite for holiday soaps! You can use peppermint EO or even a fragrance oil if you prefer – just make sure it’s a slow-moving scent!
I added 20 grams for a light scent, but you could go up to 40 – 45 grams if you want it stronger.
If you’re looking for a good place to get essential oils, I HIGHLY recommend Appalachian Valley Natural Products. I love their products and their shipping is super fast!
Color
- WInter White mica (Nurture)
- Trial By Fire mica (also Nurture Soap)
Let’s make soap! Gear up in your goggles and gloves before you handle the lye. If you are new to soapmaking, be sure to download our free guide, How to Make Cold Process Soap!
Step 1: Create a lye solution. Weigh the water and lye into two separate containers. Slowly pour the sodium hydroxide into the water while stirring. Stir until completely dissolved and set aside to cool.
For swirling, I like both oils and lye between 80 – 100°F. My lye cooled to 83°F, which was perfect.
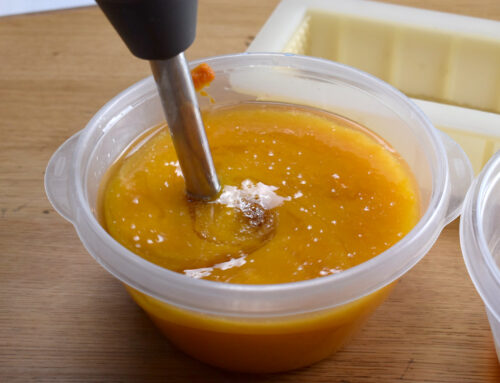
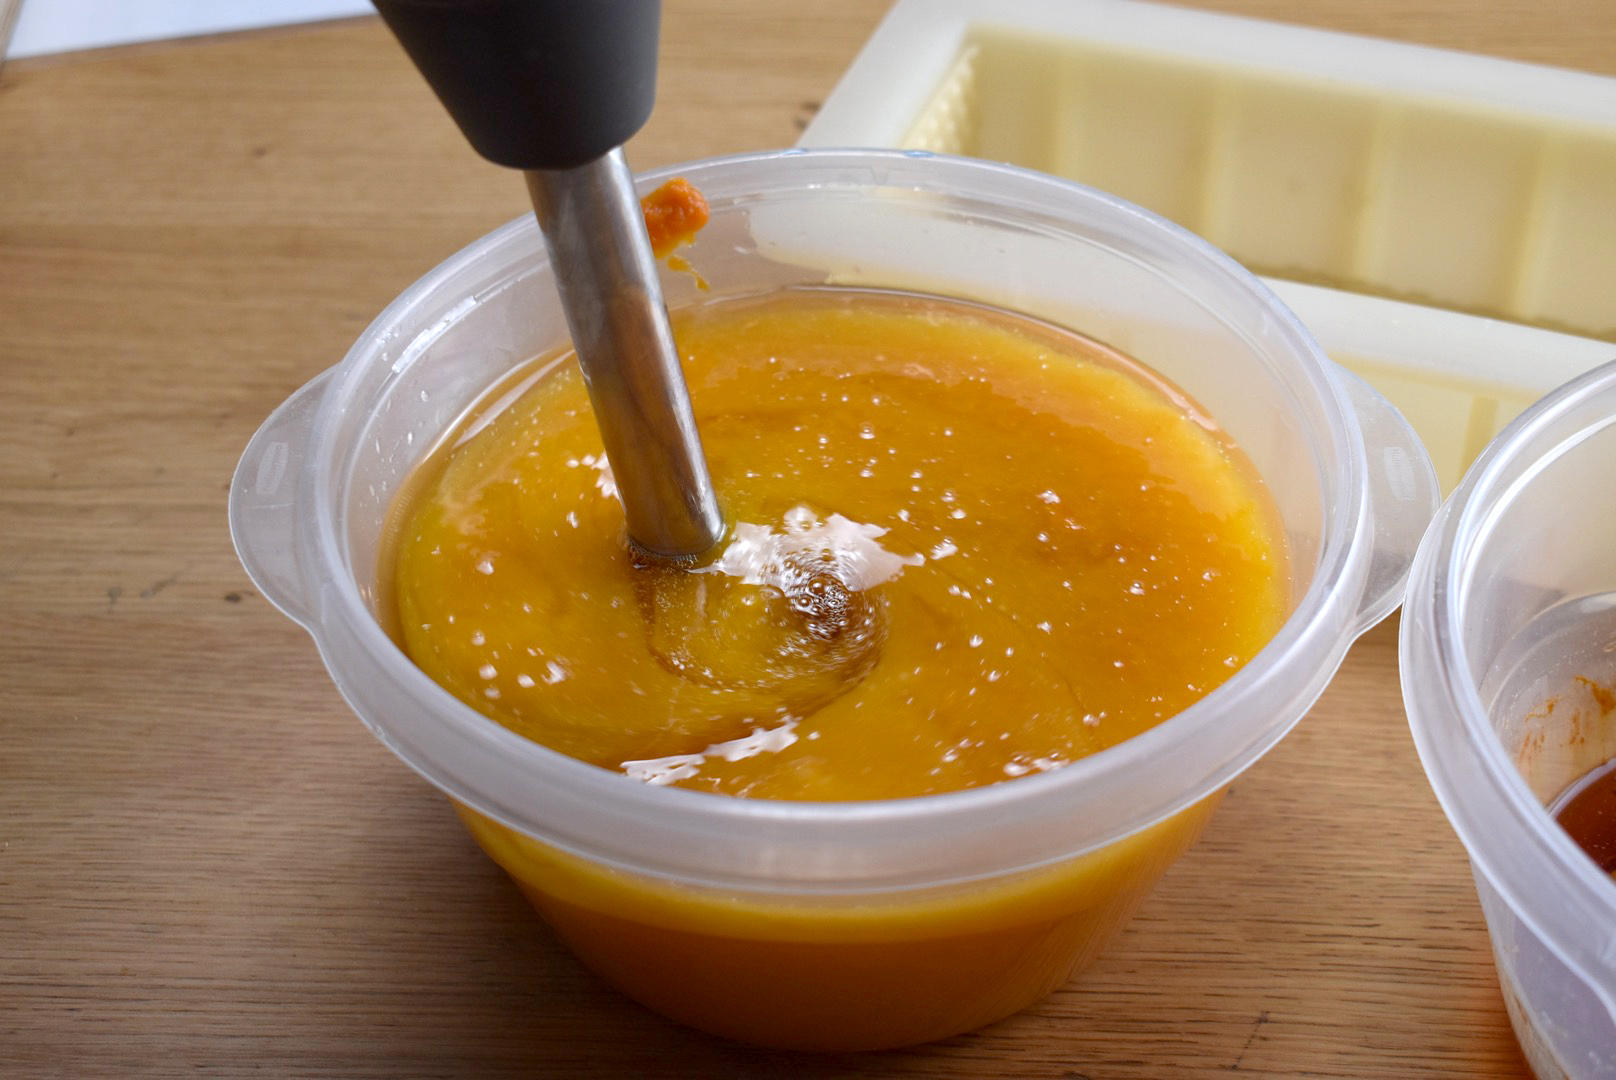
Step 2: Prepare the base oils. First, weigh any solid oils and butters into a container and melt. You can melt using the microwave or low heat on a burner.
Step 3: Next, weigh each liquid oil into the melted oils. The liquid oils will cool down the melted oils and leave you with a base oil mixture that is about at the correct temperature to make soap. It might still need to cool down a bit.
Step 4: Weigh your essential oil or fragrance oil into a glass or stainless steel container and add to your base oils. You can also simply weigh the essential oils directly into your base oils.
Step 5: Prepare your mold as your lye solution and oils cool. If you need to line your mold, line it!
Step 6: Check the temperatures using an infrared gun. You should now have a container containing liquid base oils and scent, and a container containing lye solution. Be sure to stir each mixture before taking the temp. You want your temperatures to be between 80-100 degrees F.
Step 7: Once you have reached the desired temperatures, pour the lye solution into the oil mixture and mix to emulsion. Stir by hand if your fragrance mentions acceleration in cold process soap. You want very light or no trace so that you have time to swirl.
Step 8: Once emulsified, divide your soap to color. I wanted three colors, so divided my soap into three containers.
Step 9: Add your colorants to each pour spout container! I did white, red, and pink (white plus a tiny bit of red). Blend each color with a quick pulse of the stick blender or mini mixer. I add mica with my heart – ha! If it’s not saturated enough, add a touch more!
Step 10: Pour your soap into the mold! I aimed for a tiger stripe swirl, but the batter thickened a bit, so it became more of a plop swirl – and it still turned out gorgeous. You can watch how I created this soap in real time at the end of this post!
For a tiger swirl design, using pour‑spout pitchers, alternate pouring red, pink, and white down the center of the mold.
Let the colors stack and push each other outward.
If you want, use a hanger or swirling tool to give it an extra gentle swirl inside. Here are some more detailed tutorials on these types of pours (including the plop swirl I mentioned!). I swear, they are fun and easy!
Step 11: You can leave the top as is, or add some texture! Use a spoon or spatula to create a fluffy, textured top like I did. I think this design looks adorable with soft peaks and waves.
Step 12: Let your soap harden and saponify for at least 24 hours. If your soap doesn’t gel, it could take another day or two to harden enough to unmold.
Step 13: Unmold your soap, cut, and allow it to cure for 4-6 weeks. I LOVE how this soap turned out! Bright, cheerful, and perfectly pepperminty.
Watch this soap made in real time, with lots of extra tips and tricks, in this video!

If you make this one, share it in our Facebook Group, Saponification Nation! I’d love to see your peppermint swirls.
Happy Soaping!
Amanda


granny 1 offers a thrilling survival experience where patience and awareness matter more than speed. explore carefully, avoid making noise, and complete puzzles to secure your freedom.
granny 1 throws you into a nightmare where every room may contain a clue or a threat. collect essential items and sneak through the house to escape without alerting granny.
Nice one thanks