
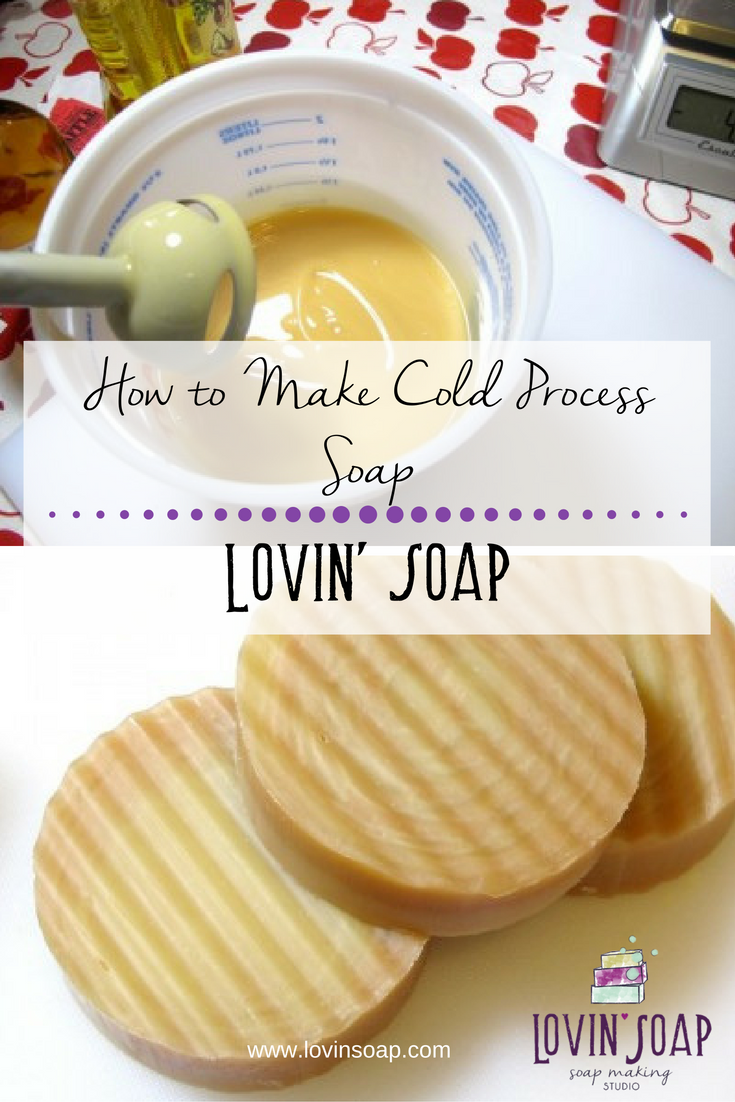
What is soap and how is it made?
Soap is the result of combining an acid with a base. In cold process soap making your oils and butters are the acid and sodium hydroxide (lye) is the base. When combined, a chemical reaction called saponification occurs resulting in soap (salts of fatty acids plus glycerin).
What is the difference between handcrafted soap and soap that you buy from the grocery store?
There are two main differences between handcrafted soap and soap you can buy from the grocery store. Soap at the grocery store usually is made with synthetic surfactants (sometimes along with saponified oils). These synthetic surfactants can sometimes be irritating to the skin. There is also a move towards natural. Handcrafted soap is considered more of a “natural” product than soap you find in the grocery store such as dove, dial, zest…etc.
Soap is composed of salts of fatty acids and glycerin which resulted from the saponification of oils and lye. Commercial soap manufactures will often times remove or “salt out” the glycerin from their soap and sell it or use it in other products. Handmade soap retains its natural glycerin adding to the emolliency of the bar.
Why do people make their own soap?
1. To control what goes into the soap
2. Making soap can be an artistic and therapeutic outlet
3. Satisfaction from making something with your own two hands
Let’s talk about safety.
When handling lye always wear safety goggles and gloves. It is even a good idea to wear long sleeves to protect your arms from splashes.
When handling lye you must make sure your environment is free from distractions including pets, children and other family members. Always add your lye to the water- NEVER add your water to the lye or a volcanic eruption can occur. Make sure you mix your lye in a well ventilated area as it does let off fumes when first mixed with water. I personally mix mine on the stove with the vent turned on or outside. Some people choose to mix in their sink with a window open.
The utensils, dishes, containers, pots, etc. that you use with your cold process soaps should not be used for regular use such as cooking or storing food. Keep your soap making supplies separate. Do not use aluminum or nonstick surfaces as they will react with lye. Stick with stainless steel, heavy duty plastics and silicone to be on the safe side.
Let’s make soap!
Get all of your supplies ready. I like to cover the surface (table) that I’m working on with a plastic table cloth. This helps to catch any splashes or spill I might have. You can also use plastic trash bags.
You’ll need to decide which mold to use. My favorite mold for round soap is a pvc pipe. You can get pvc pipe from most any home improvement store. When I use pvc I don’t line it (although some people do) or “treat” it with anything for easy soap removal. You can find caps for the pvc. I also like to put a piece of tape to seal up any bottom seams that might leak.

The Recipe:
Palm oil – 8 oz
Coconut oil – 6 oz
Olive oil – 6 oz
Shea butter – 1 oz
Castor oil – 1 oz
Water – 7 oz
Lye – 3.1 oz
This recipe uses 22 oz of oils and will make 2 pounds of finished soap.
Step 1 – Measure out your water – you want to use distilled or bottled water. Some tap water can contain metals and minerals that react with the lye in your soap leaving specks and dots. Place your empty container onto the scale and hit tare. This will zero out the scale. Pour water into your container until you reach the needed amount. Remove this container and put it to the side.

Step 2 – Measure out your lye. Gear up in your goggles and gloves before you handle the lye. Place an empty container onto the scale and hit tare to zero it out. Measure out your needed lye and put away your unused lye.

Step 3 – Pour your lye into the water and stir. It is very important that you pour the lye into the water and not the water into the lye. Remember…snow falls on the lake…lye falls on the water. Use either a stainless steel spoon or a silicone utensil to stir. Stir it…let it sit until it becomes clear (5-10 minutes) then stir again to make sure all of the lye is dissolved. It will fume…so stand back while stirring and stir in a well ventilated area.

Your lye solution will heat up to 190-240 degrees depending on the temp of your initial water. I like to use cold distilled water for making the lye solution. This helps keep the temp down a bit. Set your lye solution to the side to cool down.
Step 4 – Measure out your hard oils and melt. You can either use the microwave to melt your oils of if you’re doing a big batch – melt the oils in a stainless steel pot on the stove. Use low-med heat. Place your container onto the scale and hit tare to zero the scale. Weigh out the first oil. Hit tare again to zero out the scale. Measure out the next oil. Do this for each of the hard oils/butters. Melt the oils just until melted and not longer. If you’re using the recipe in this tutorial you’ll need to melt the coconut oil, palm oil and shea butter.


Step 5 – Once your solid oils and butters are melted add your liquid oils. This will be the olive oil and the castor oil. You can measure these directly into the melted hard oils or you can measure them out into a separate container and then add to the hard oils. Place your container on the scale and hit tare to zero out the scale. Measure your first liquid oil. Hit tare again and measure the next liquid oil until all of the liquid oils are measured out. Combine the liquid and melted oils if you used separate containers.

Step 6 – Add your fragrance oil to the melted oils. If you’re using a fragrance oil use .7-1 oz per pound of oils. If you’re using an essential oil the amount to use varies greatly but a good starting range is .5-.7 oz per pound of oils. We have 22 oz of oils which equals 1.375 pounds of oil. So for fragrance oils use about 1 oz – 1.3 oz and for essential oils use .65 – 1 oz for this recipe.

Step 7 – We’re almost ready to make soap but before we do…let’s make sure we have everything ready. Make sure your mold and any additives or colorants are ready to go. I want to color half of my soap with rose clay. When working with clays be sure you hydrate the clay beforehand by adding water to the clay. I used about 1/4 teaspoon rose clay and added about a tablespoon of distilled water to hydrate.


Step 8 – It’s time to make soap. Gear up in your goggles and gloves! If you don’t want to wear goggles please choose another hobby. I’ll occasionally not wear gloves and if I get a splash it is easily rinsed away under the faucet. But I never forgo goggles. It takes just one splash of lye solution in your eye to cause blindness or other permanent damage.
Take the temps of your lye solution and melted oils. I like both to be between 100 and 120 degrees F. They do not have to be the same temp…just both in that range. Once you get a bit more experienced you probably won’t need a thermometer. You’ll be able to feel the side of the container and tell if it’s in that range.

If your temps are within range pour the lye solution carefully into the oils. Be aware of splashes when doing this.

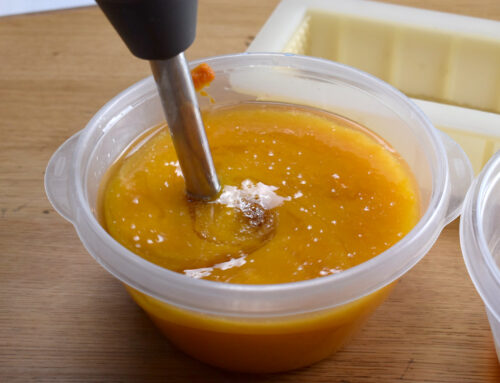
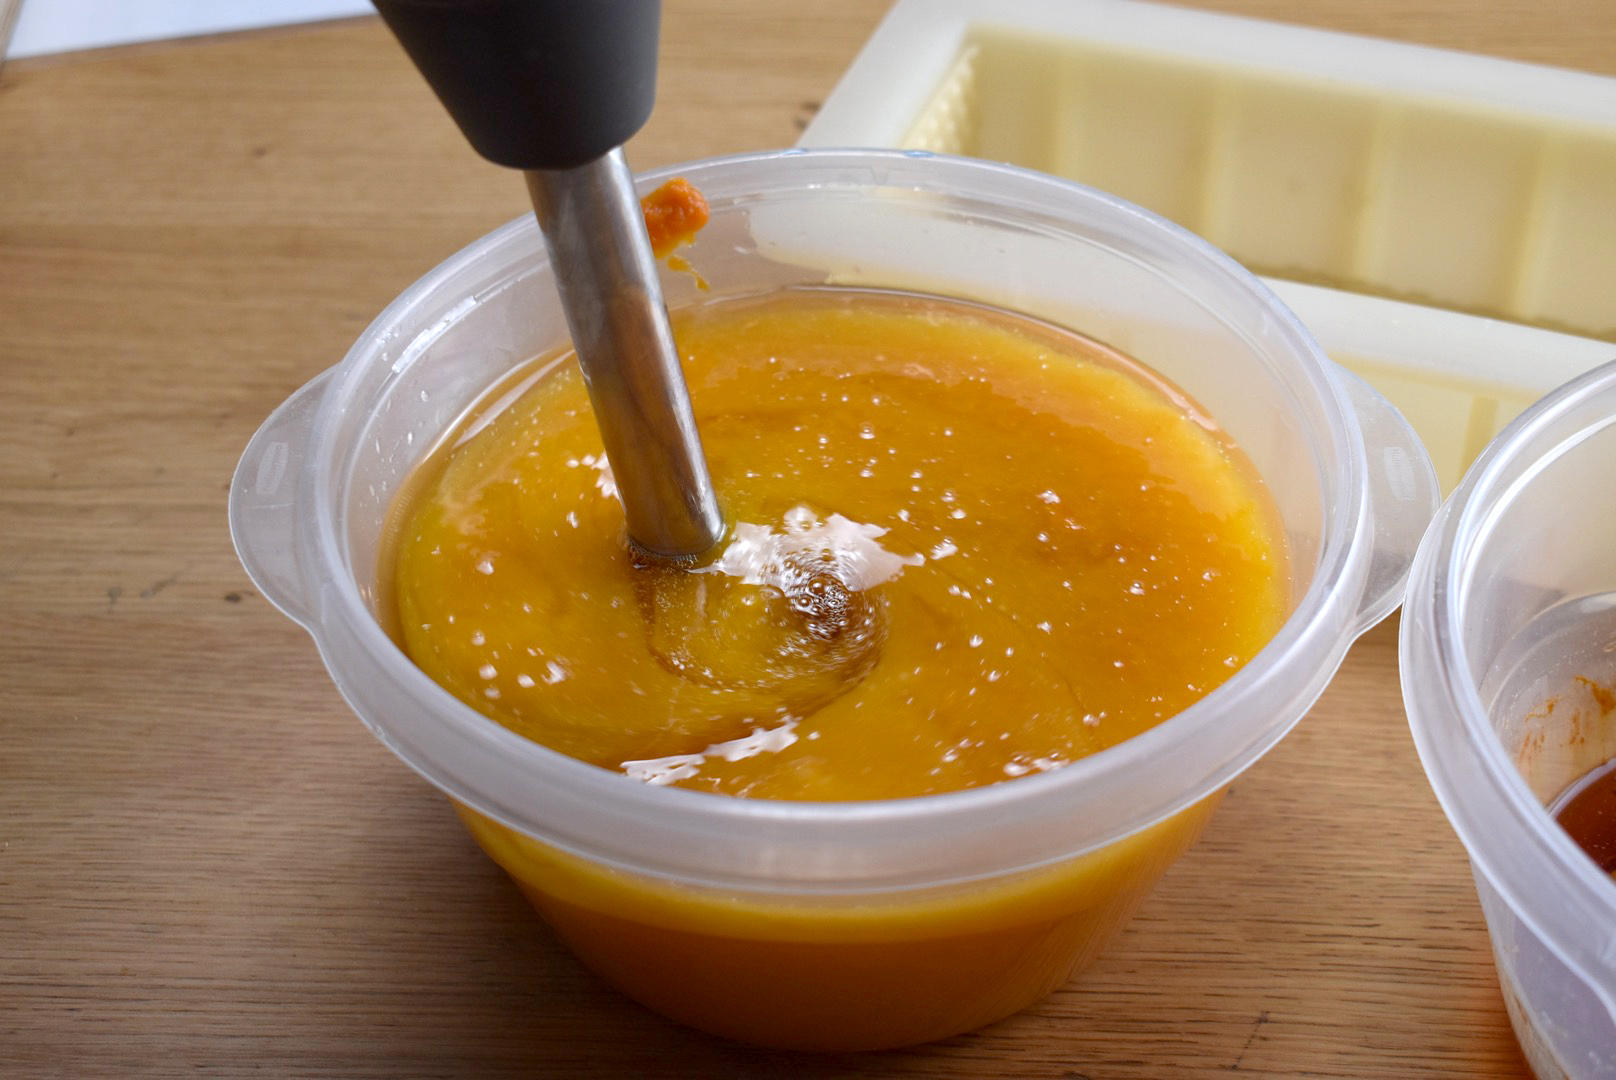
Step 9 – Time to mix using a stick blender. Make sure the bell of your blender is completely submerged in the mixture. Tilt the blender to the side to “burp” out any air that might be trapped beneath. Turn on the stick blender and mix using 4-6 second bursts. We’ll mix until we see a light trace.

Almost there but not quite. You can still see streaks of non emulsified oils floating on top.

And here we have trace. The mixture is consistent in color. You don’t have any oil streaks on top and the mixture looks well emulsified. If you drizzle soap on top it stays for just a second before flattening back into the mixture.

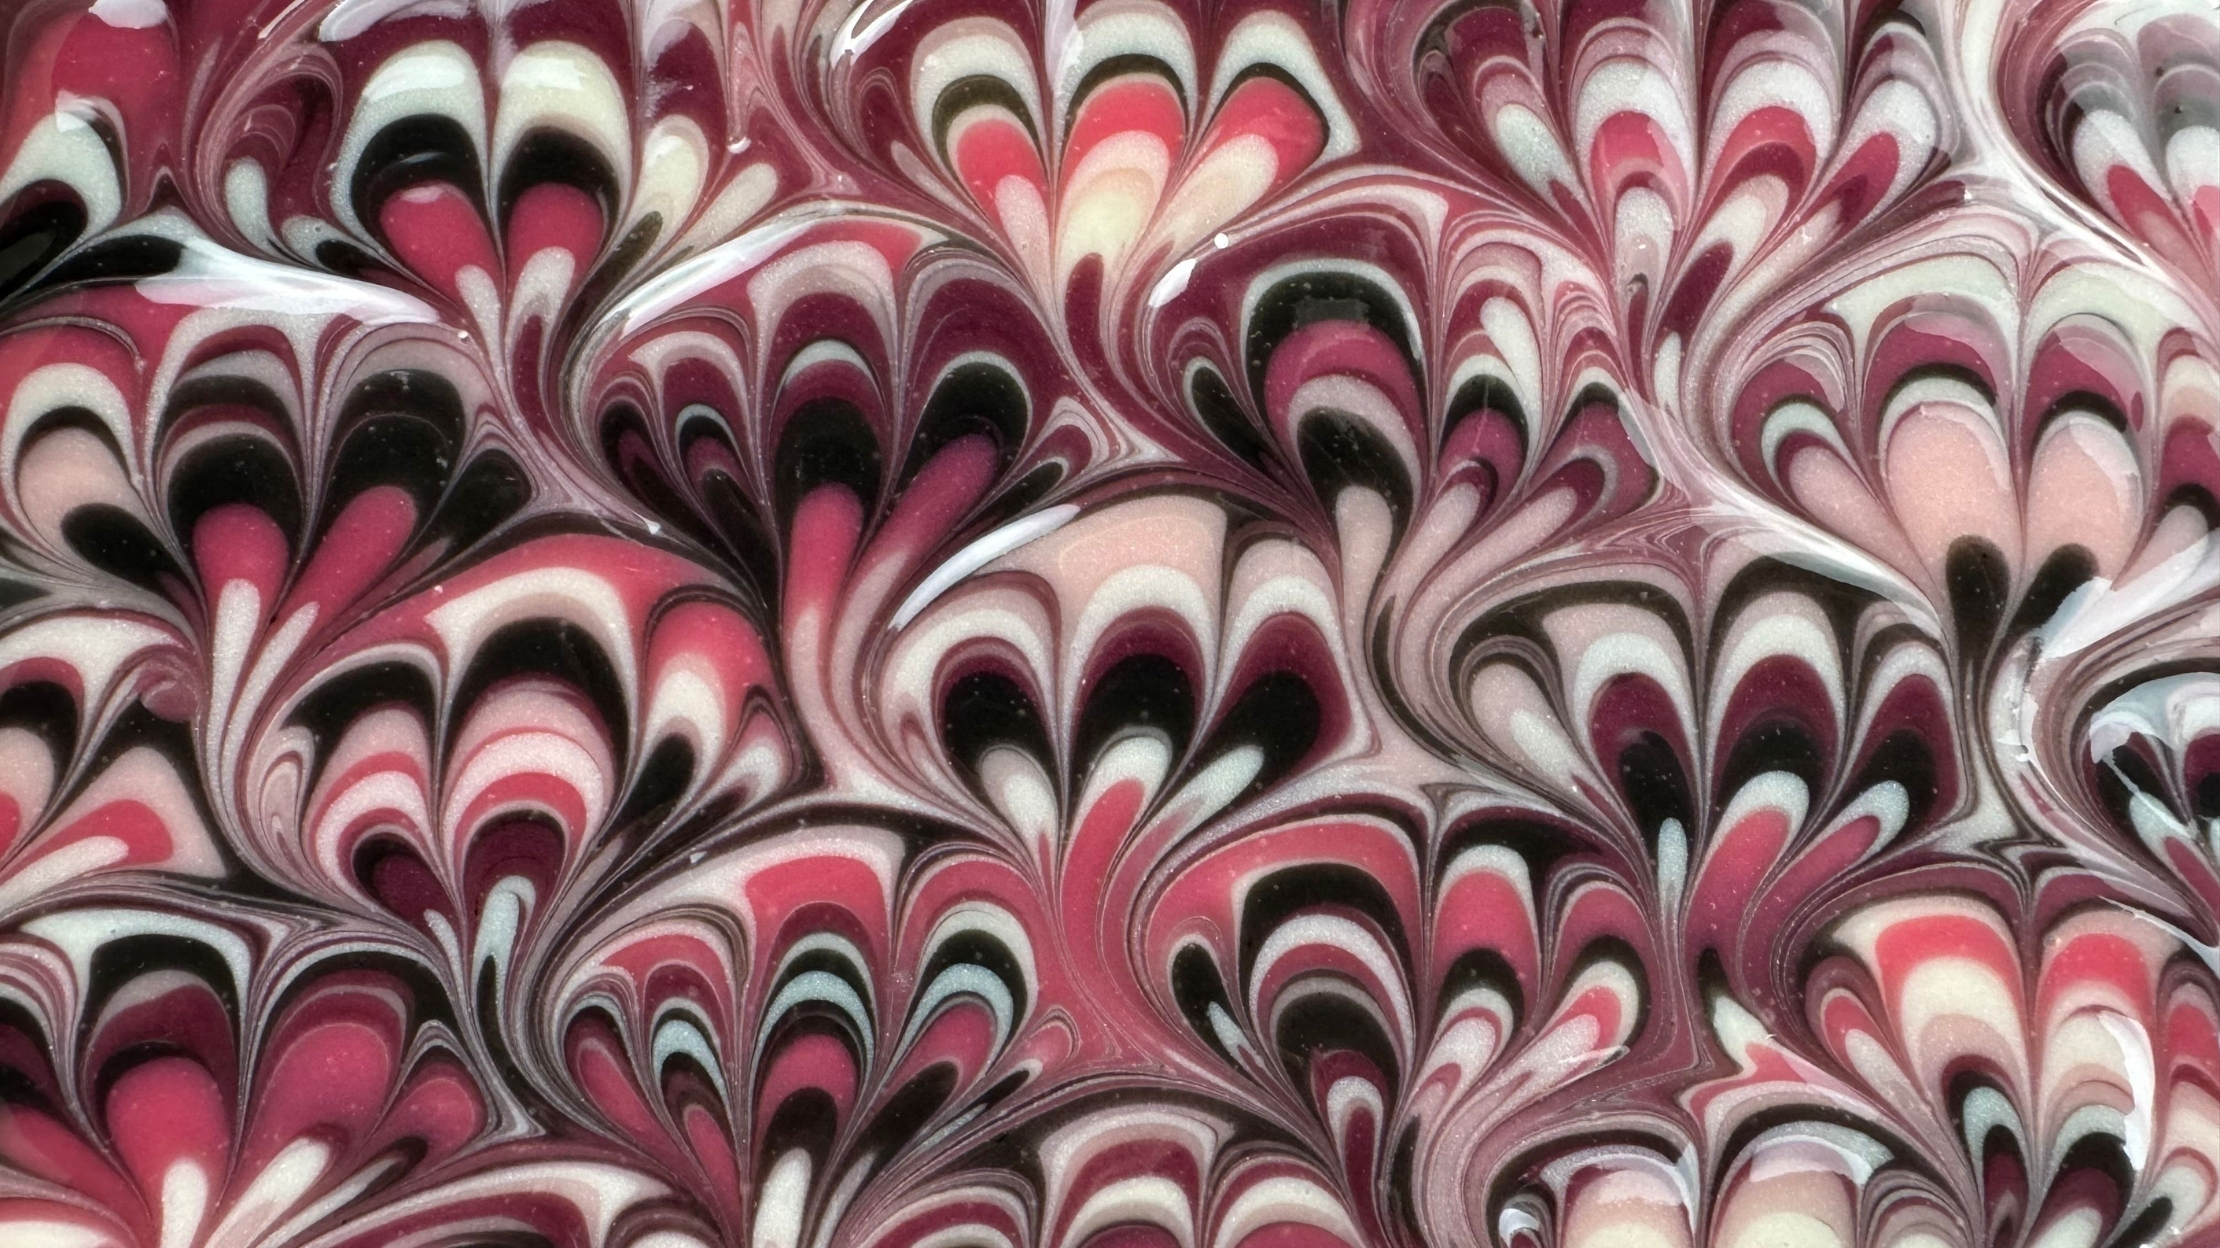
I wanted to color half of this batch with rose clay so I separated out half, added the rose clay and mixed it up.


Once I got that mixed up I drizzled it back into the main container. Don’t mix it. When you pour it into the mold it will swirl the soap!

Step 10 – Pour the soap into your mold.

You’ll let the soap stay in the mold for about 24 hours. PVC doesn’t usually require any insulation – you can simply cover with plastic wrap. After 24 hours see if you can push the soap out of the mold. I usually use a cup that fits in the opening and push using that. If it doesn’t come out easily put it in the freezer for about 30 minutes. Set it on the counter for about 5 minutes then try pushing again. If it still doesn’t come out take it outside and drop it on concrete on one end. This will usually jar the soap loose and you can push out.
Slice your soap into bars. You can use a stainless steel knife or a wax/soap cutter. For these bars I actually used a vegetable crinkle cutter.

It is best to cure your soap for a minimum of 4 weeks or longer. The longer you cure your soap the harder (more water evaporates), longer lasting and milder your soap will be. Store it in open air on a shelf for two weeks then you can put it into cardboard boxes with holes after that. Putting them in the cardboard boxes after two weeks helps to keep the scent incorporated but also allows for air to circulate around your soap. Never store your soap in plastic or without proper air circulation.
**This tutorial just skims the surface of soap making. It is geared towards beginners who want to learn the basic process. Once you get a couple of batches under your belt learn about superfatting, water discounting, making your own recipes and advanced designs! Your journey has just begun! Good luck!**
Happy Soaping!
Amanda


Thank you so much for such an excellent photo tutorial. I just found this by accident but I am intrigued and I will be off to take a closer look around your site. Thanks once again for sharing.
Hi Amanda,
I made soap using the PVC pipe and a cap. I’m not sure what happened but I think my soap overheated, it exploded out of the tube and melted completely through the bottom cap. Any idea what might have happened?
Hi Kellan,
It definately sounds like it overheated. I would soap cooler. Some fragrance oils overheat so you might want to check that out also! Good luck!
Amanda,
Thanks for this tutorial. I am a soapmaker based in Tanzania, East Africa. I have been teaching my daughter to make soap over the last few weeks, and we have been using plastic tubing for some of the soaps.
I would just like to say that this is the clearest and most user-friendly tutorial on cold process soap-making that I have found and I will be printing it out so that she can put it on her new Soap File for future reference. I learnt to make CP soap on a course so I know what I am looking for, but it’s difficult to explain sometimes, but you have done that very clearly. Thank you.
Hi Amanda,
I love your website and tutorials! 😉 Used the pvc pipe the other day and it worked out OK……I need help with the bottom…..what do you cover it with? I have the cap and lined with freezer paper but would like another idea? Thanks!!
Lori
Hi Lori – I just use the cap and put tape around the edge so it doesn’t leak. You can also cover with a couple layers of plastic wrap and secure with a rubber band. You just can’t move it if you do that!
Thank you Amanda!! I’m going to try the plastic wrap, the cap didn’t work so well for me!
how do I subscribe to your blog? I can’t find a “subscribe” button
Hi Faith! I added a subscribe by email thing to the top right of the blog! Thanks!
Amanda
Excellent post and very pretty soap!
Me ha encantado la explicación. Muchas gracias.