

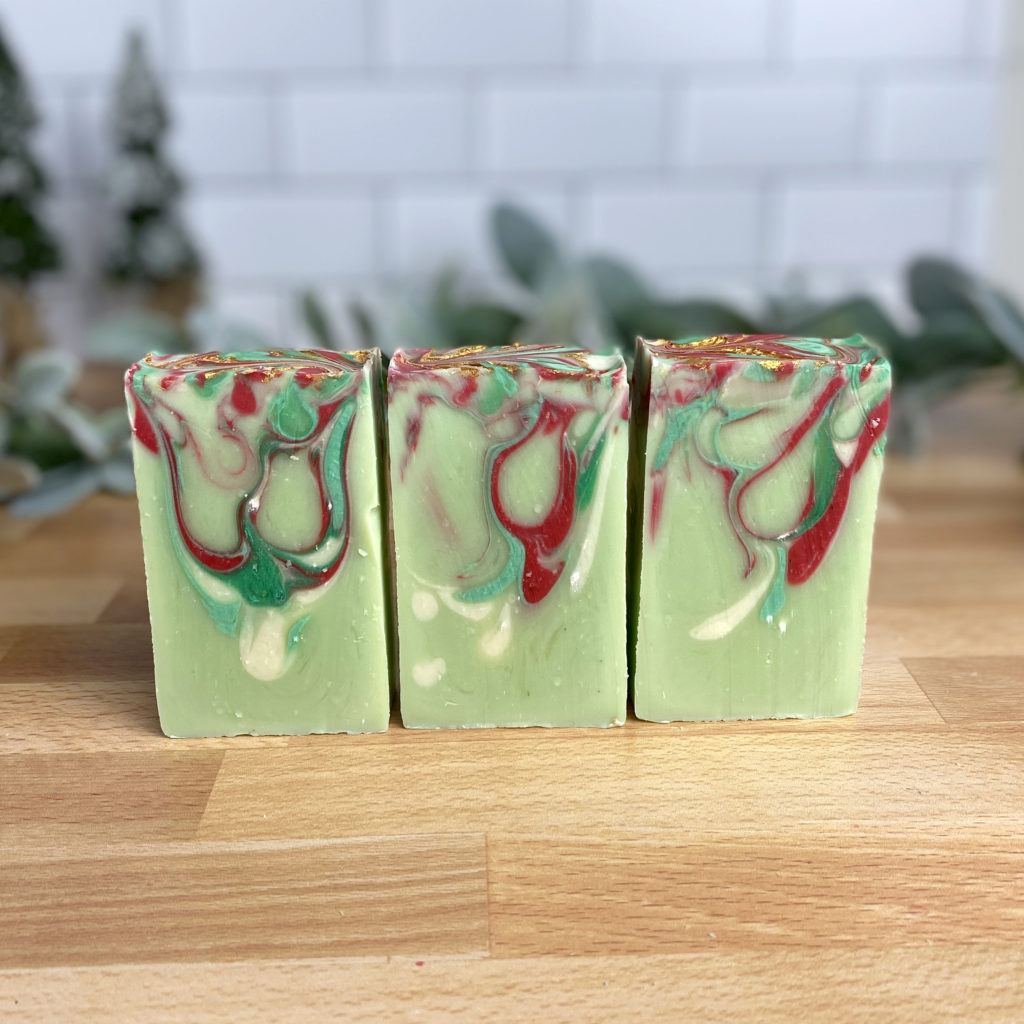
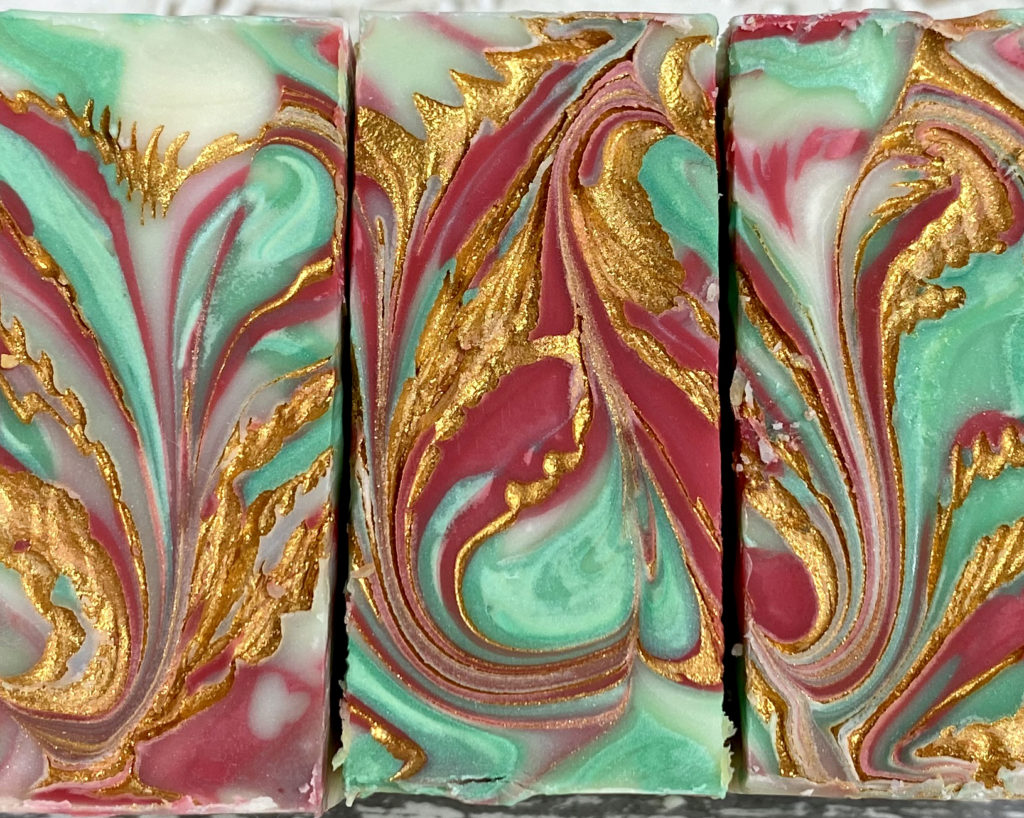
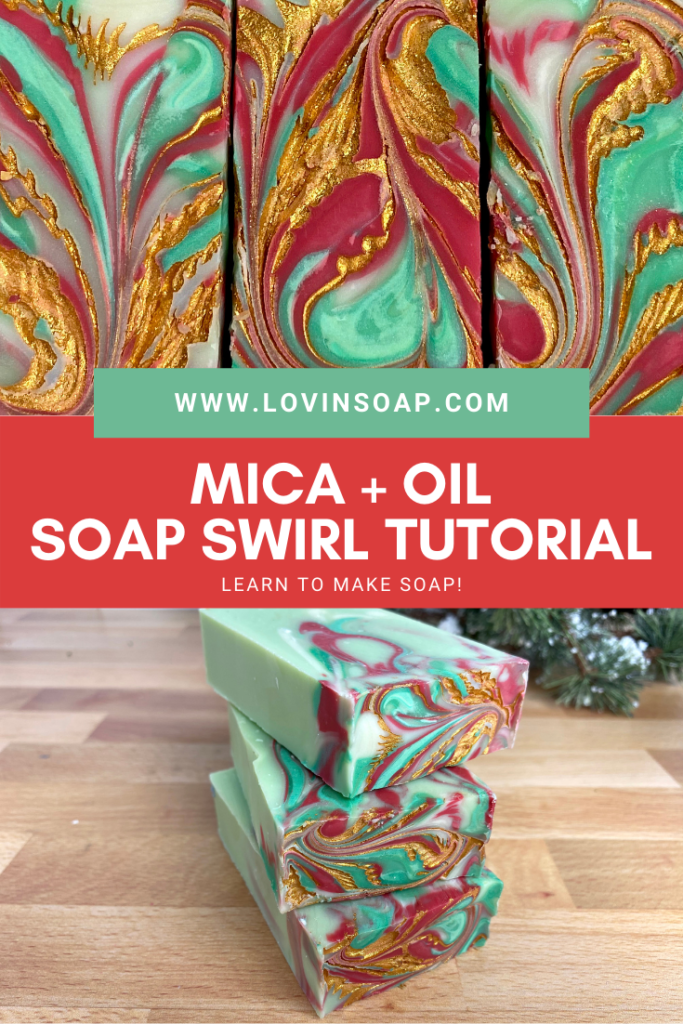
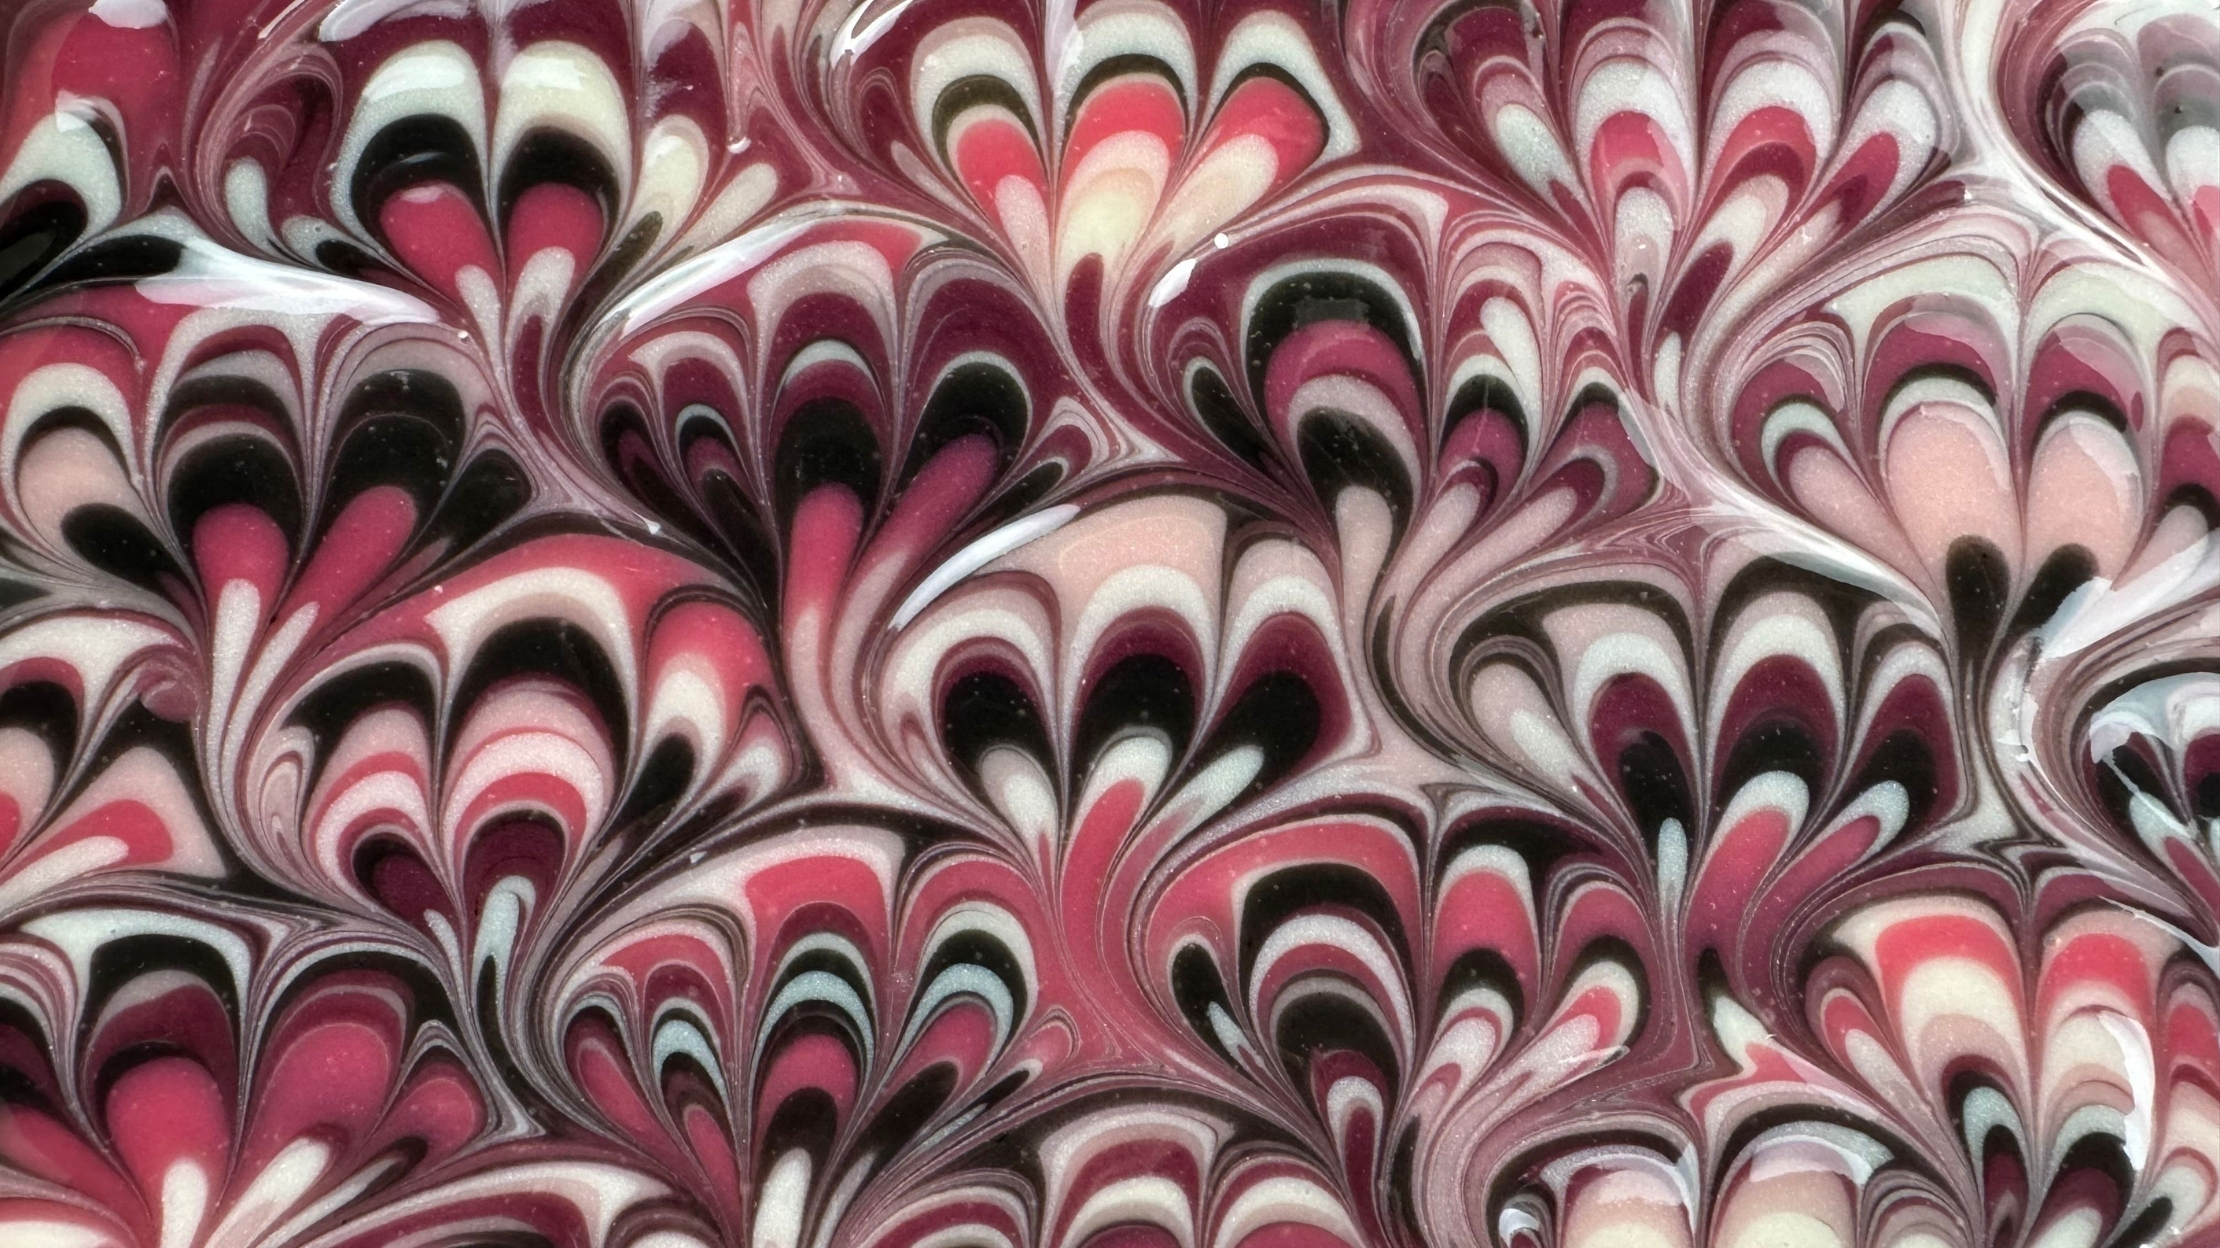
For this holiday soap design, I simply wanted to do a green and red swirl….but with a little bit of something extra. I decided to add a gold mica/oil swirl on top for some added interest! I LOVE the way it came out.
(Disclosure: Some of the links below are affiliate links, meaning, at no additional cost to you, I will earn a commission if you click through and make a purchase.)
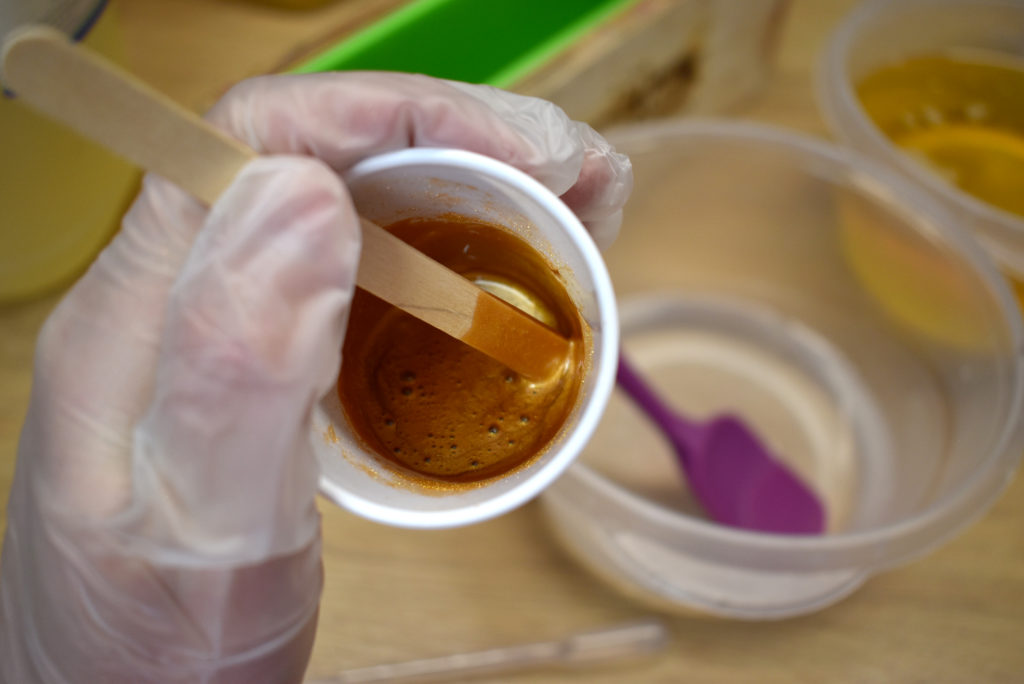
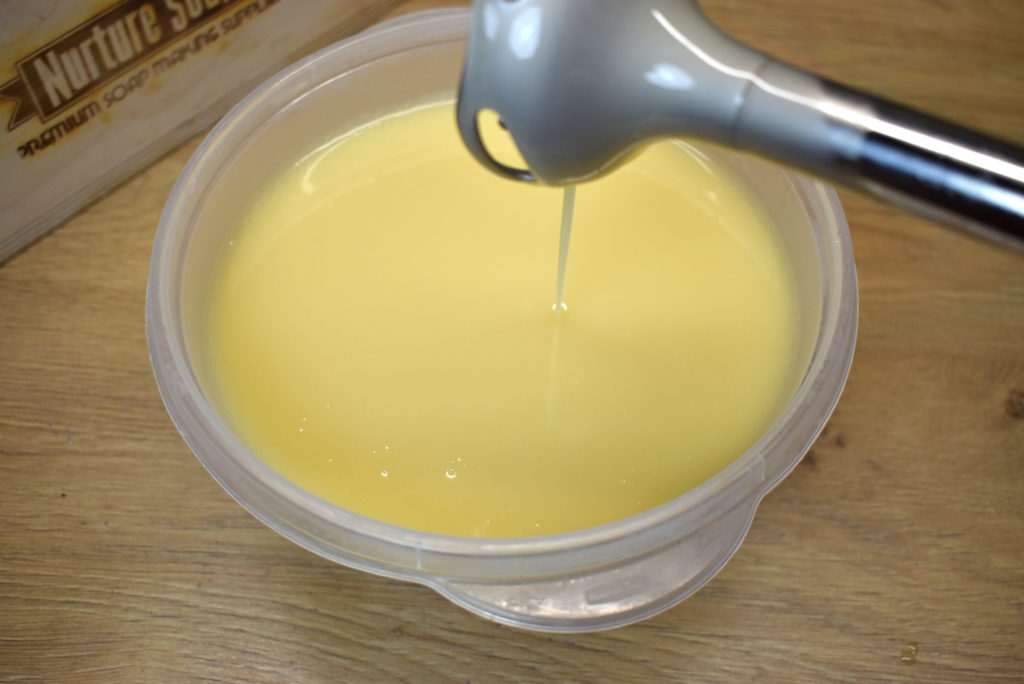
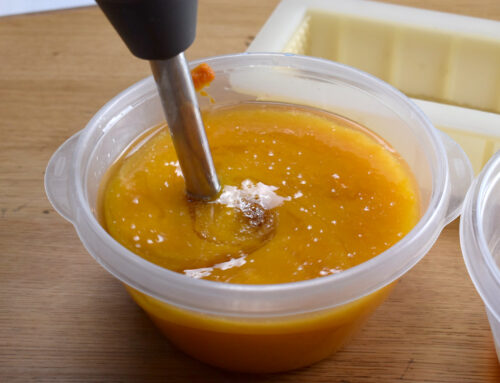
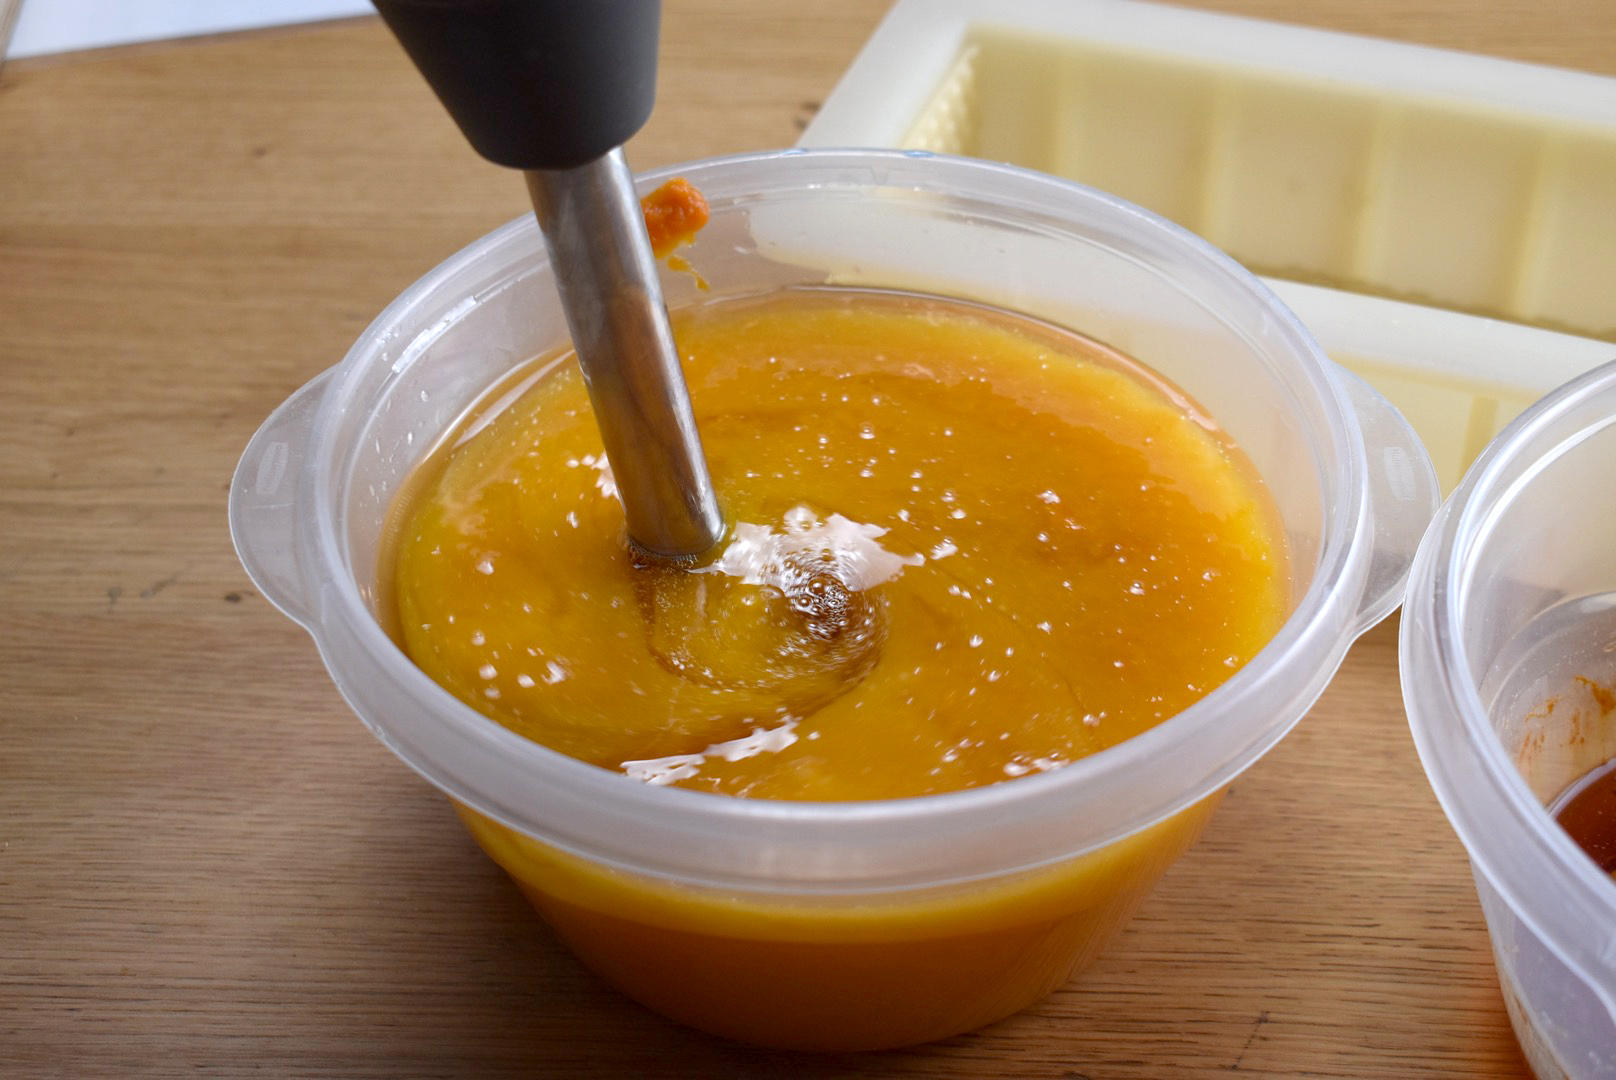
How to Create Your Mica + Oil Mixture
You don’t have to use gold, you can use any color of mica! I just really like the way gold looks. When doing a mica/oil swirl, you simply mix oil and mica and swirl that on top of your soap! The oil gets absorbed into your soap leaving the beautiful mica on the surface in little craters where the oil was.
Castor oil is the perfect oil for this, although you can use any oil that you’d like. Castor oil just saponifies easily so is super attracted to the lye in your soap. It sinks down the most and never leaves a gloppy mess.
To prepare your mica + oil, simply mix mica into your oil. I add quite a bit! You can try adding 1 teaspoon of mica into 1 tablespoon of oil and see how it looks. You want it to be super concentrated with mica, but still be nice and fluid so that you can swirl it onto your soap. I used Maya Gold from Nurture Soap. If it is gloppy and not runny enough to swirl, simply add a bit more oil.
Here my mica/oil mixture is ready to go!
Christmas Soap with Gold Mica Swirl
Basic Body Bar – More Moisture from Lovin Soap Studio Recipe eBook (Grab your copy for 50 cold process soap recipes + 64 essential oils blends!)
Base Oils
- Coconut Oil (76 degree) – 270 grams (30%)
- Shea Butter – 90 grams (10%)
- Olive Oil – 342 grams (38%)
- Avocado Oil – 72 grams (8%)
- Rice Bran Oil – 126 grams (14%)
Lye Solution
- Sodium Hydroxide – 126 grams (5% superfat)
- Water – 252 grams (1:2, lye:water ratio)
Scent
Use your favorite slow-moving fragrance or essential oil blend. I simply used a blend of rosemary and peppermint essential oils. If you’re looking for a good place to get essential oils, I HIGHLY recommend Appalachian Valley Natural Products. I love their products and their shipping is super fast!
- Peppermint Essential Oil – 10 grams
- Rosemary Essential Oil – 10 grams
Color
Mold
I used my favorite Tall & Skinny mold from Nurture Soap!
Let’s make soap! If you are new to soapmaking, be sure to download our free guide, How to Make Cold Process Soap! Gear up in your gloves and your safety glasses.
Step 1: Create a lye solution. Weigh the water and lye into two separate containers. Slowly pour the sodium hydroxide into the water while stirring. Stir until completely dissolved and set aside to cool. Your solution will start off cloudy and will clear up as it cools.
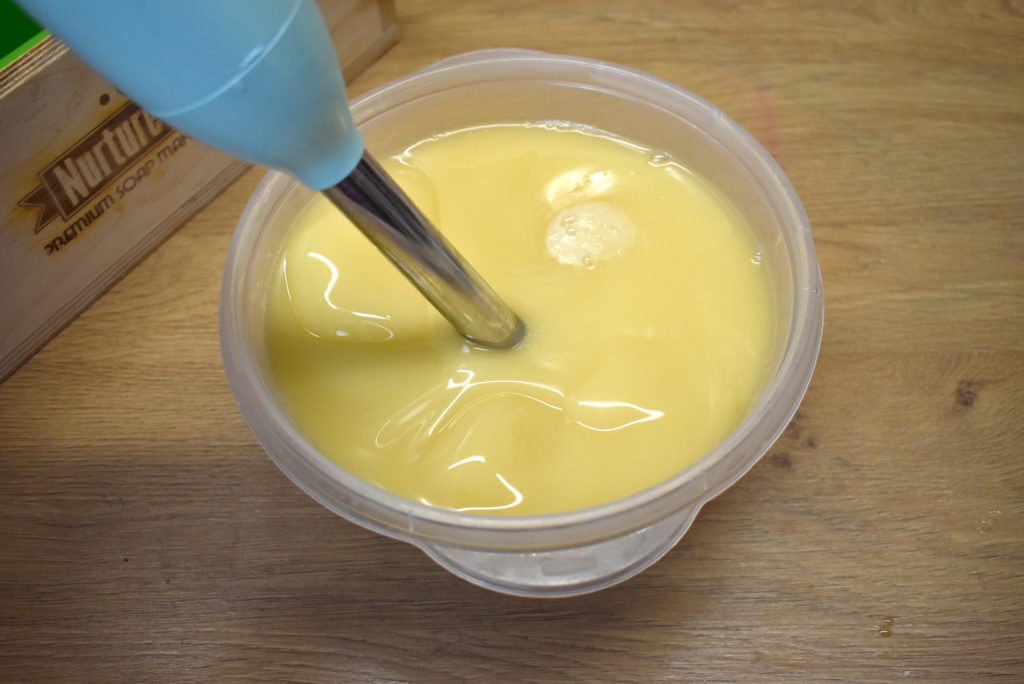
Step 2: Prepare the base oils. First, weigh any solid oils and butters into a container and melt. You can melt using the microwave or low heat on a burner. Next, weigh each liquid oil into the melted oils. The liquid oils will cool down the melted oils and leave you with a base oil mixture that is about at the correct temperature to make soap. It might still need to cool down a bit.
Step 3: Weigh your essential oil or fragrance oil into a glass or stainless steel container and add to your base oil.
Step 4: Prepare your mold. If you need to line your mold, line it.
Step 5: Check the temperatures. You should now have a container containing liquid base oils and a container containing lye solution. Take the temperatures using an infra-red temperature gun. Be sure to stir each mixture before taking the temp. You want your temperatures to be between 80-110° F.
(NOTE: I usually make my mica/oil mixture at this point. So it can be ready to go in case things move quickly!)
Step 6: Once you have reached desired temperatures, pour the lye solution into the oil mixture and mix to emulsion.

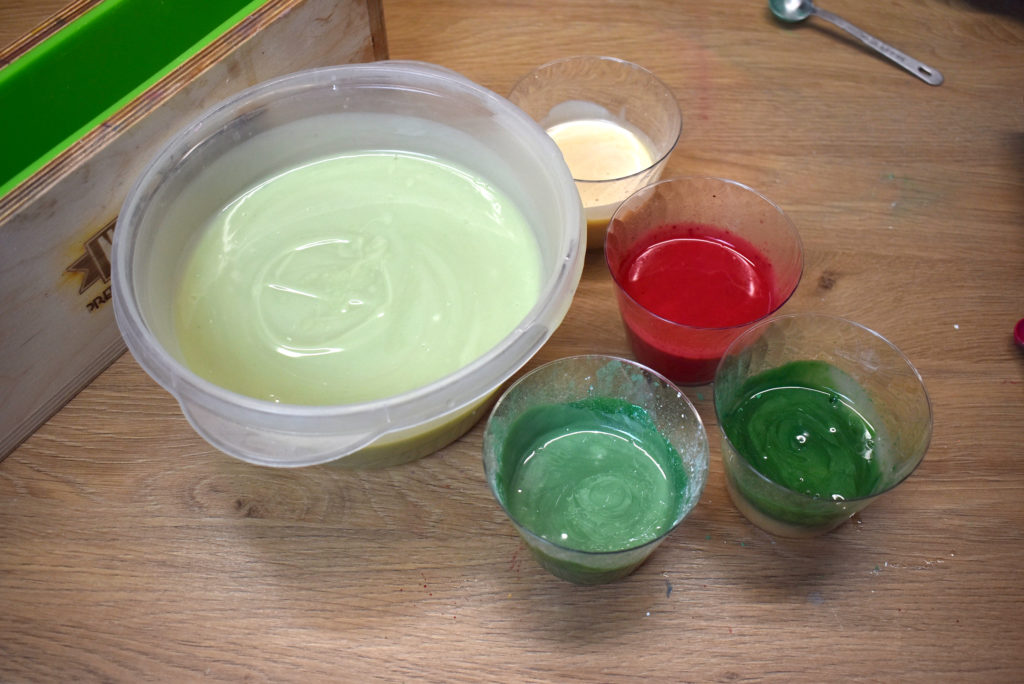
Step 7: Divide the soap into containers to color.
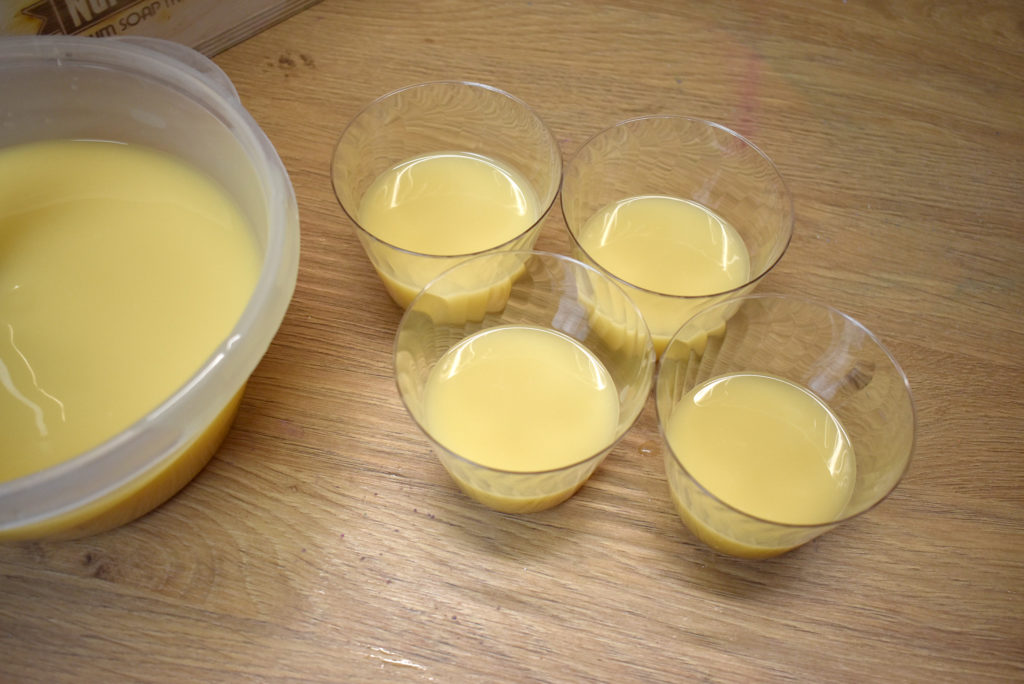
Step 8: Add colorants to each cup and mix well using a mini-mixer.
Step 9: Pour the base into your mold. Leave a little bit in case you want to pour some base on top! Totally up to you!
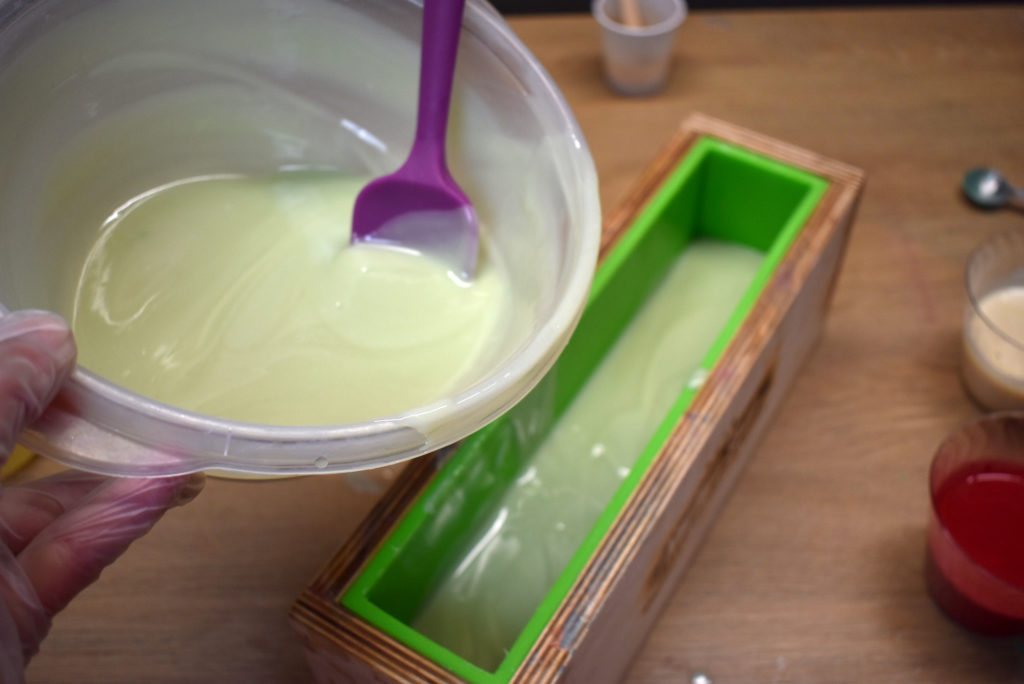
Step 10: Pour each color into your base as you move the cup up and down your mold. Hold your pouring cup up high to make the soap dive down into your base. Hold your pouring cup down low so that the soap will land closer to the top of your base.
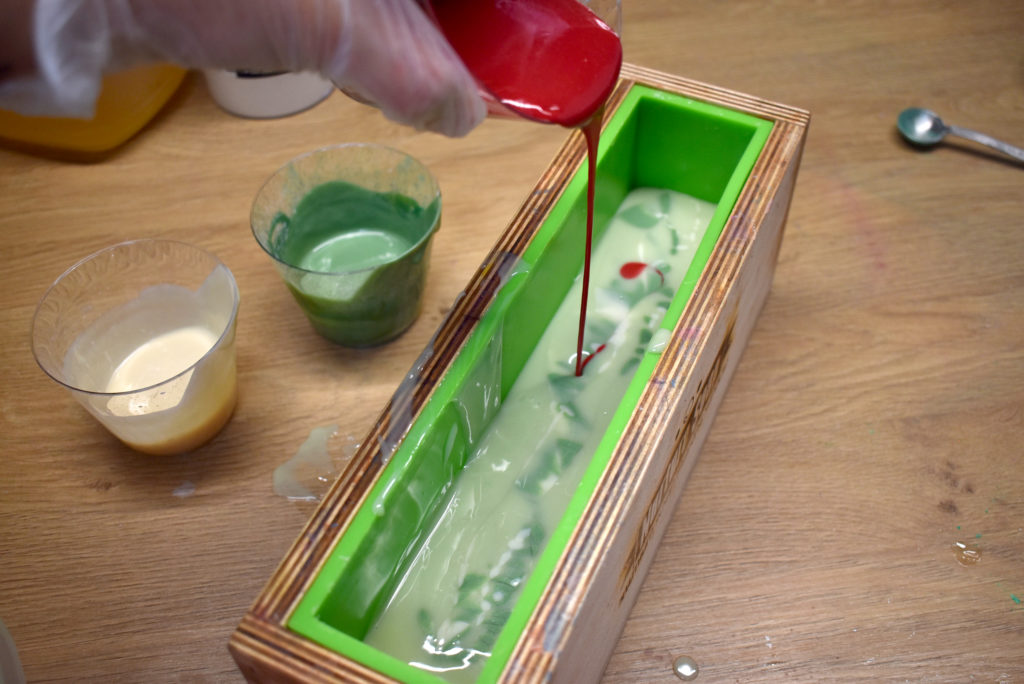
Add the rest of your base if you have a bit left over like I did.
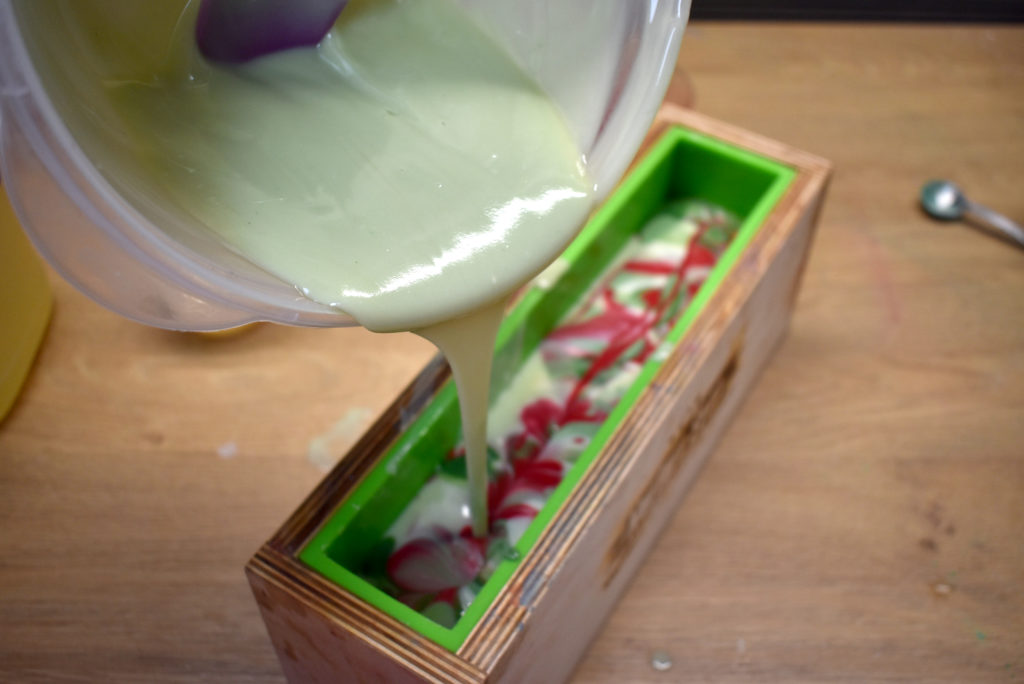
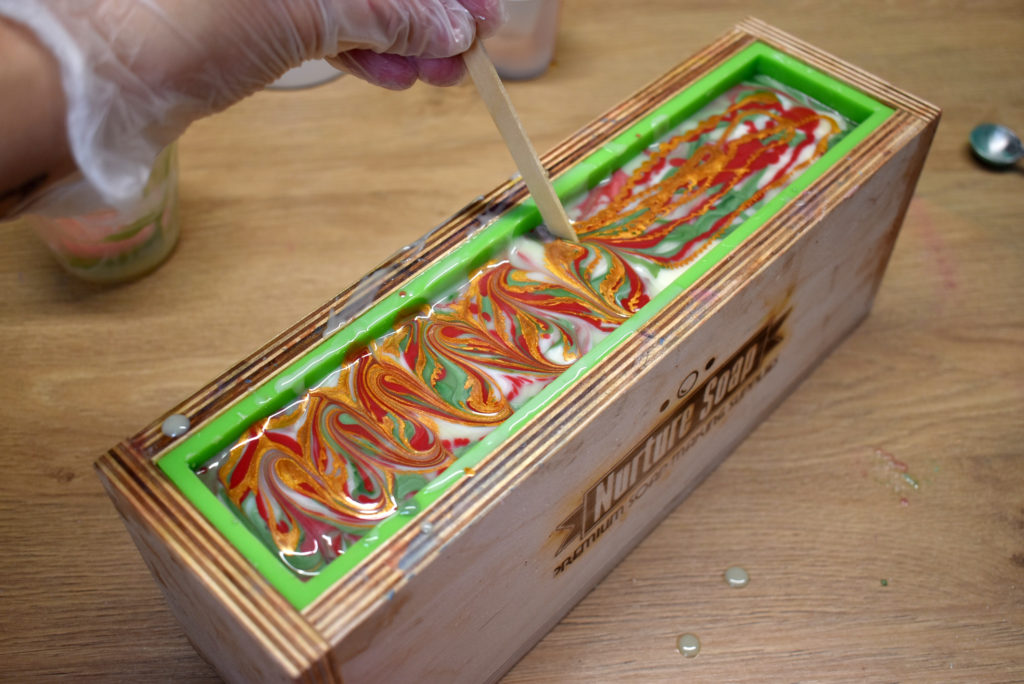
Scrape out each cup into thin lines on top to swirl.
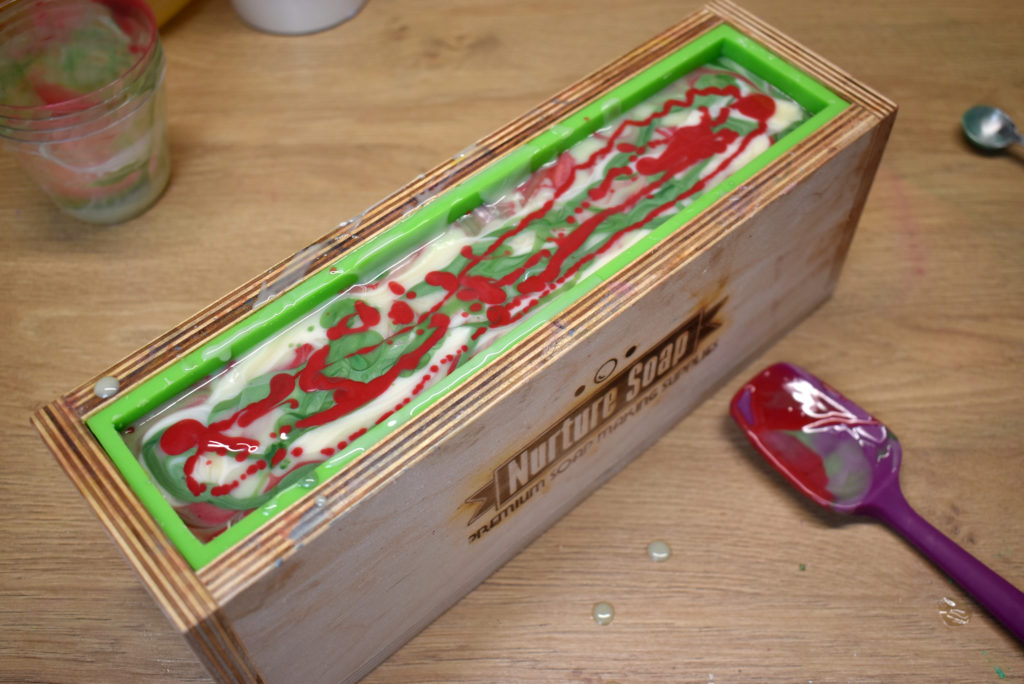
Step 11: Pour your mica/oil mixture on top of the soap in thin lines.
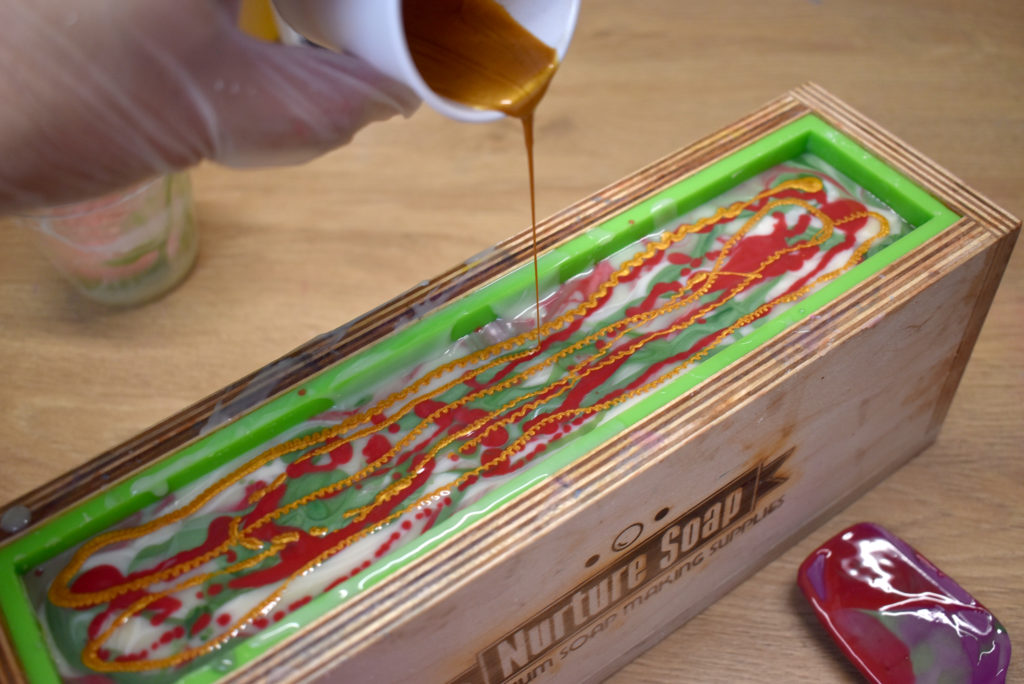
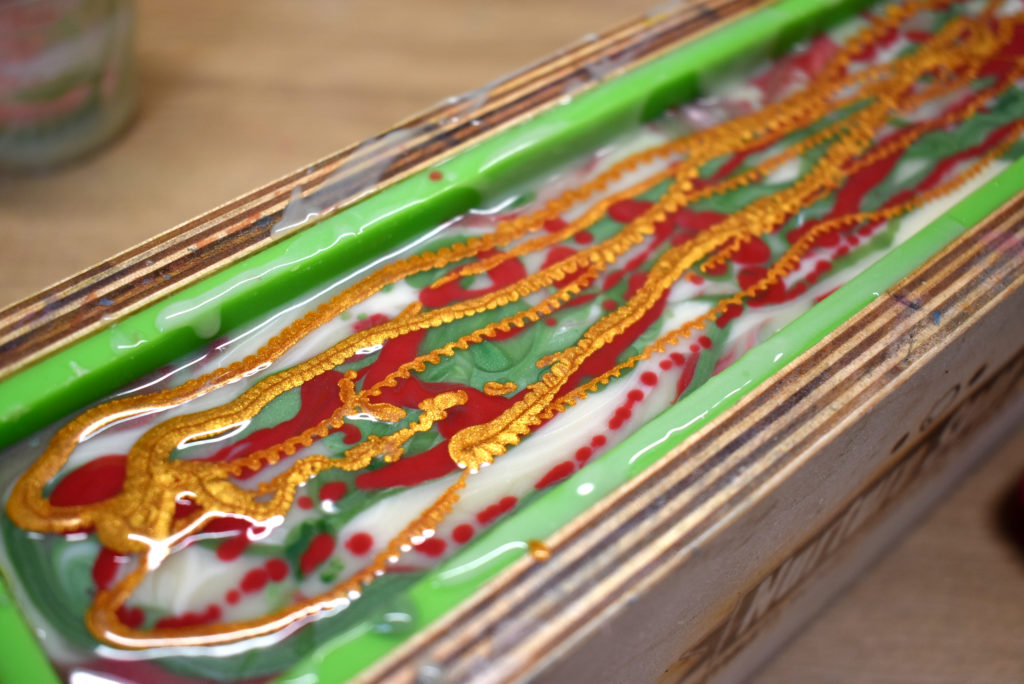
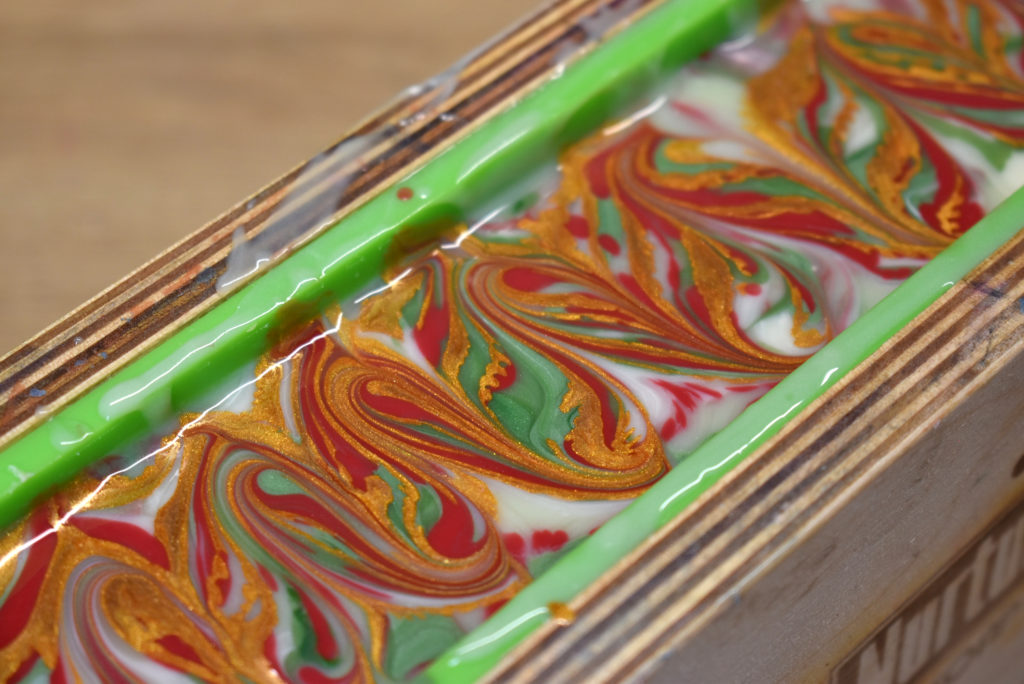
Step 12: Swirl your soap using a skewer or something similar!
Note: I typically spray my soap with rubbing alcohol to combat ash! Just be aware that if you do that on a mica/oil swirl, it might pick up the mica and move it around. So, do so with caution! I didn’t spray this one. 🙂
Step 13: Let your soap harden and saponify for at least 24 hours.
Step 14: Unmold and cut into slices!
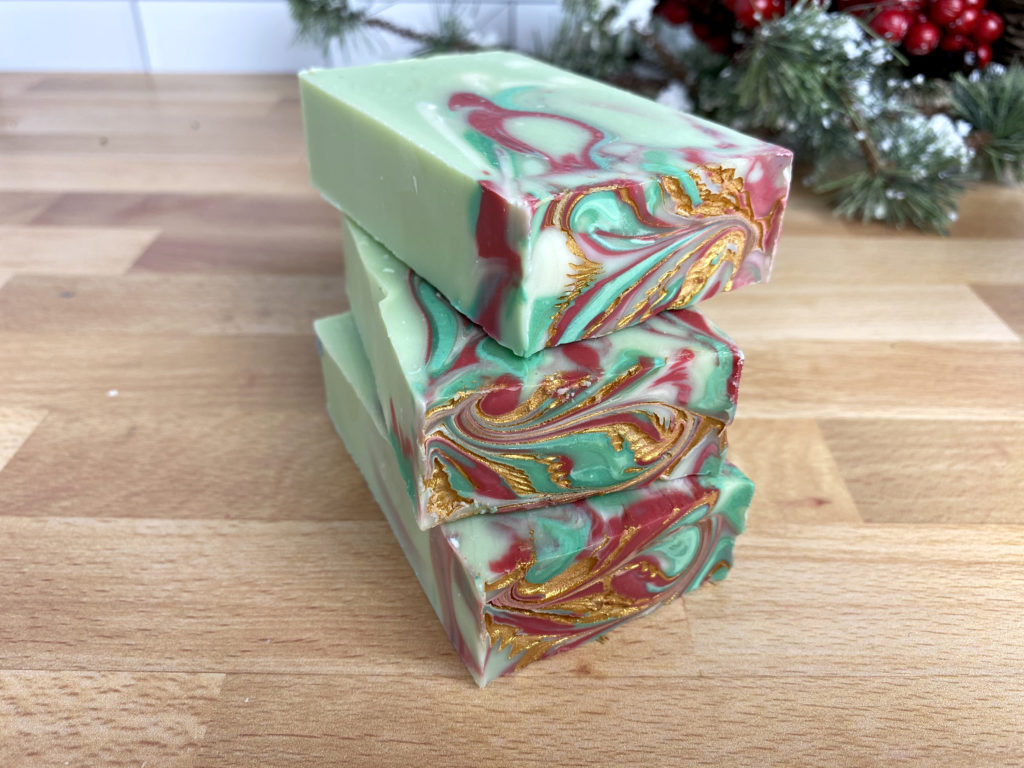
Step 15: Cure your soap for 4-6 weeks.

Please share on Pinterest! Thank you!
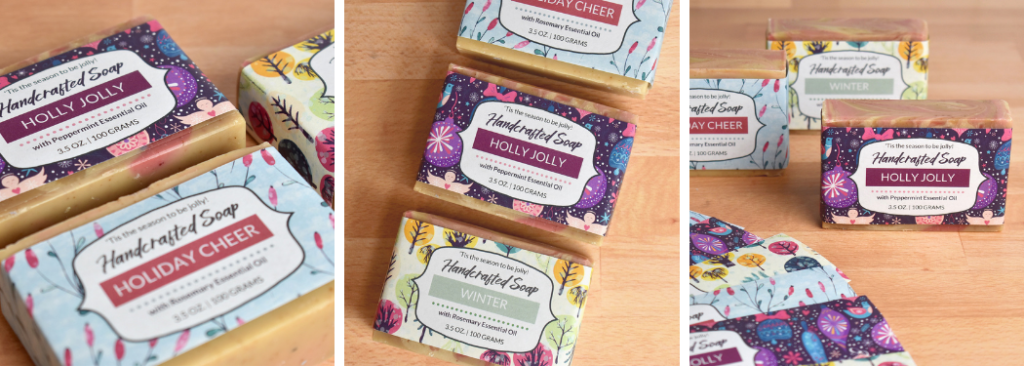
Do you need labels for your Holiday soap? Check out Soap Label Vault!
Get label templates + training on how to use Canva to add your info! Labels can be hard! Soap Label Vault makes it easy to design labels for any occasion!


That looks amazing – how much trial by fire should I add so that it doesn’t stain
Good evening Amanda, I would like to try this recipe. I’m new on making soap. I love your videos. I have one question. To harden and saponify your soap, do you insulated it. I mean you cover it or just leave it at room temperature? Thanks in advance.
I love this. I also know that sparkle needs to reflect light in order to – sparkle. If the gold mica was part of the red and green swirls on the inside, would it sparkle as the soap wears down and continues to expose it to light?
Thanks so much for the recipe I’m very new at making soaps. I could take all the tips that the viewers can give me.
Thanks so much for the recipe I’m very new at making soaps. I could take all the tips that the viewers can give me.
I see you’re advertising the soap label vault. Do you have anything for labeling jars for body butters, etc.? Thanks!!
is it ok to sub water for the apple cider?
i assume so … but would like your expertise 🙂
thank you !