
If you are new to soapmaking, you’ve probably heard the term trace being mentioned here and there and it can sometimes be a bit confusing as to what this mysterious term means.
Trace is simply the visual representation of emulsification in soapmaking! Let’s break that down.
When you mix water and oil, it doesn’t stay mixed together…it separates.
The same happens when you initially mix your lye solution (water and sodium hydroxide) with oils. If you pour your lye solution into your oils, you’ll notice the lye solution sinks to the bottom of your container and the oils float on top.
All of these ingredients need to be mixed and emulsified together! In modern day soapmaking, we can simply hit the mixture with a stick blender to help speed up the emulsification process. Sure you can stir by hand, but it can take awhile!
Once emulsified, your mixture shouldn’t separate and once poured into your mold, it will turn into soap after going through the saponification process!
Trace is the term when you can visually see that your soap is well emulsified and it is starting to thicken. To test for trace, simply pull your turned-off stick blender out of your thickening soap and drizzle some soap back onto the surface. If it sits a bit on the surface and you can see it, then you have reached trace. Your soap is well emulsified and you can now pour it into your mold.
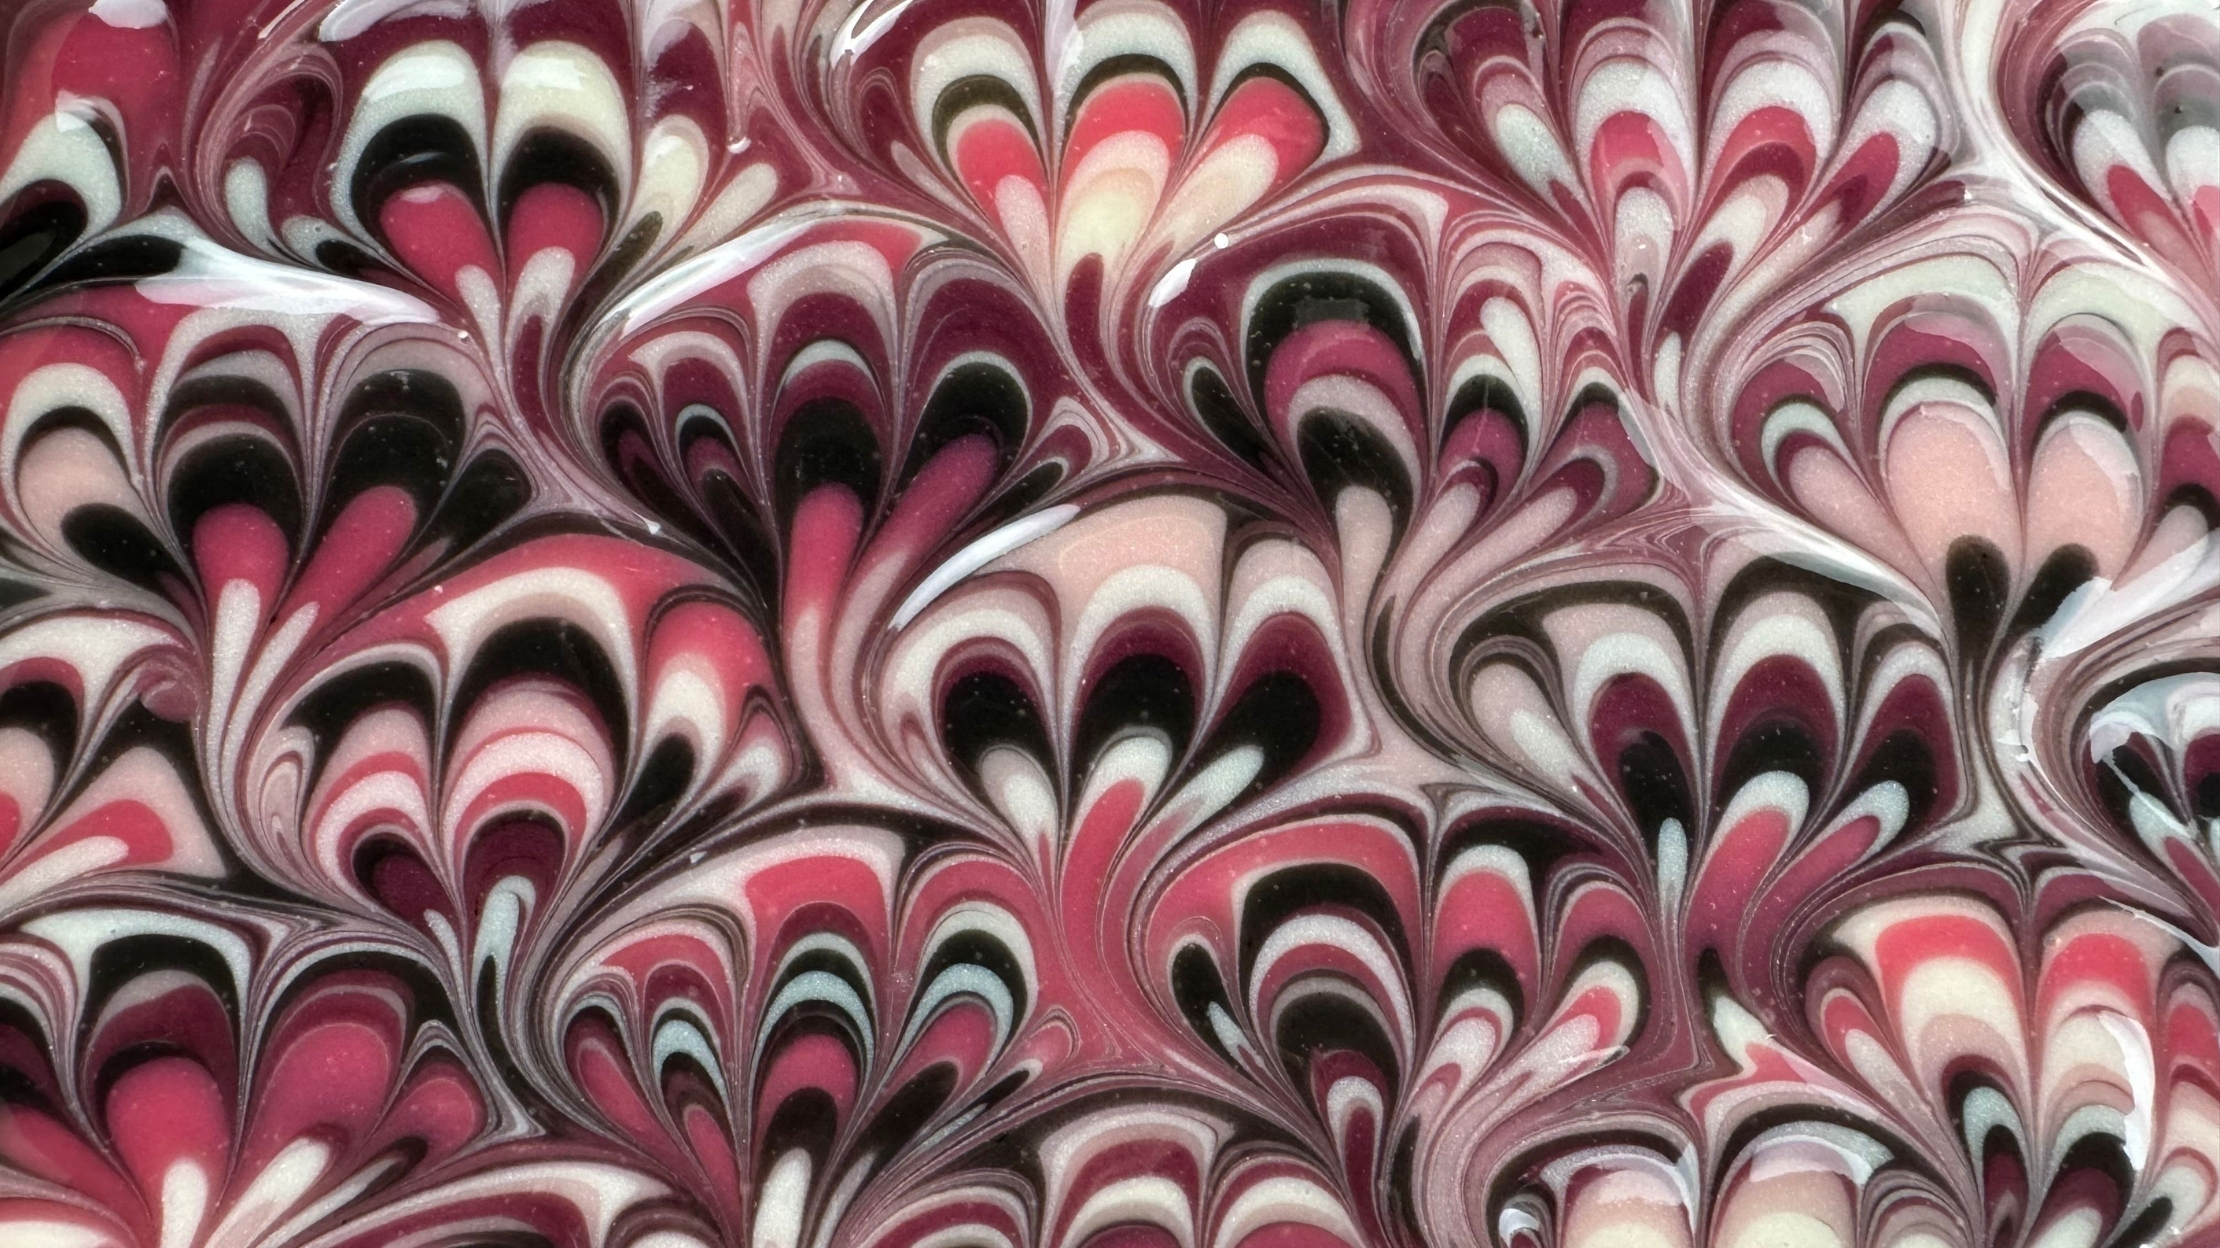
Once you get good at determining trace, you’ll then be able to notice when your soap is fully emulsified, but not yet to the point of a visual trace. This point in the mixing process (before you reach visual trace) is the perfect time to divide your soap to color and swirl! When trying to make an intricate swirl, if you reach trace, you might have gone to far.
A myth in soapmaking is that you have to reach trace for your soap to be successful. You don’t! You simply have to make sure that you at least have a stable emulsion.
Let’s walk through the mixing process so you can see emulsion versus trace.
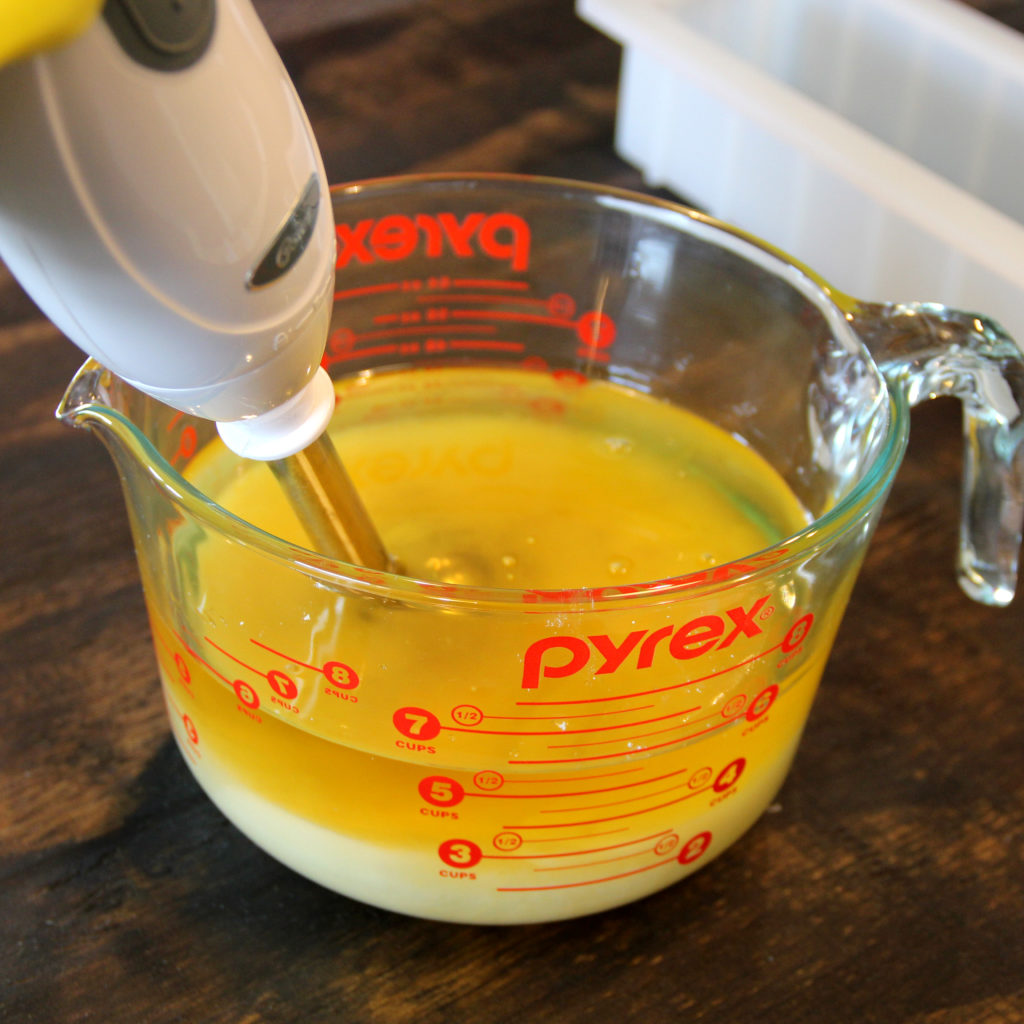
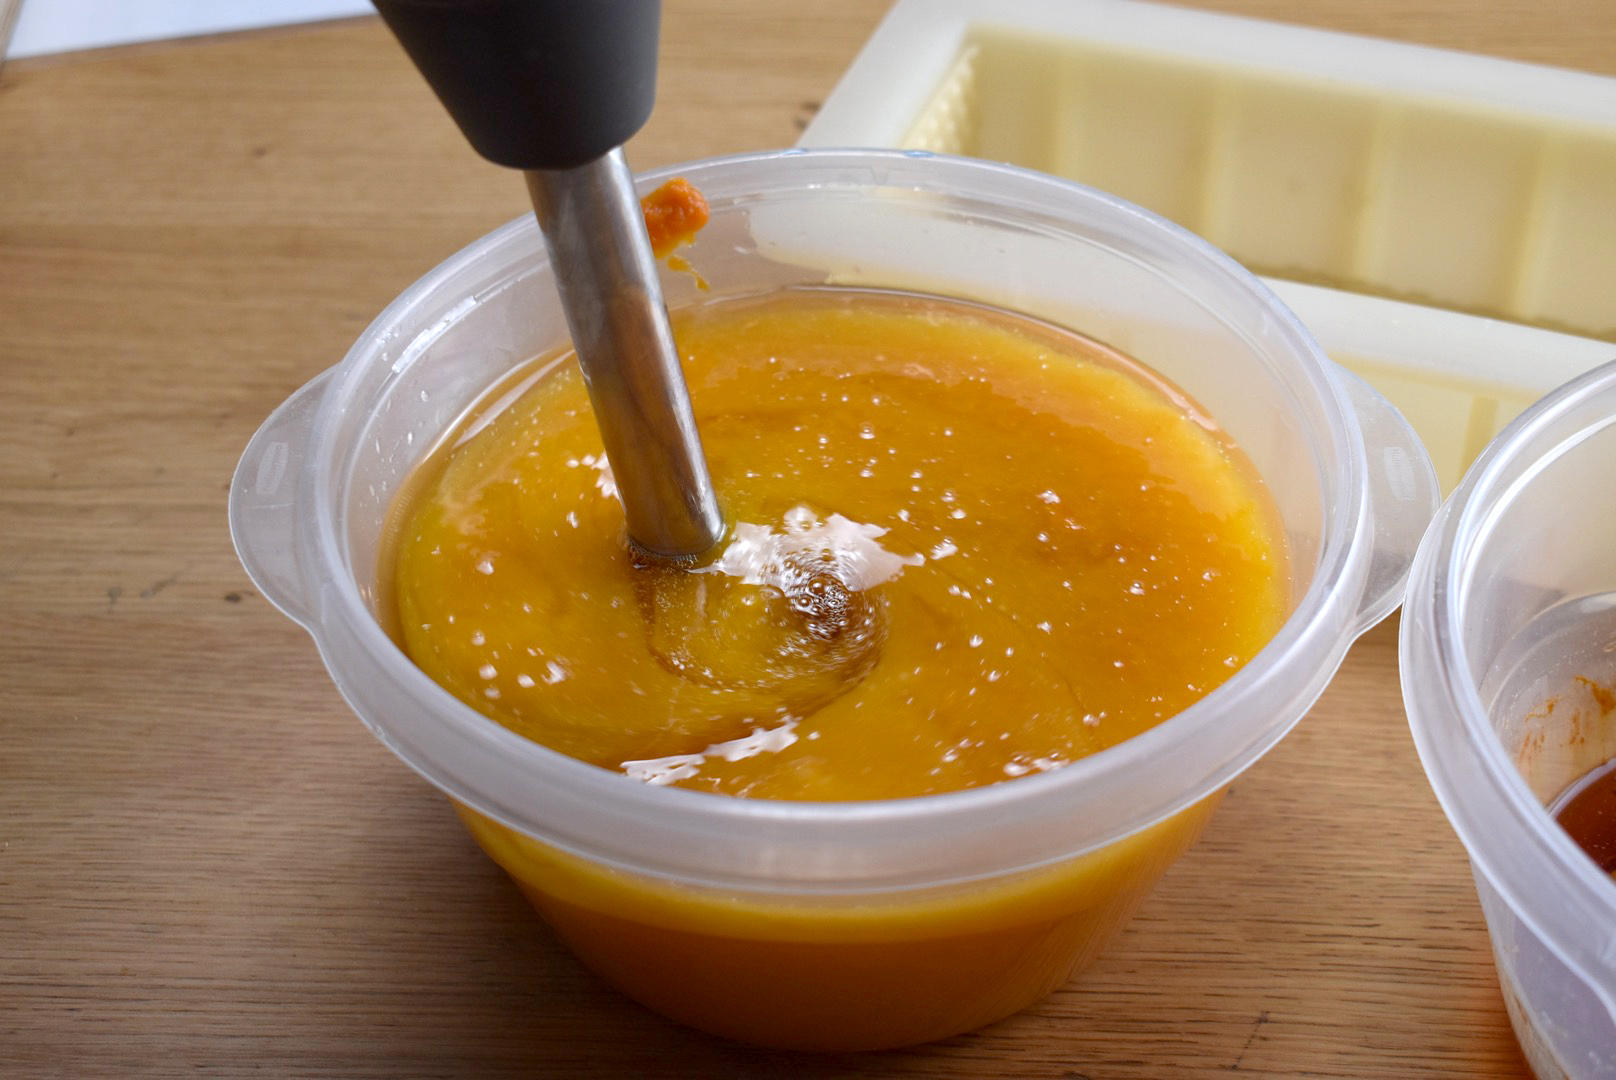
In the pic below, I have just poured the lye solution into the oil mixture. It is sitting on the bottom of my container (starting to emulsify a bit) and the oils are clearly floating on top.
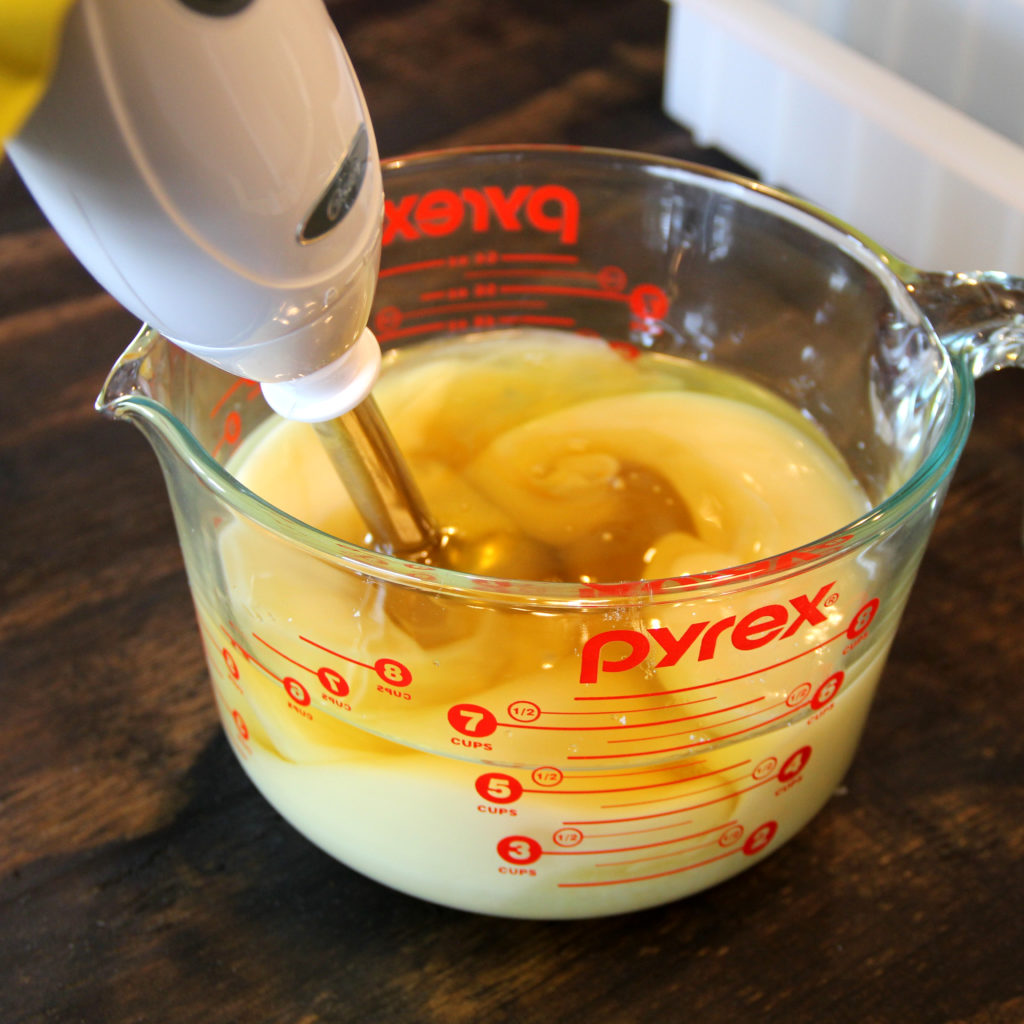
In the pic below, I have been mixing for a few seconds. Things are starting to emulsify together. The soap will start turning opaque and cream in color. But, you can still clearly see oil separated out.
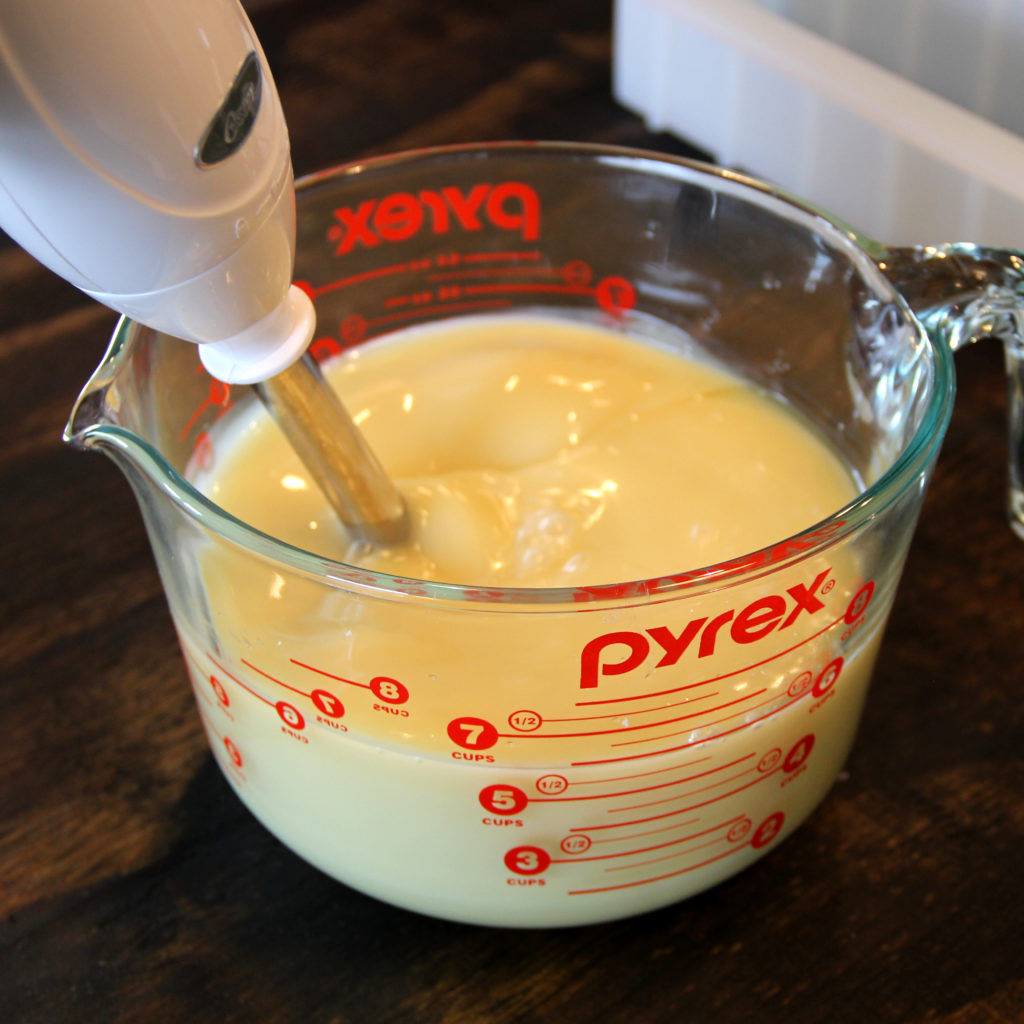
In the next picture, the soap is starting to emulsify! You can see that it is all turning opaque and you don’t see any oil floating on top.
Below is soap that is clearly emulsified! All the soap is the same color and there are no oil streaks. This is the point where you can divide your soap out to color and swirl! Your soap will be more fluid.
If you need help with swirling, I highly recommend checking out our eClass, Swirling Success: Controlling Trace for Intricate Soap Designs!
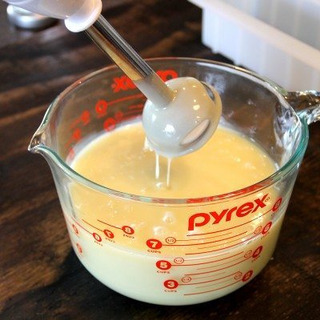
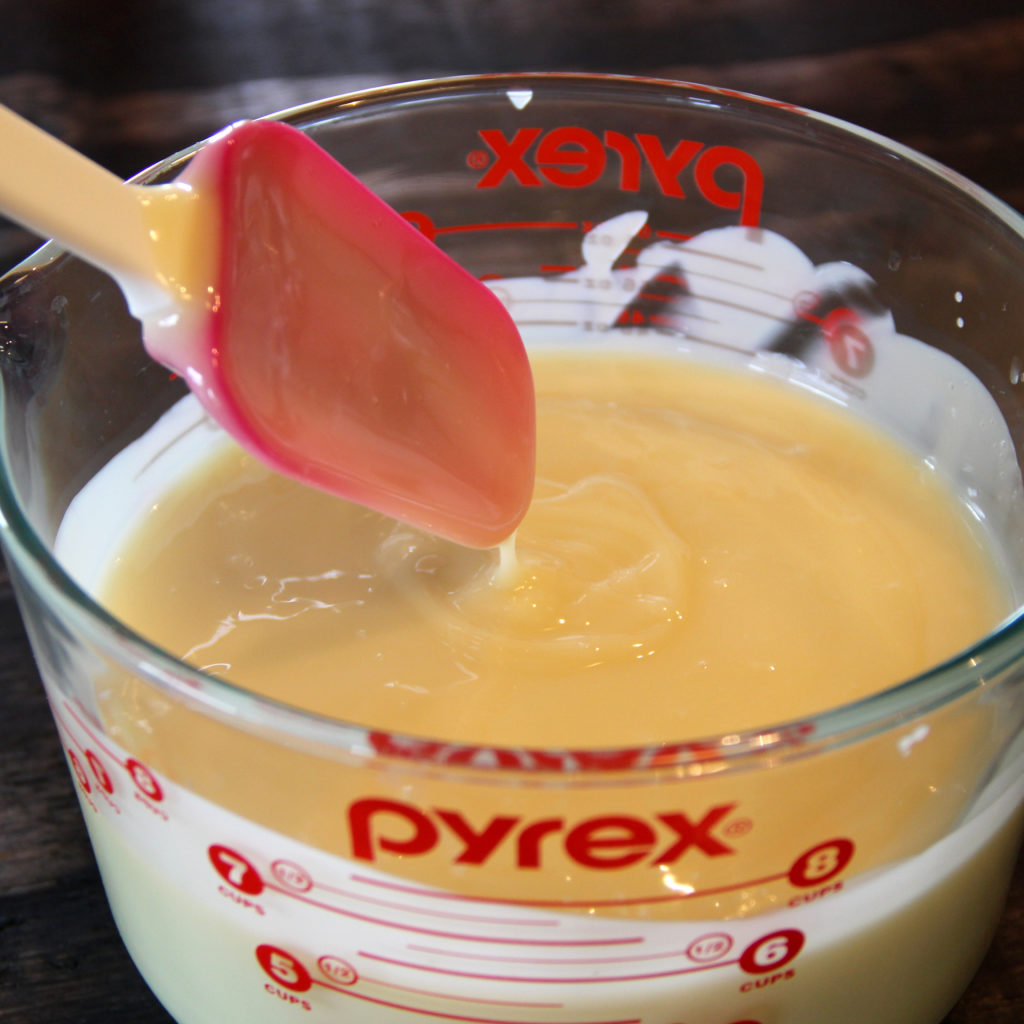
Once emulsified, you can keep mixing your soap to various levels of trace. Below you can clearly see that as I drizzle soap from my spatula it sits a bit on the surface before flattening back into the mixture!
Once you reach trace, you can pour your soap into your mold and it will go through saponification and turn into soap!
Just keep in mind that as you get a few batches under your belt, you might want to experiment with reaching a stable emulsion (before trace) so that you can divide your soap out to swirl and still have plenty of time to work with it before it thickens.
If you are new to soapmaking, we have an awesome FREE soapmaking guide that you can download and read through. It includes a detailed description of the soapmaking process, along with information on supplies, ingredients, recipes, suppliers…etc.
I’d also like you to join our Facebook Group, Saponification Nation where we like to talk soap and share what we’re working on.
See you there!
Amanda Aaron


Leave A Comment