
Almost as addictive as soap making, making your own molds will have you scouring antique stores for old paper weights and looking at everything as a DIY mold potential! Ha! The info in this blog post was on a topic that I taught at conferences several years ago. (I’ve gotten much better at photography), but the content is so good and helpful that I didn’t want to not share it.
I also have a resource on making silicone slab/block molds! Check that out here!
What can we make molds out of?
The surface of your mold negatives (what you are creating a mold from) needs to be smooth and non-porous. If your item is made of wood, clay or plaster you’ll need to seal it with acrylic. You can find spray acrylic at the local home improvement or hardware store.
Most items made of glass, plastic, acrylic or other smooth and shiny surfaces do not need to be sealed. Some of my favorite objects to make molds out of are:
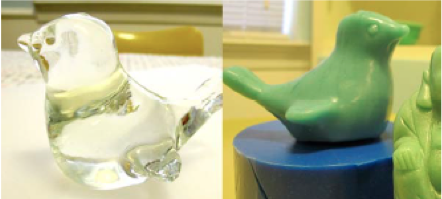
- Paper weights – There are all sorts of really cute glass paper weights including birds, frogs, fish and other animal shapes. The good thing about glass paper weights is they don’t need to be sealed. For example…here is a glass bird that I found which made a cute mold.
- Salt and Pepper shakers – You can find all kinds of vintage or new salt and pepper shakers that make adorable molds. Here is a rabbit that I found and made a mold out of.
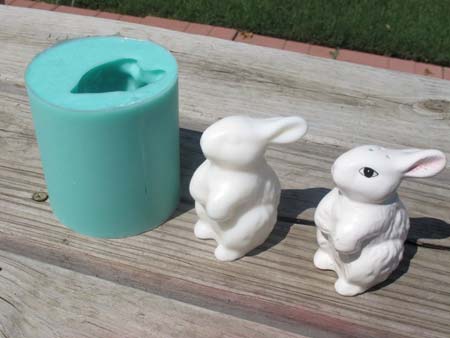
*You need to make sure you cover the holes in the salt and pepper shakers or they’ll just fill up with silicone. I simply put a piece of tape over them but it would be better to push some clay down into the holes.
Since salt and pepper shakers are hollow…they will float if you simply pour silicone over them. So you can do two things; you can fill them with BBs or something similar or hot glue them down in your mold box. I typically do both. I’ll fill it with something heavier and use both a dab of hot glue to glue it to the mold box.
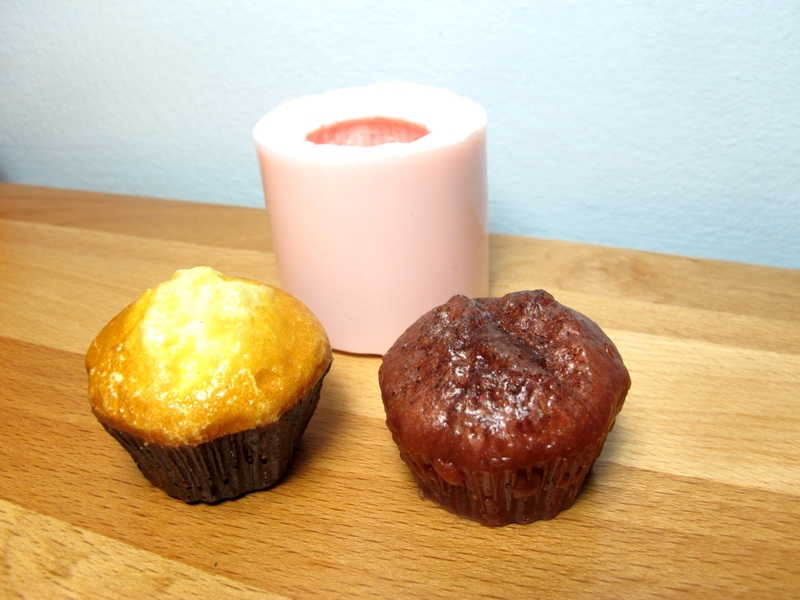
- Fake food! Food soaps including cupcakes, cookies, vegetables and fruit are always the rage! Check out fake food on Ebay or other online stores and see what you can find.
- You can also carve mood or sculpt clay into an entirely custom made mold. Remember, you’ll need to seal both wood and clay with acrylic.
Basic Terms for Mold Making
- Shore hardness – Gauges the softness or hardness of the silicone. A Shore A hardness of 10 is more flexible or softer than a Shore A hardness of 30 which will be more rigid and less flexible.
- Mold box – Or a mold container is the vessel in which you place your mold negative and pour the silicone into. These can be constructed out of
- many different materials including acrylic, plastic or finished wood.
- Mold negative – This is the item that you will be pouring silicone over to create a mold.
- Pot life – The amount of time you have to work with the silicone before it sets up. You’ll need to be finished long before the time is up to let air bubbles rise and ensure it pours smoothly as it does still thicken during this time.
- Cure time – The amount of time before you can remove your silicone mold from the mold box.
- RTV – Room Temperature Vulcanization (room temperature cure).
- Tear strength – Measures a rubbers ability to tear.
Choosing silicone – So many choices!
For making silicone soap molds you want to look for a pourable tin-cure RTV silicone rubber. This silicone comes in two parts and when mixed it cures at room temperature.
Smooth-On is one of the most popular manufacturers of silicone. They have several distributors you can lookup on their website or you can order online. They make a series of silicone called Mold Max® which comes in different varieties. Smooth-On Link for tin cure silicones. https://www.smooth-on.com/category/tin-silicone/
Their basic Mold Max Pourable Silicone comes in a Shore A hardness range of 10A – 60A. 10A is the most flexible and 60A is much stiffer. I’ve used 10A and 30A. I prefer the 10A when doing the single cavity soap molds. Since it is more flexible, un-molding is much easier than with a stiffer silicone. The Mold Max series has a mix ratio of 100:10 and you do have to use a scale to weigh each part.
I’ve also used the OOMOO® Silicone Rubber series with good results. It has a mix ratio of 1:1 (use equal parts) and you can measure by volume instead of weight. It also seems to get less bubbles than the Mold Max but it doesn’t come in a 10A Shore A hardness which is what I like to be at as far as flexibility.
In this post I am using Bramble Berry’s pourable silicone. I don’t think they sell it anymore, but the process is still the same! Their product was similar to Mold Max and had a ratio of 100:10 (I believe!).
How much silicone do you need?
This is the hard part and Smooth-On explains it a lot better than I could. They also have a handy calculator that might help you out. https://www.smooth-on.com/support/calculators/
I always try to have a couple of extra items set up to mold in case I have left over silicone. You don’t want to waste it if you don’t have to.
Basically you will determine the cubic inches of the mold box and the cubic inches of the mold negative. Subtract the mold negative from the mold box. Times this by the specific gravity of the silicone to determine the amount needed.
Smooth-On tells us that Mold Max 10 has a specific gravity of 24.1 cu. in. / lb. (cubic inches per pound). This means that 16 oz (1 lb) of the silicone will fill 24.1 cu. in. Divide 24.1 by 16 to get per ounce. 1 oz of silicone will fill 1.50 cu. in.
- Mold box – 4″ x 3″ x 2.5″ = 30 cu. in.
- Mold negative – 3″ x 2″ x 2″ = 12 cu. in.
- Mold box – Mold negative = 18 cu. in. of silicone needed
- 18 / 1.5 = 12 ounces of silicone needed
Constructing a Mold Box
A mold box is what will contain your mold negative and what you’ll pour the silicone in to make your mold. It can be made several different ways. Below in the tutorial, I show you how to make one out of PVC and lexan sheets. You can find lexan sheets from a local plastic supplier, ebay or even in the form of a cutting mat at the grocery store. I get mine locally from Allied Plastic, www.alliedplastic.org.
You can also create a mold box out of acrylic sheets. Here are some links to give you some ideas.
- http://www.makeyourownmolds.com/adjust-a-mold-box
- https://www.smooth-on.com/tutorials/build-mold-box/
What you’ll need to get started.
- Pourable silicone
- Mold negatives – These are the items that you want to mold.
- Mold release – Ease Release® 200
http://www.smooth-on.com/Release-Agents-and/c9_1123_1226/index.html - 2 Mixing containers – Plastic mixing containers work well. After you pour your silicone, let the container sit and you can usually peel the silicone out to reuse the container. You can find them locally at hardware stores. I also use these for soap making.
http://www.smooth-on.com/Tools-Supplies-and/c1_1220/index.html - Mold box – In this tutorial I use lexan sheets.
- Scale and gloves.
- Mixing utensil – I usually use a plastic mixing spoon from the dollar store. Like the mixing container, just let it sit until the silicone is cured and you can usually peel it off to reuse the utensil.
The Process – Let’s make some molds!
Gather your objects and make a mold box/container!
A mold box/container is what will contain your mold negative and what you’ll pour the silicone in to make your mold. It can be made several different ways. I’ll show you how to make one out of lexan sheets, PVC pipe and a salt tube. You can find lexan sheets from a local plastic supplier, Ebay or even in the form of a cutting mat at the grocery store. I get mine locally from Allied Plastic, www.alliedplastic.org. PVC pipe can be found at most local hardware stores.
Bath salt tubes can be bought from container suppliers.
Making a mold box out of PVC pipe is easy but the unmolding is tricky (see below under finishing your mold). Make sure your PVC pipe is large enough that your mold has at least 1/4-1/2″ from your object to the container edges. Measure the pipe and cut it about 1/4-1/2″ taller than the object to be molded.
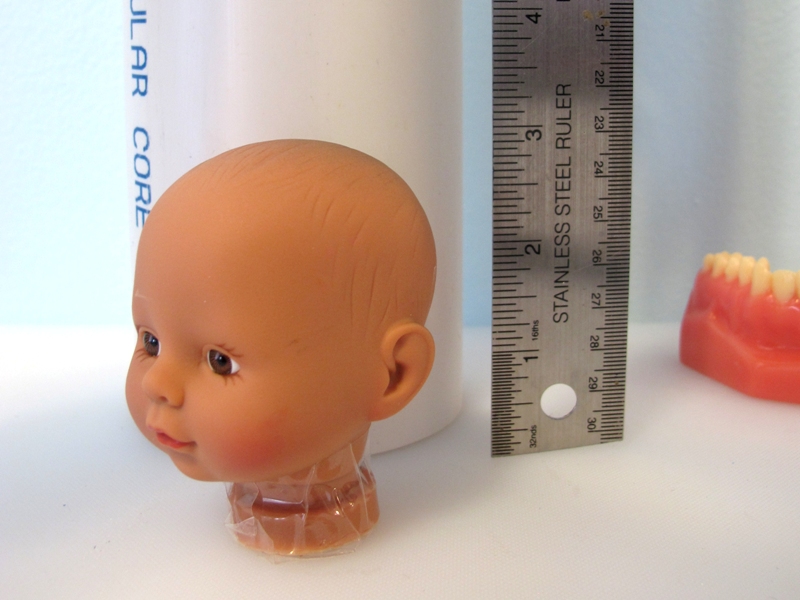
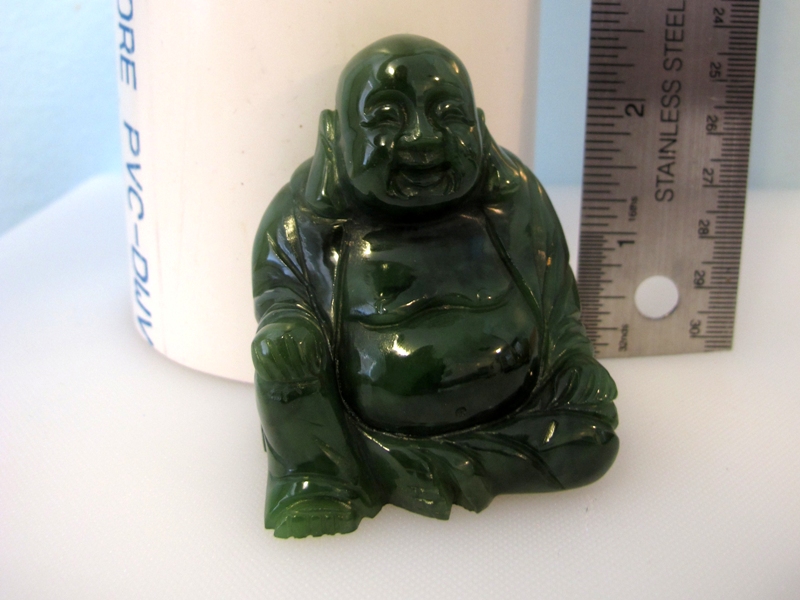
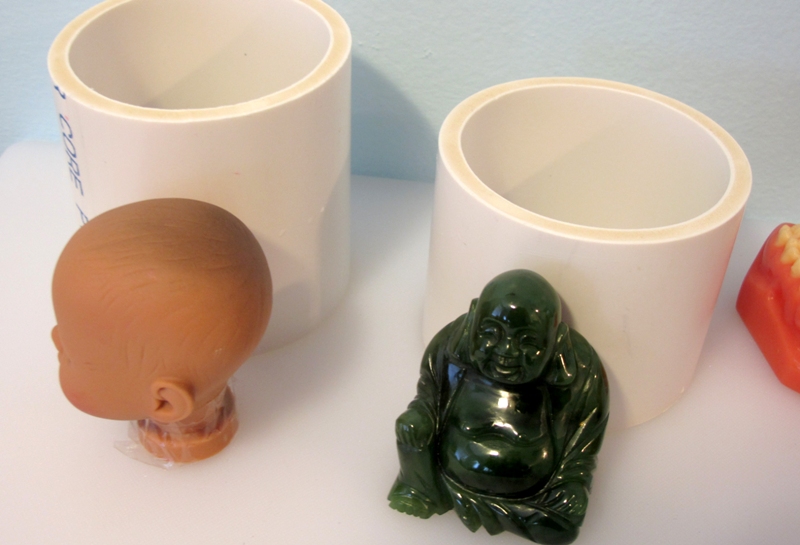
Below, my PVC pipe is cut and ready to go. You can also see that I have plenty of room around each object so the sides will not be too thin.
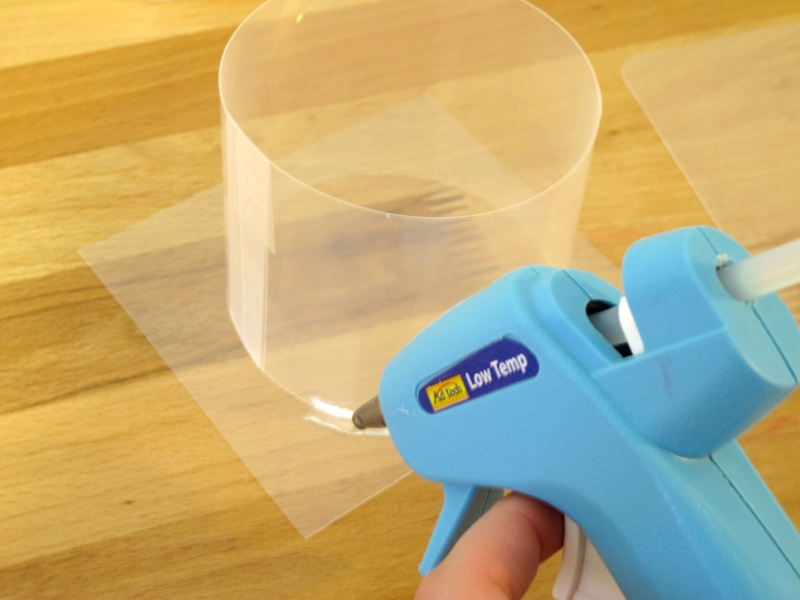
We need to add a bottom to the PVC so that the silicone does not flow out from underneath. I used plastic sheets cut into squares and glued this base piece to the round PVC pipe. Be sure to use plenty of hot glue and make sure you don’t leave any gaps in the glue.

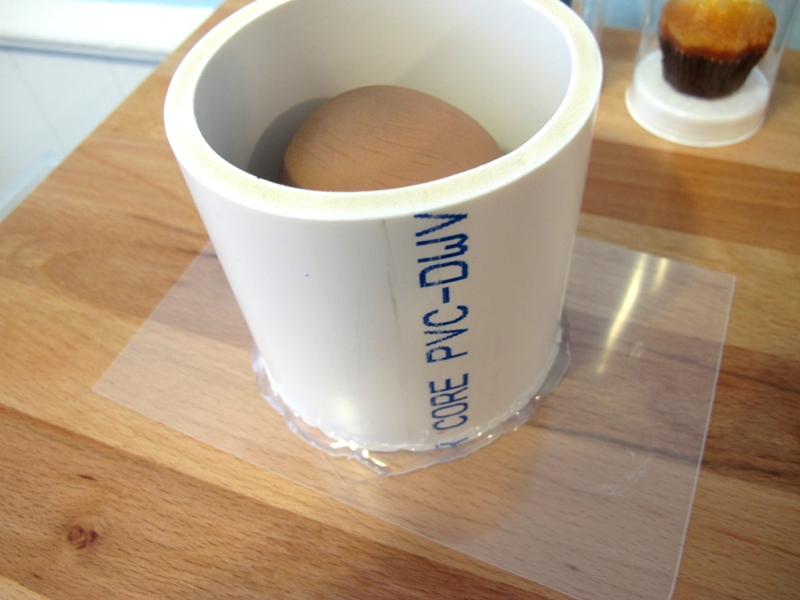
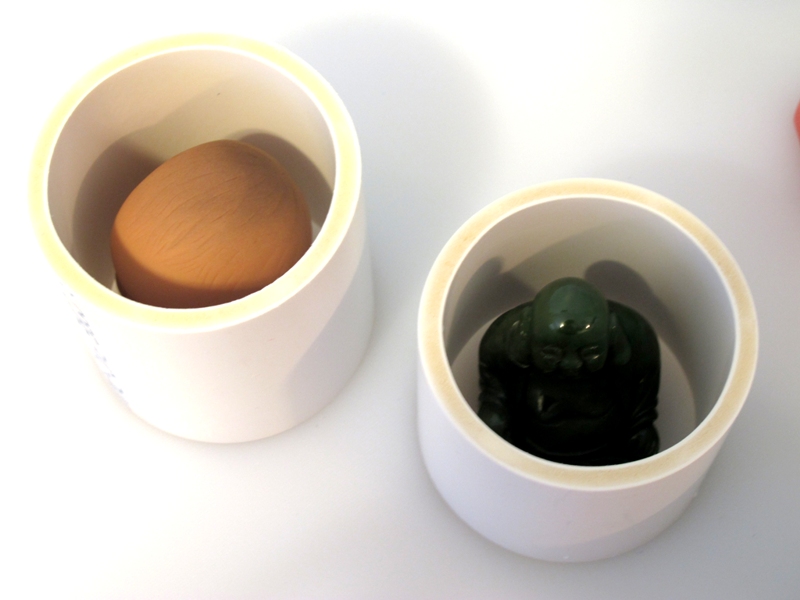
Put a dab of hot glue onto the bottom of your object and glue it down centered in the mold box. This is ready to pour silicone into.
You can also made mold boxes / containers out of lexan or other plastic type of sheets. These work really well if you can’t find a PVC size that fits your object nicely without too much extra room on the sides. You can make a lexan container that is custom sized to fit your object…thus reducing wasted silicone.
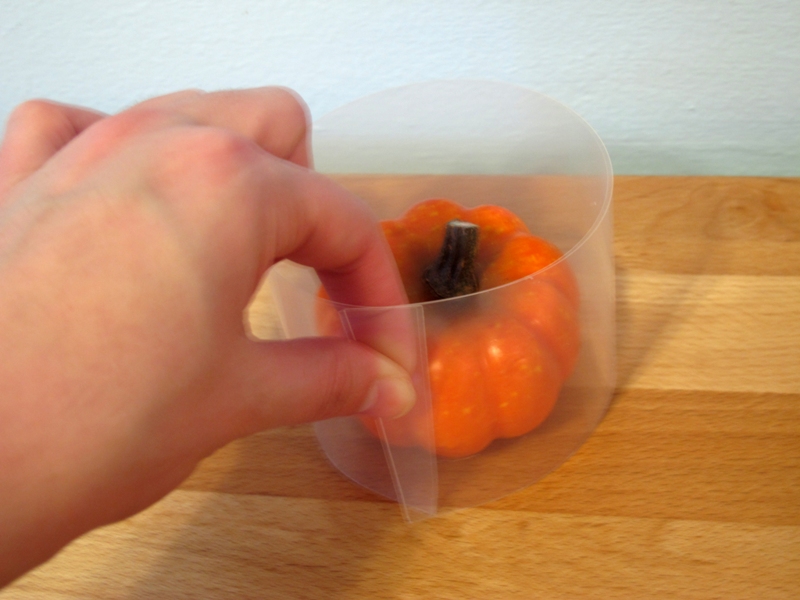
Cut a piece of lexan that is 1/2″ taller than your object to be molded. Wrap it around your object until you have about 1/2″ of space between the object and the plastic. Trim if needed and tape. I use regular scotch tape.
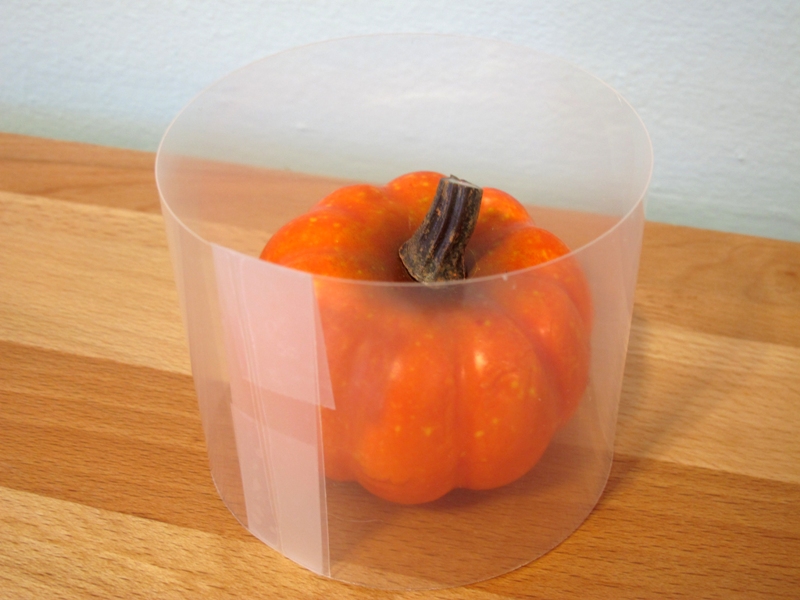
Like we did with the PVC pipe, create a base for this mold container. Glue the base using hot glue and leave no gaps for the silicone to run out of. Place a dab of hot glue onto your object and glue it to the base centered in the mold box.
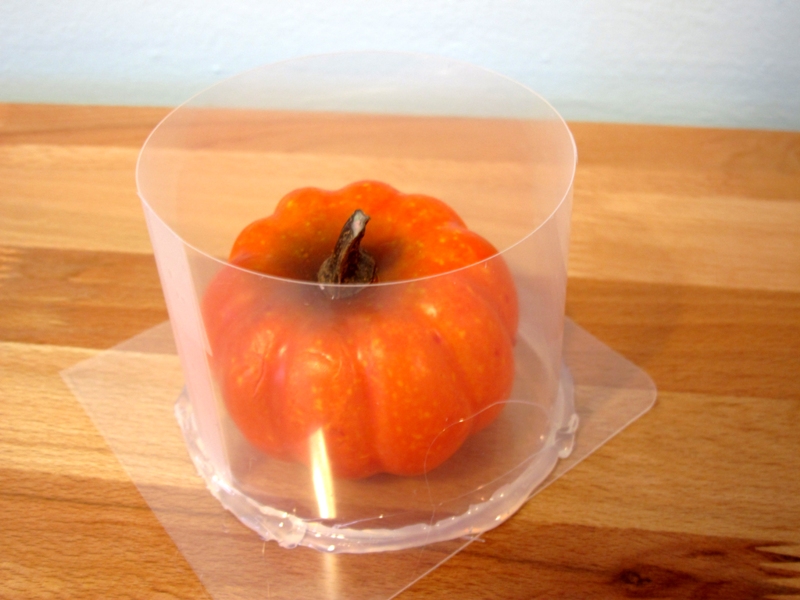
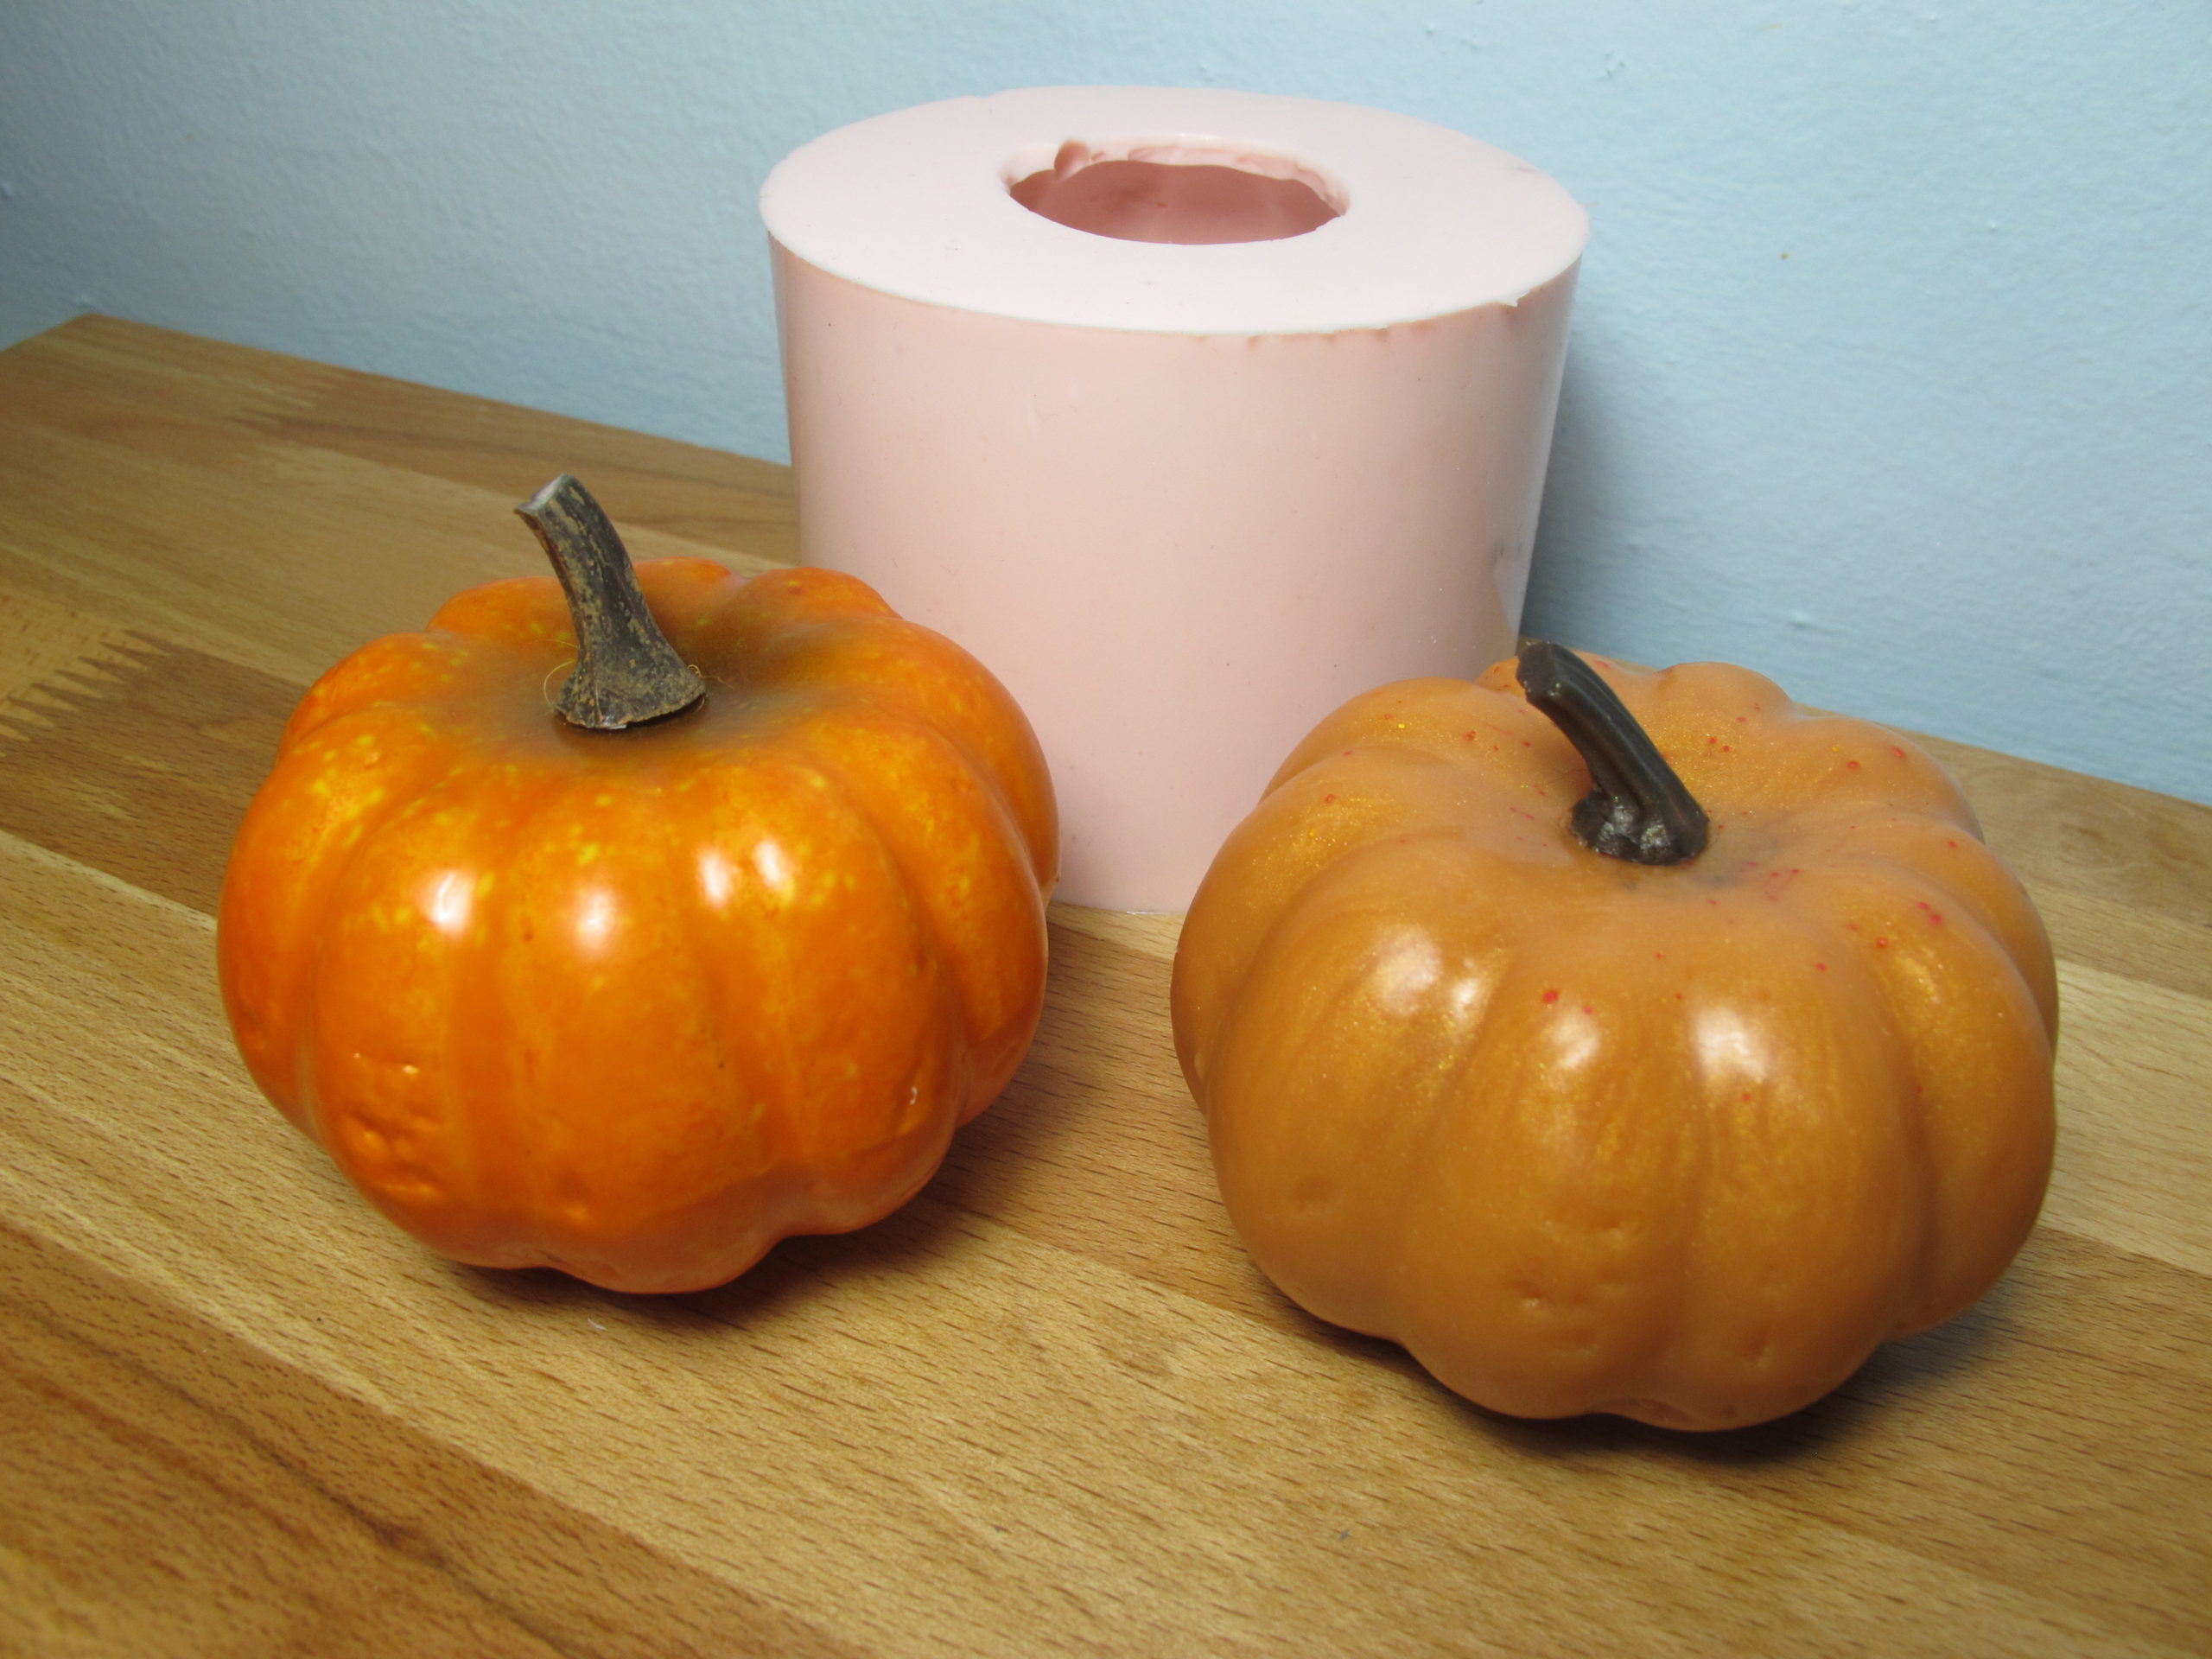
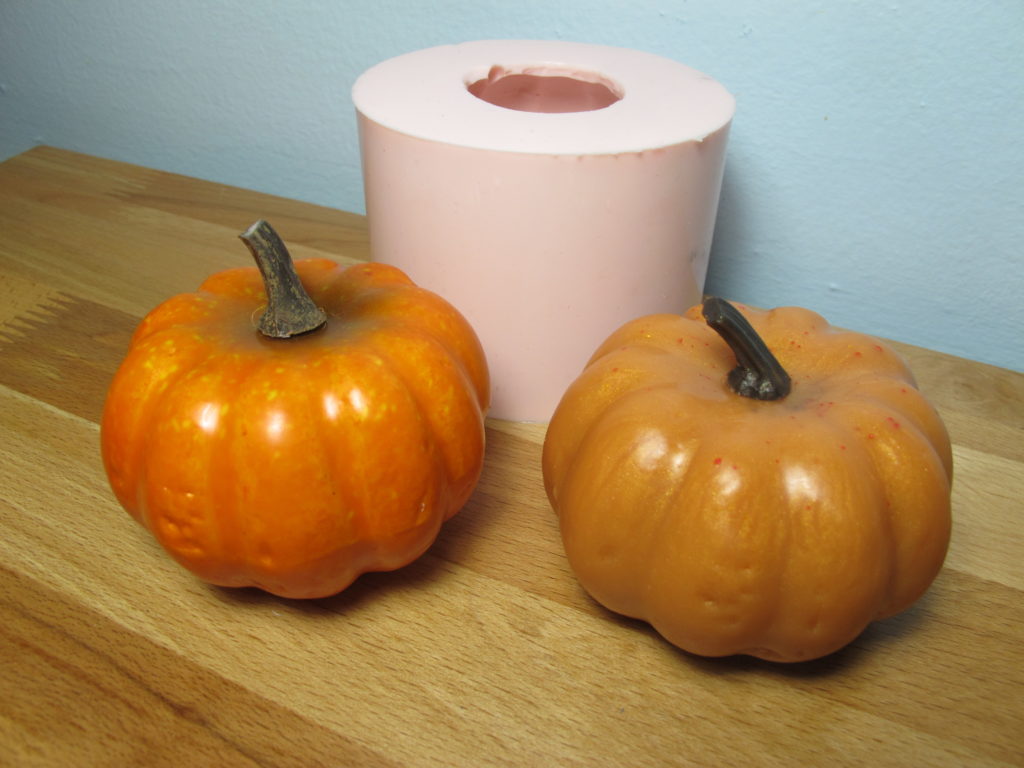
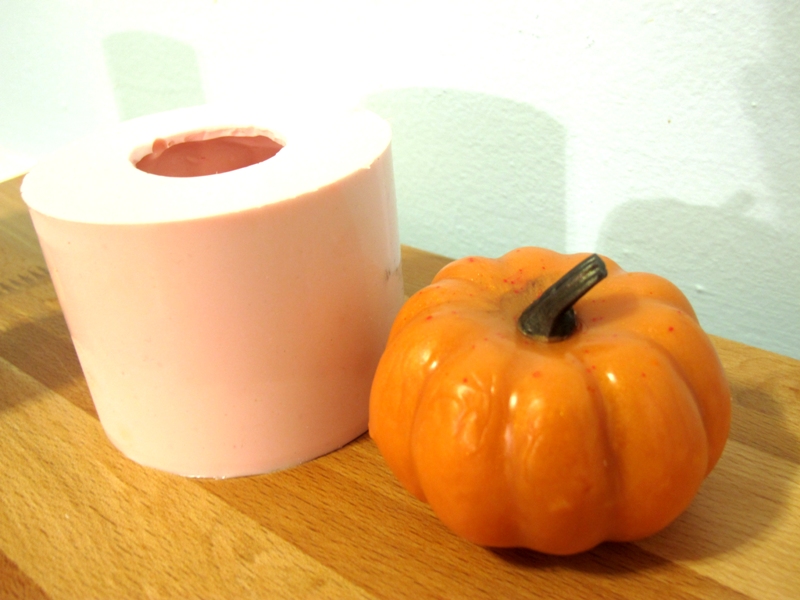
The above pumpkin mold is ready to pour.
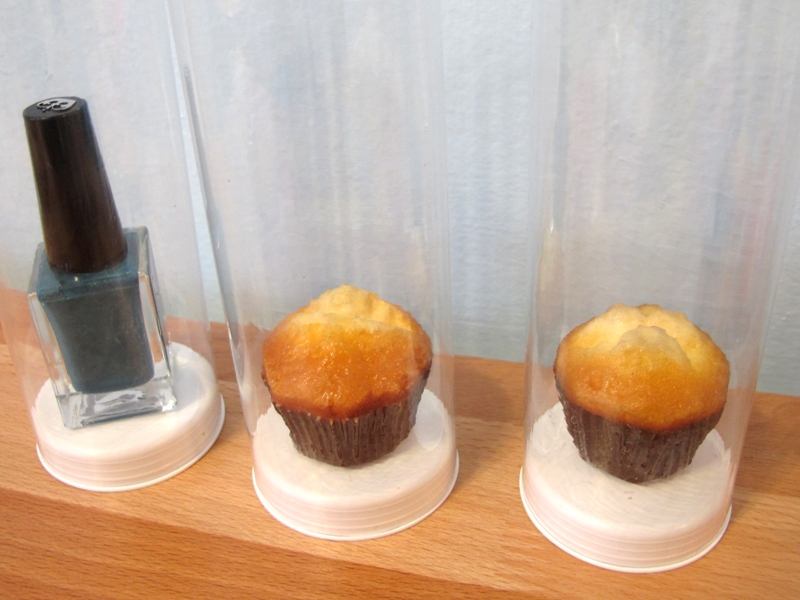
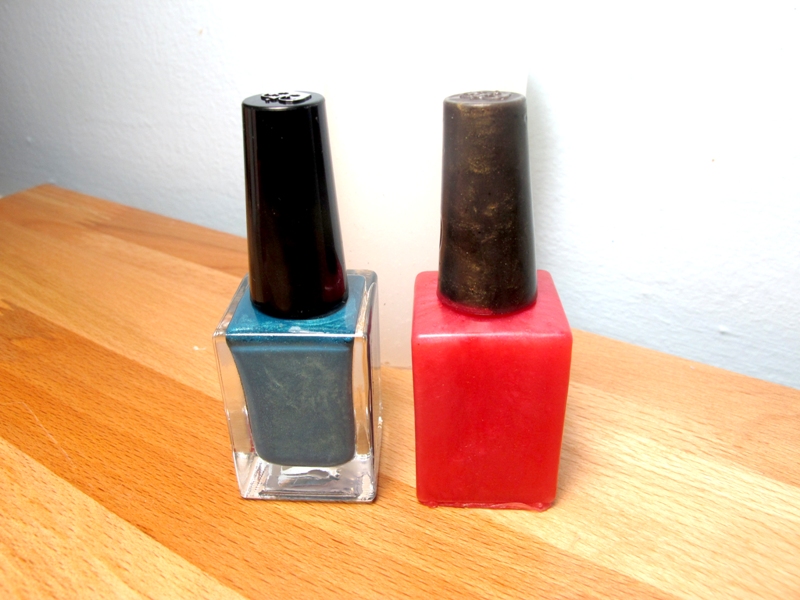
You can also use bath salt tubes if you happen to have objects that fit inside of them. They are simply plastic so are just like using the lexan or plastic sheets. They are just already put together for you so it saves a step. I like using these especially for nail polish bottle molds. Simply hot glue your item to the bottom piece. Super easy! Just make sure no part of your object is touching the plastic wall.
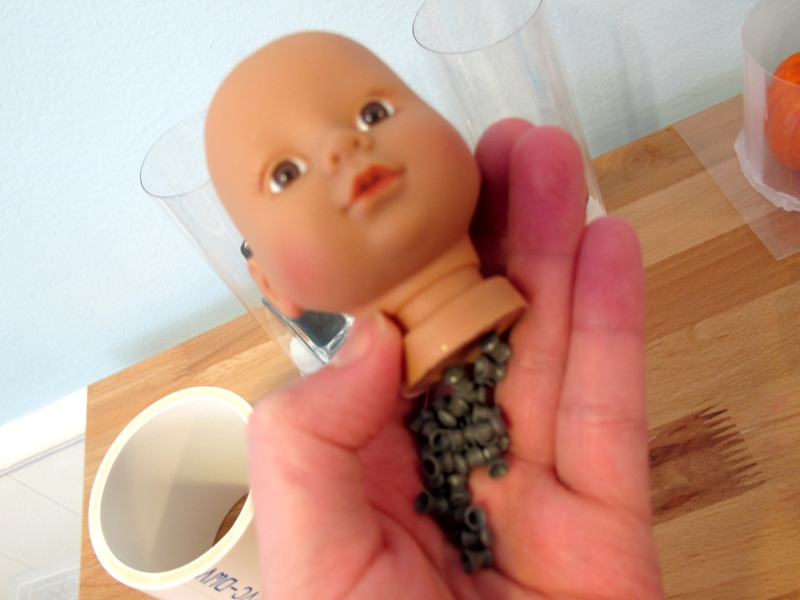
NOTE: If your object is hollow it will float once you pour the silicone. For this reason I like to fill with BB’s, pellets, sand or something similar. I filled the baby doll head with pellets. I also do this with salt and pepper shakers and other similar items.
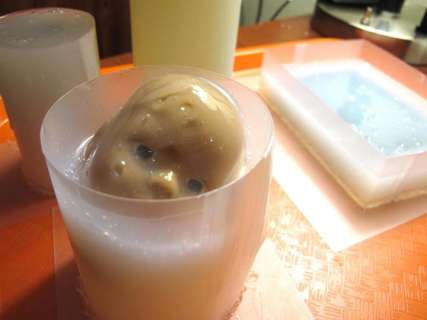
If you don’t…look what can happen! I even glued this down but it just wasn’t enough. The buoyancy of the object was just too much for the glue to hold. EEK!
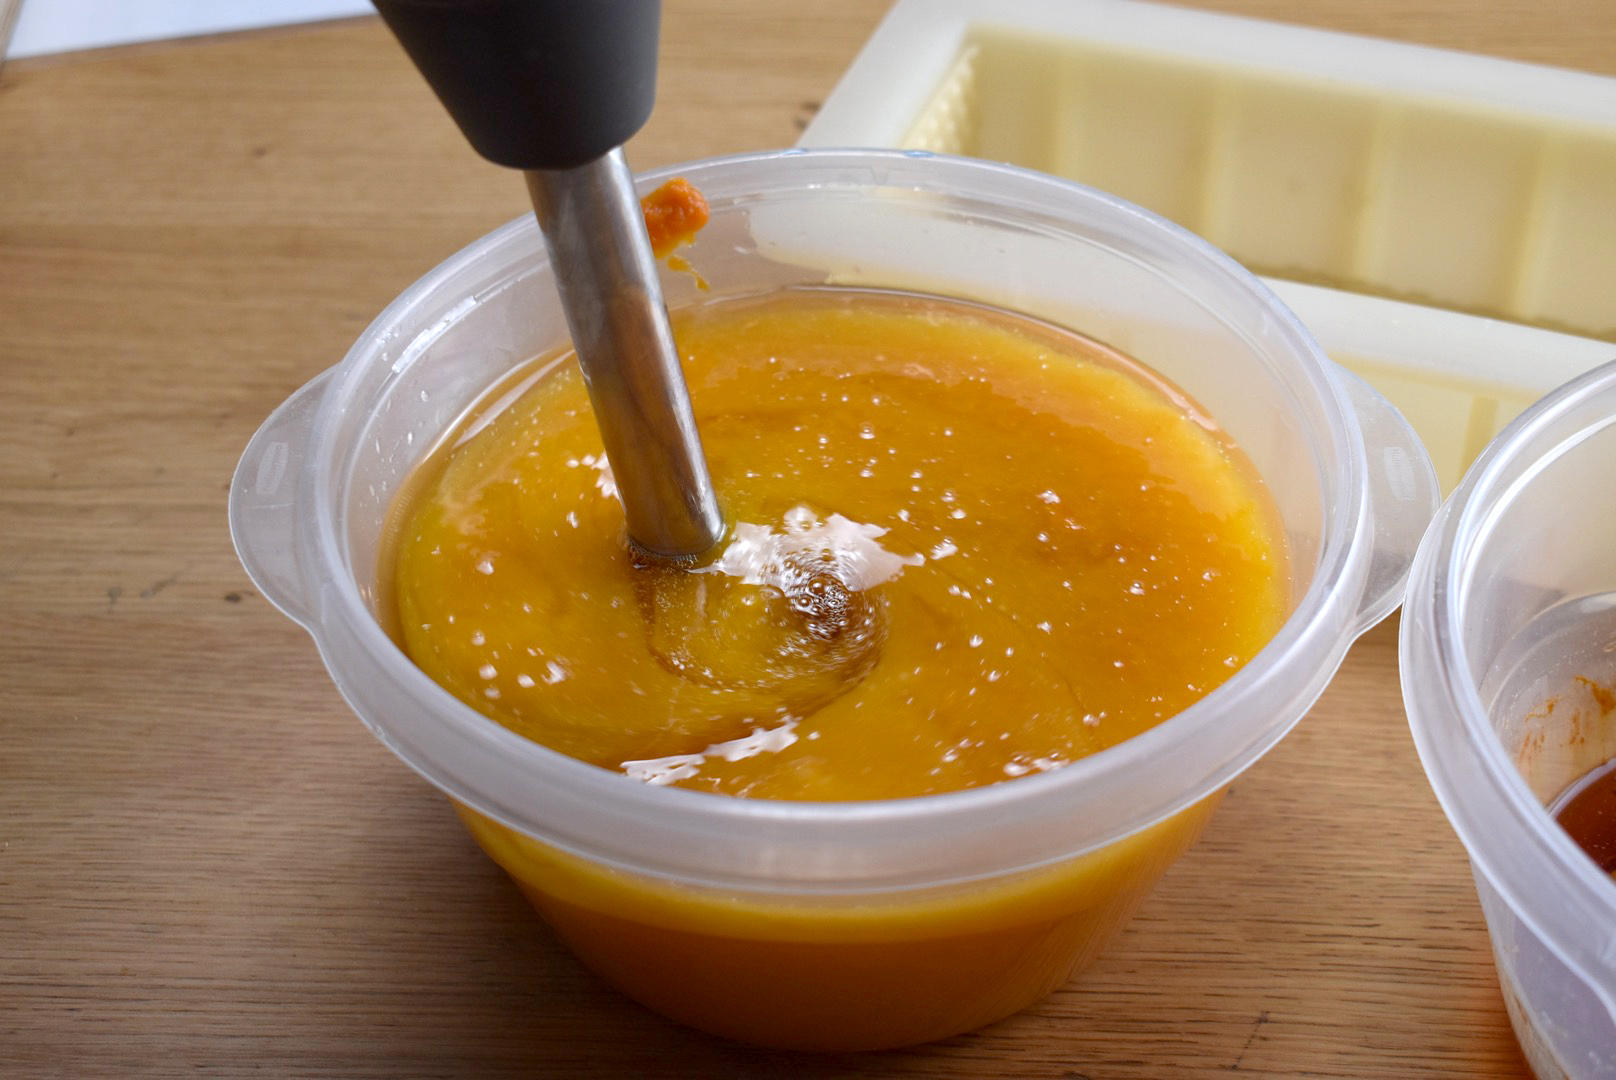
Once you make the silicone containers / mold boxes…it is time to mix and pour the silicone. Be sure to refer to your silicone’s mixing guidelines as different silicone is mixed differently.
I am using pourable silicone from Bramble Berry and the silicone is mixed using a ratio of 100A/10B. This silicone is measured by weight.
Place your container on a scale and hit tare so the scales reads zero. I like to use grams to be as accurate as possible.
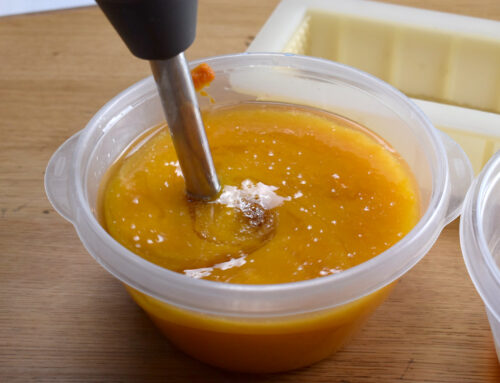
Step 1: Weigh out part A.

Step 2: Hit tare again so the scale reads zero. Weigh Part B into the same container.
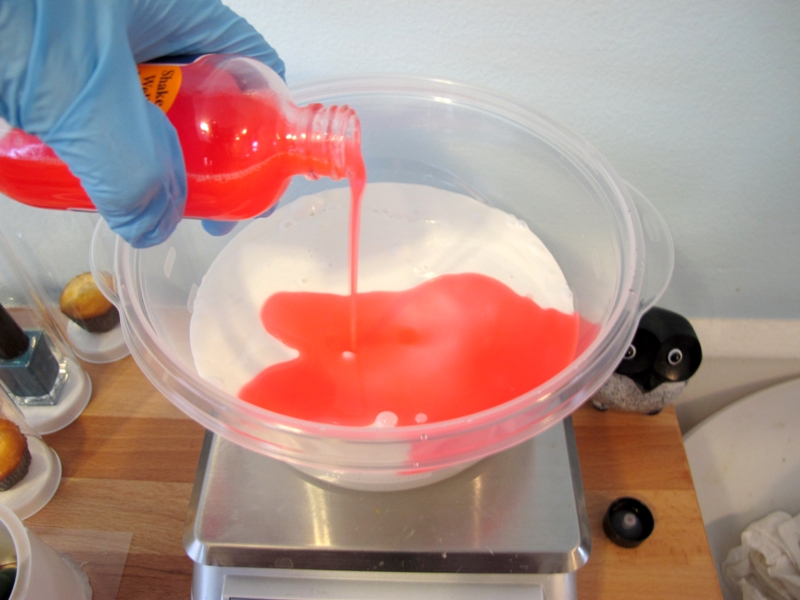
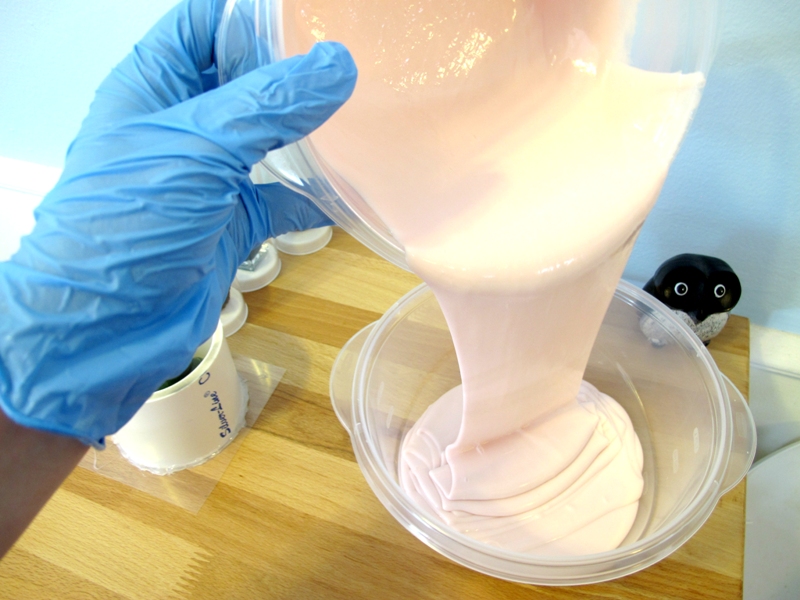
I measured out 800 grams of Part A (sticky white base) and 80 grams of Part B (pink liquid). Mix the two together. Your silicone will also specify a “pot life”. This is how much time you have to work with your silicone before it starts to set up. The silicone I am using has a pot life of 45 minutes. You should pour way sooner than that though as it will start to set up and thicken even before that time is up.
To mix the silicone I like to use a plastic spoon or even something disposable like a large craft stick or wooden paint stirrers that can easily be thrown away. Mix the silicone until there are no streaks remaining. Then mix a little more.
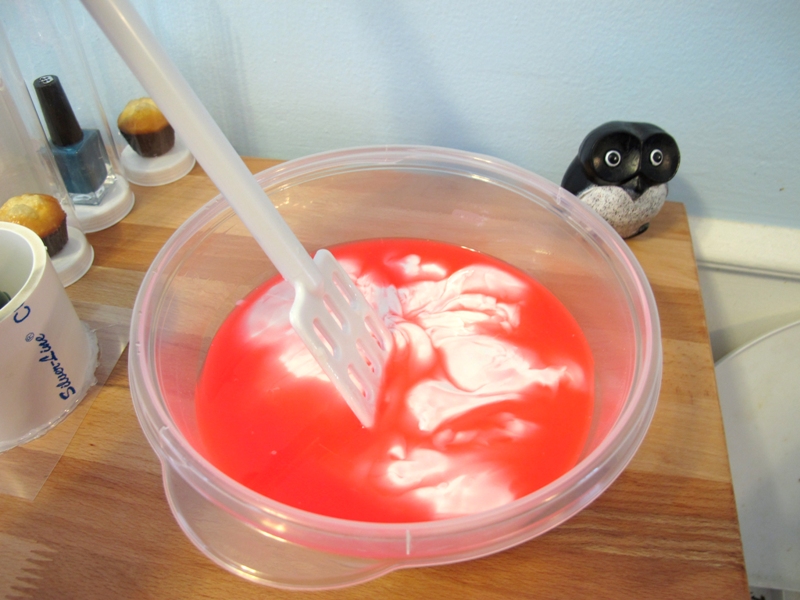
In the picture below you can still see some streaks. Keep mixing until the silicone is all one even color.
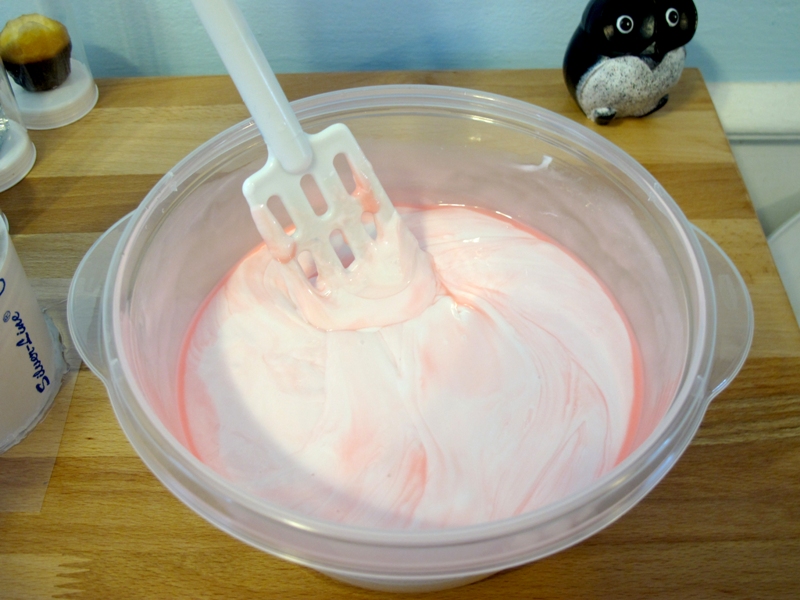
This below looks good. It is even in color and no streaks. Be sure to scrape the edges well.
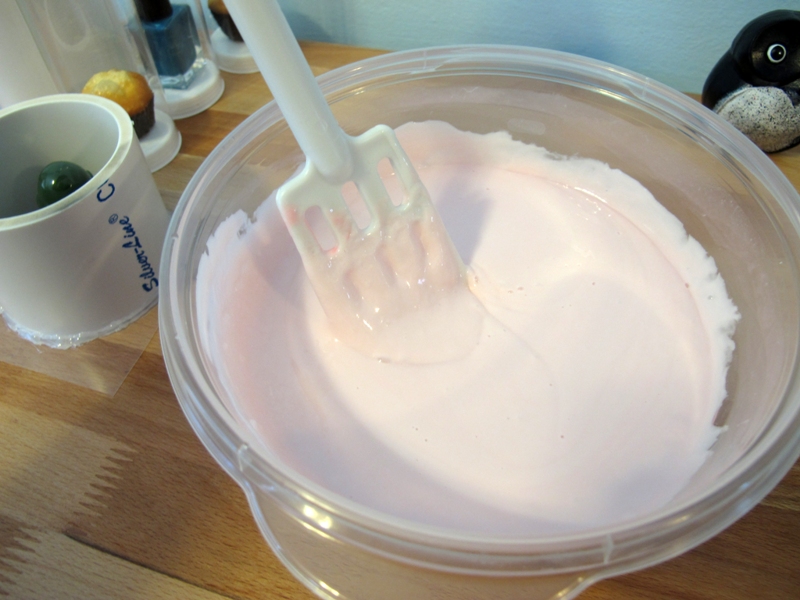
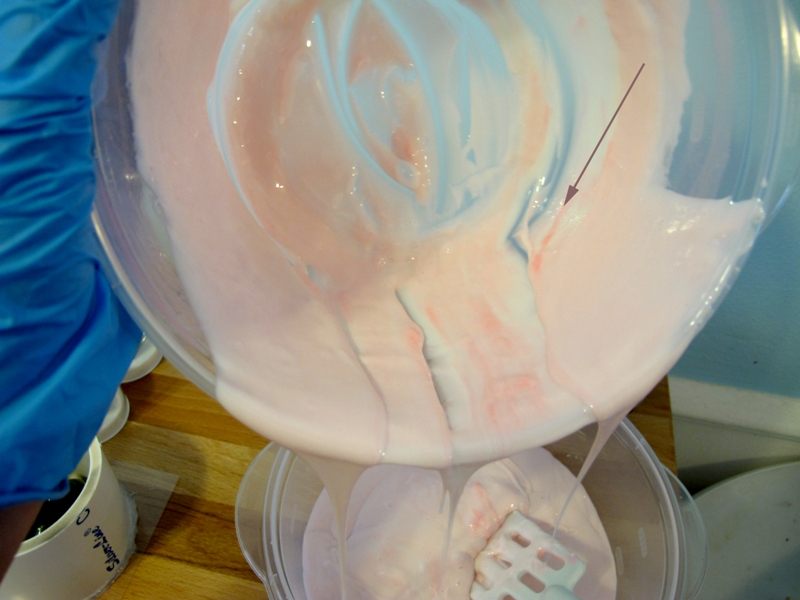
Pour the silicone into a second container. This ensures that there isn’t any unmixed silicone stuck to the sides or bottom or your original container that will mess up the molds. This is an important step. Don’t skip it. See in the below picture where there is some streaked silicone stuck to the edge? That is why this step is important. You don’t want to pour that into a mold or it will not come out
good.
Mix a bit more. Now it’s time to pour the silicone into the mold boxes / containers!
You’ll want to pour the silicone into the containers at the lowest point and on the bottom of the container if possible. This makes the silicone rise from the bottom around the object and helps to not create a bunch of air bubbles. Sometimes this is hard to do if you item/mold box is small. Do the best you can.
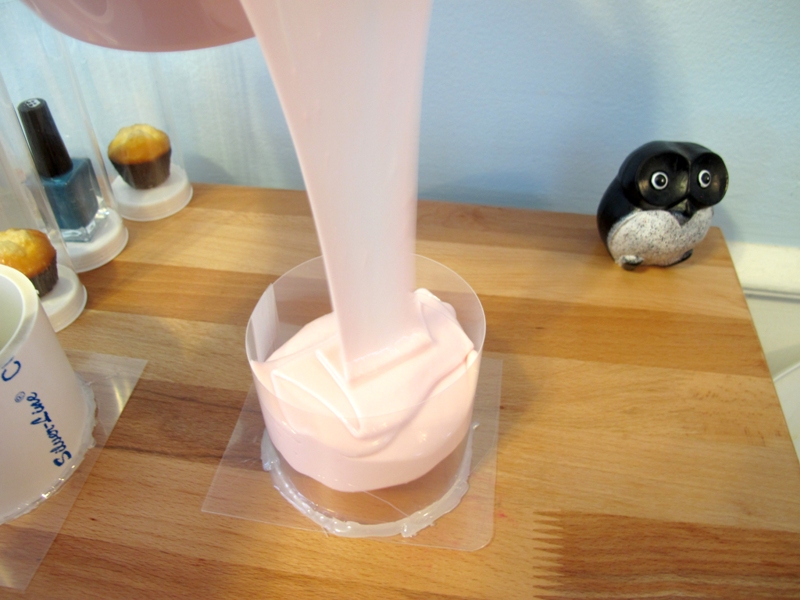
Pour the silicone over each item until you have about 1/2″ of silicone covering the object. You’ll notice after you pour that there are air bubbles that come to the surface. To help reduce them, take a skewer and run it over the surface and bubbles to pop. Repeat this in ten minutes as well. You won’t get rid of all of them unless you invest in a vacuum but you’ll get rid of most of them.

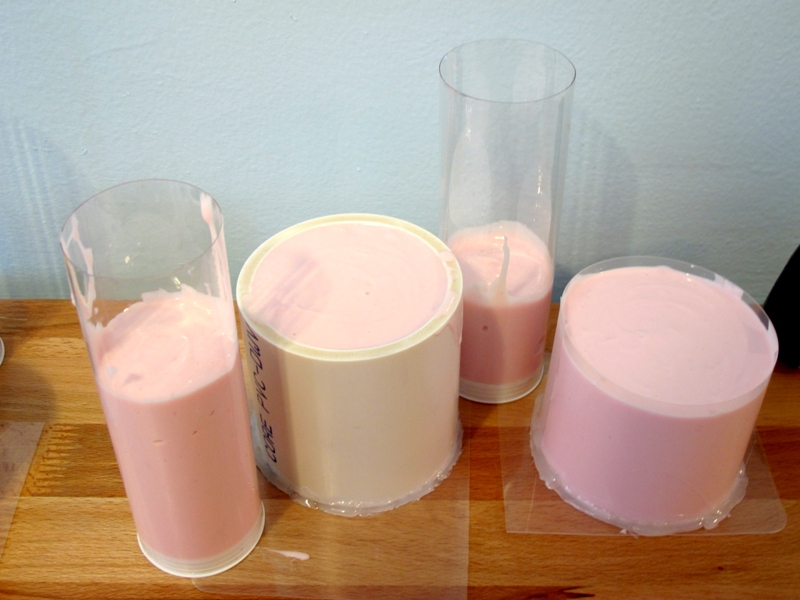
Let the molds set up as specified on your silicone instructions. Silicone has different unmolding times. The one I am using is 24 hours.
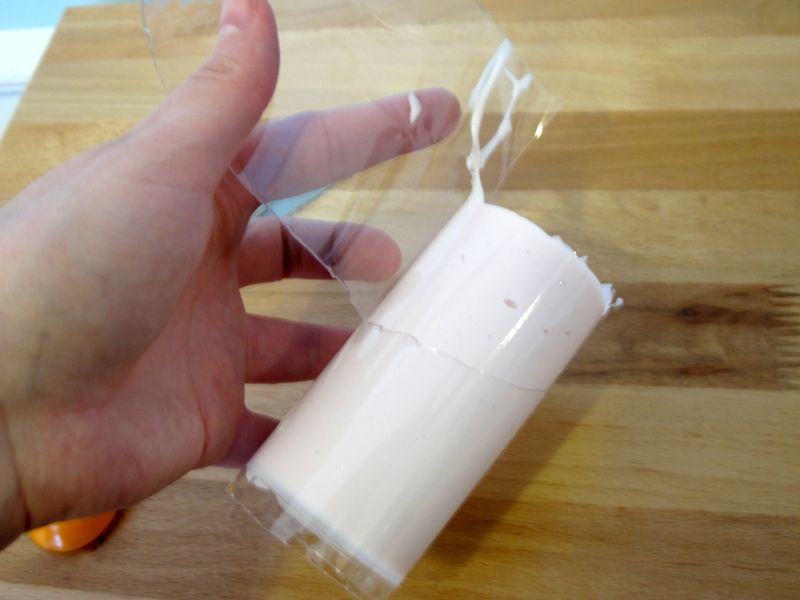
After 24 hours, remove your silicone molds from the mold containers. The salt tubes and plastic sheet containers are easy to unmold. Just cut a slit and tear or remove by taking apart tape.
The PVC pipe is a bit trickier. It required a Dremel to saw it into two pieces. I think I’m going to stick to the plastic but I wanted to share the PVC in case it gave you some ideas.
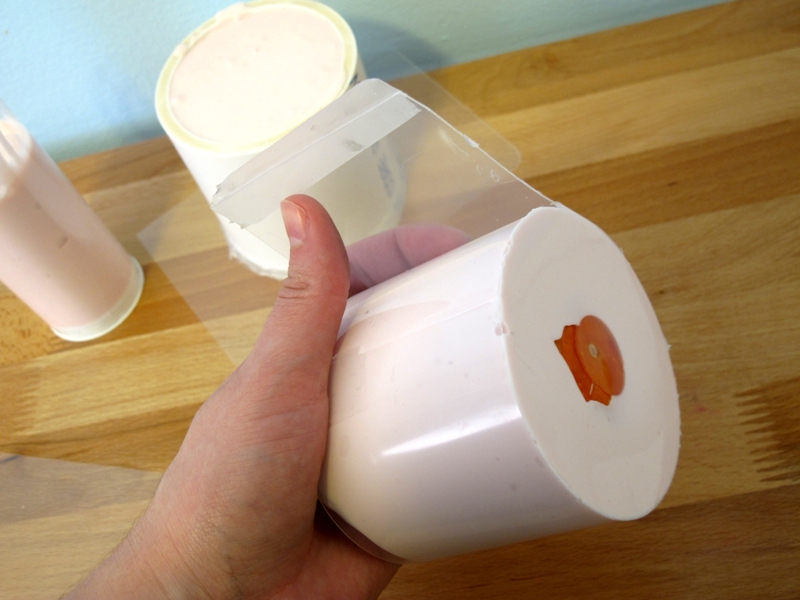
The PVC pipe is a bit trickier. It required a Dremel to saw it into two pieces. I think I’m going to stick to the plastic but I wanted to share the PVC in case it gave you some ideas.
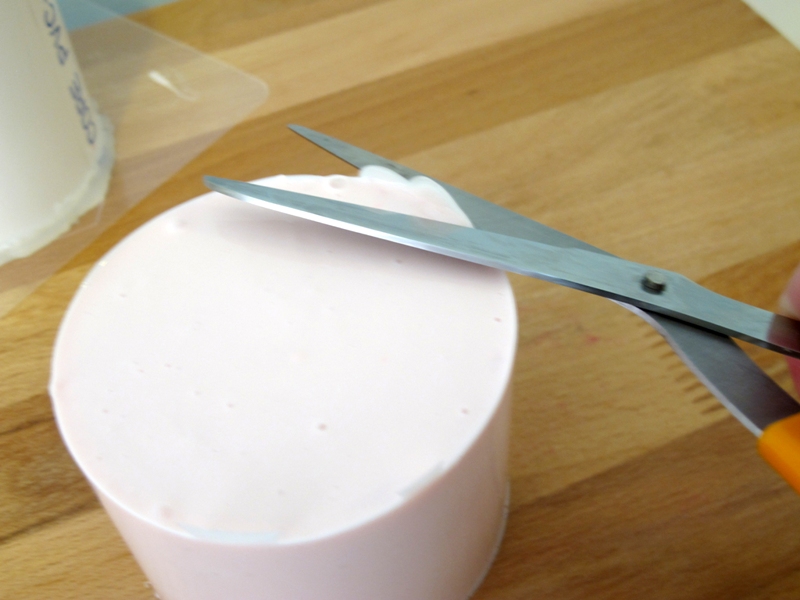
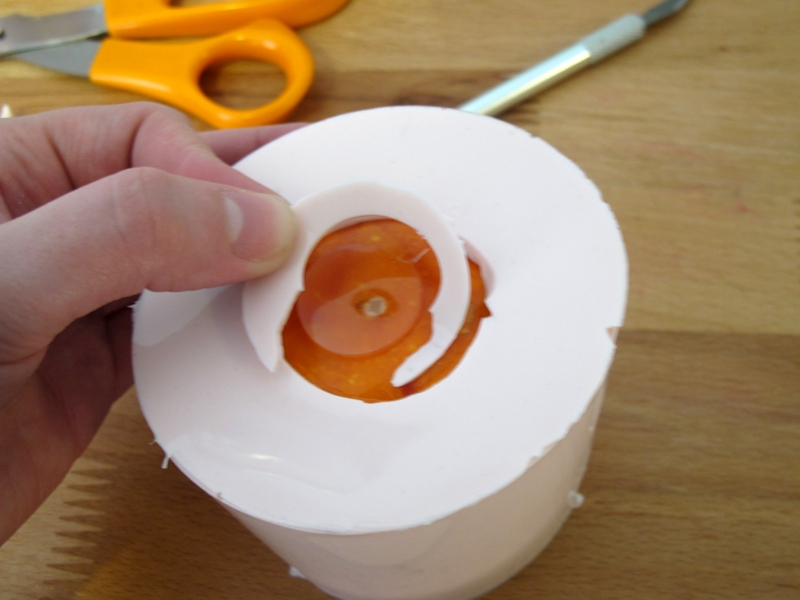
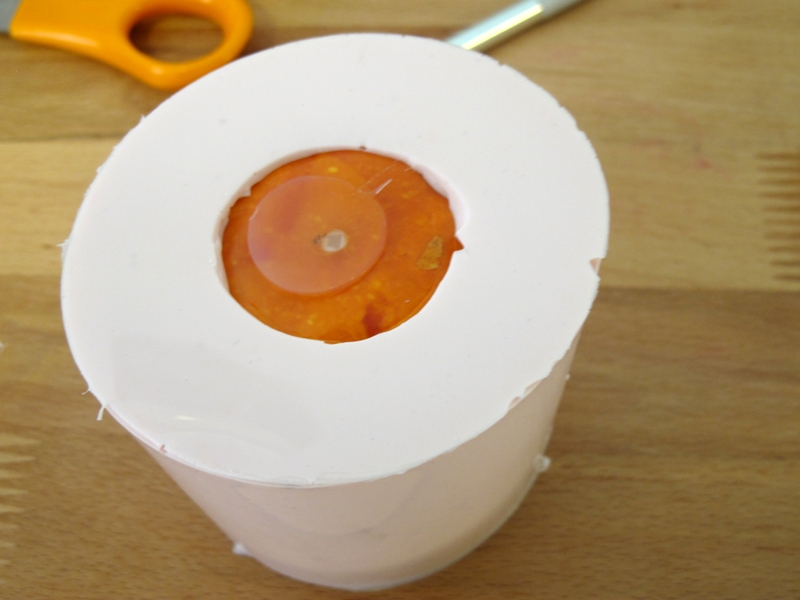
Depending on the item that you molded, finishing the mold might require different steps. Here is an easy one, the pumpkin. Start by cutting of any flappy edges.
Then using a utility knife, cut a circle around the base of the pumpkin. This will be how you pull the pumpkin out.
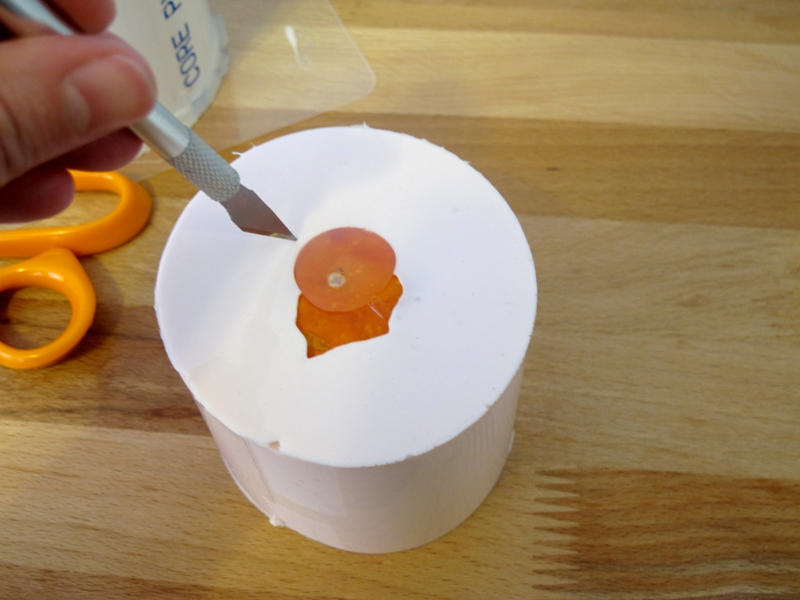
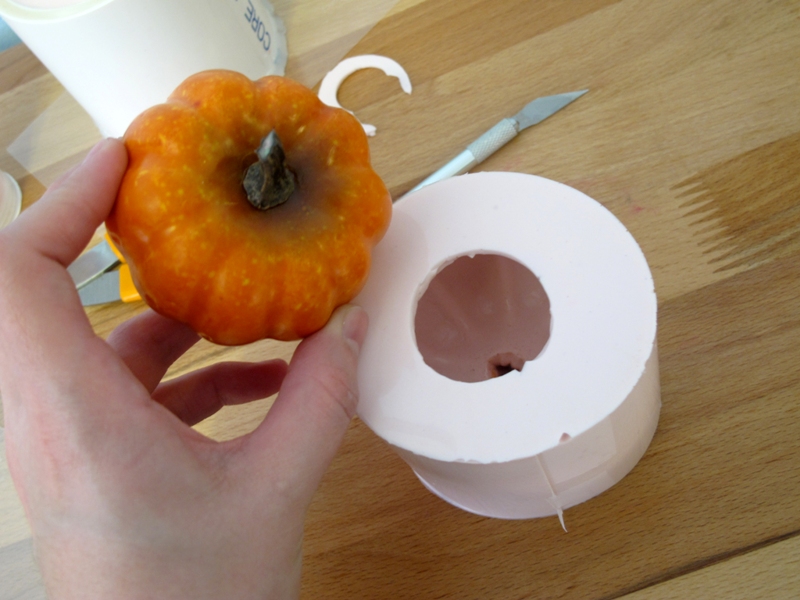
Was it easy to do? If not…you might require one more step. The pumpkin was easy. The baby head is going to be a bit more difficult because the middle part is bigger that the top. So you simply can’t pull it out. First I cut around the base like I did with the pumpkin. Then I cut two slits down opposite sides about half way down.
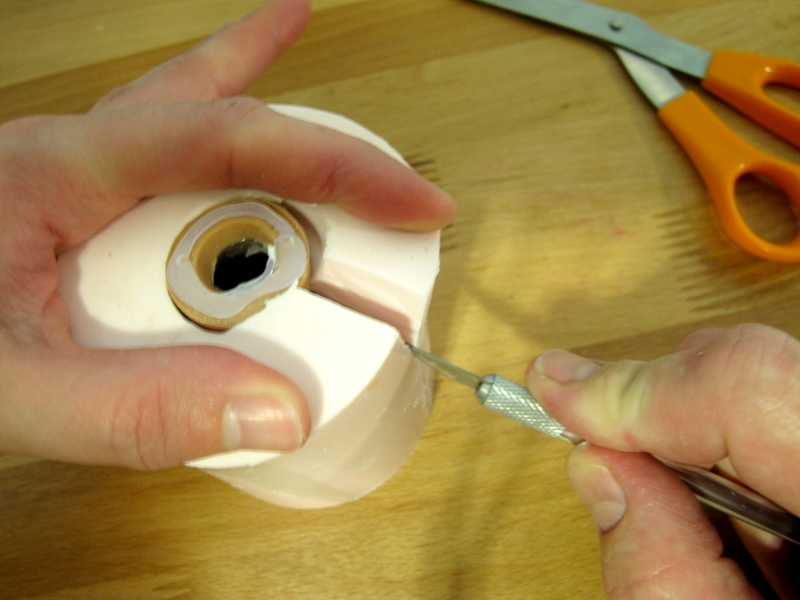
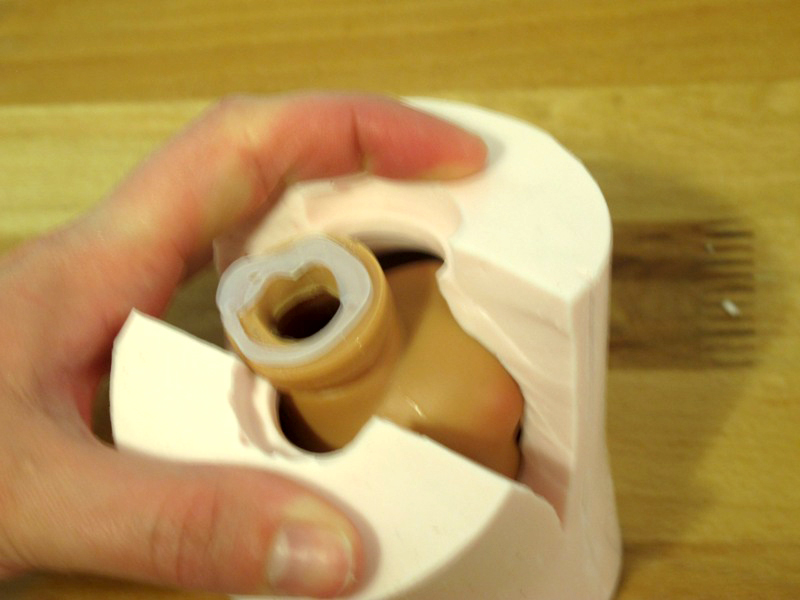
This allows me to easily remove the item.
Now your molds are ready to use! Some silicone will require that you wait a specific amount of time before using, so be sure to read your instructions!
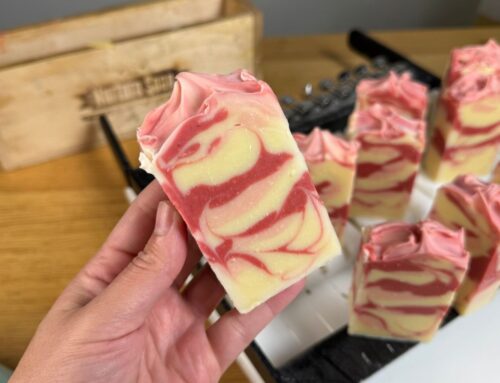
You can use your molds with both melt and pour and cold process soap. If you use cold process soap you might have to freeze before removing from your mold.
Happy Mold Making!
Amanda


Leave A Comment