

It’s no secret that I LOVE pumpkin soap! Check out my Pumpkin and Cinnamon Soap recipe.
The recipe above uses 100% pumpkin for water replacement. This one uses the pumpkin-in-oil method! You make a lye solution with 50% water and 50% lye. Then you add the additional amount of liquid (in this case pumpkin) to your oils!
Let’s jump into it!
Oh! I should mention, I’m using a really cool soapy tool today! I wanted this soap to have a honeycomb design. I usually use bubble wrap to get that effect, but I bought something recently to try out! Check out this Honeycomb Impression Mat from Elysian Acres! It is so easy to use! You simply cut it to size (if needed), place it in the bottom of your mold, and pour your soap on top! It makes such a clean honeycomb effect. LOVE IT!
Pumpkin and Honey Cold Process Soap Recipe
Basic Body Bar – More Moisture from Lovin Soap Studio Recipe eBook (Grab your copy for 50 cold process soap recipes + 64 essential oils blends!)
We’ll be using 50% water and 50% pumpkin puree in this recipe. I do add a splash more water than completely equal amounts. Just to make sure the lye is all dissolved.
- Add the pumpkin puree to your oils mix. This helps keep temps down as pumpkin heats up.
- Add the honey to your warm lye solution. This helps to dissolve it.
Base Oils
- Coconut Oil (76 degree) – 270 grams (30%)
- Shea Butter – 90 grams (10%)
- Olive Oil – 342 grams (38%)
- Avocado Oil – 72 grams (8%)
- Rice Bran Oil – 126 grams (14%)
- Pumpkin Puree – 126 grams
Lye Solution
- Sodium Hydroxide – 126 grams (5% superfat)
- Water – 130 grams
- Honey – 1 teaspoon
Scent
You can use your favorite Pumpkin fragrance oil! I’m making this for my family (including small kids) so I’m simply using a blend of orange essential oil and litsea essential oil. It doesn’t smell like pumpkin but it’s a family staple. 🙂
Gear up in your goggles and gloves before you handle the lye. If you are new to soapmaking, be sure to download our free guide, How to Make Cold Process Soap!
Step 1: Create a lye solution. Weigh the water and lye into two separate containers. Slowly pour the sodium hydroxide into the water while stirring. Stir until completely dissolved and set aside to cool.

Step 2: Prepare the base oils. First, weigh any solid oils and butters into a container and melt. You can melt using the microwave or low heat on a burner.


Step 3: Next, weigh each liquid oil into the melted oils. The liquid oils will cool down the melted oils and leave you with a base oil mixture that is about at the correct temperature to make soap. It might still need to cool down a bit.
Step 4: Weigh your essential oil or fragrance oil into a glass or stainless steel container and add to your base oils. You can also simply weigh the essential oils directly into your base oils.
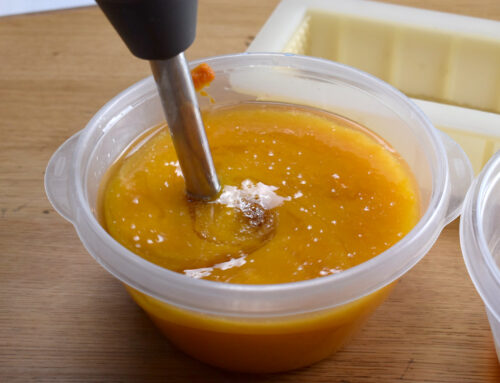
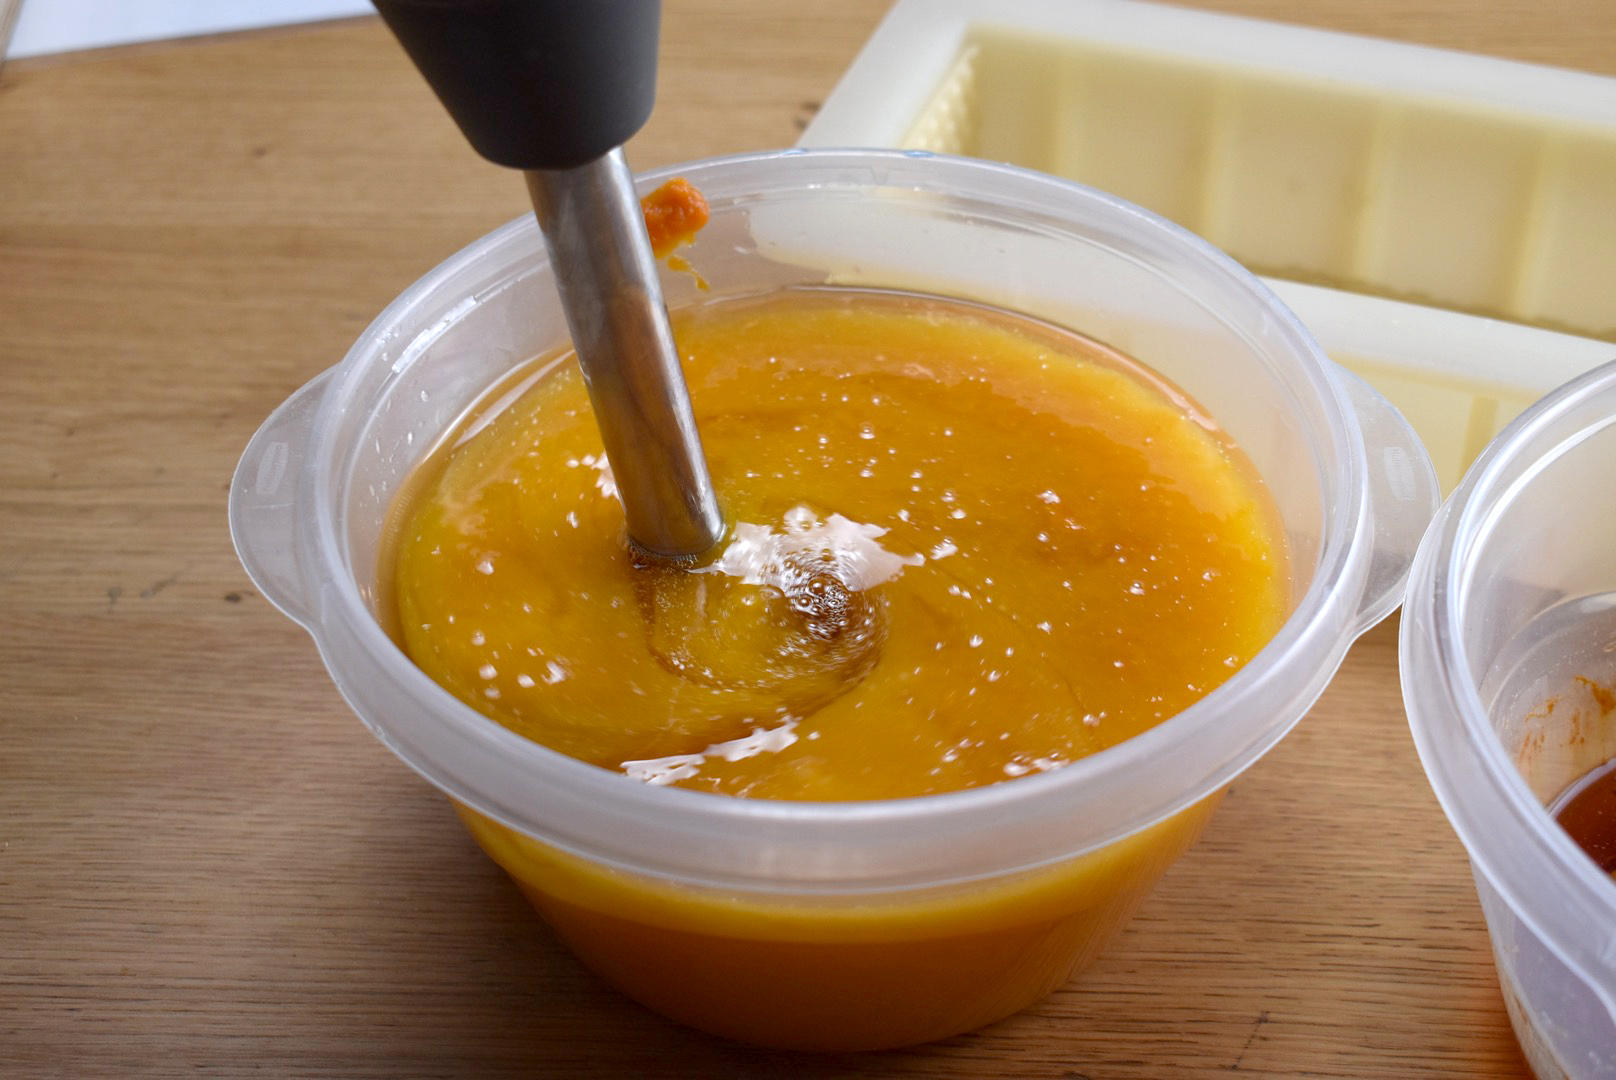
Step 5: Add the pumpkin puree to your oil mixture and blend well.

A note about the lye solution! When doing a concentrated lye solution like this, you’ll notice it can quickly form a floating substance on top. That is simply the lye reacting to the air, creating sodium carbonate. You don’t need to strain your lye! Simply stir (they won’t dissolve) and make your soap as usual. It won’t hurt anything! Check out the floaties on top of the surface below!

Step 6: Add 1 teaspoon of honey to your warm (not piping hot) lye water. This helps to dissolve the honey so you don’t end up with honey spots in your soap. Notice that your lye solution turns bright orange!


Step 7: Prepare your mold as your lye solution and oils cool. I’m using a 10″ silicone loaf mold, so I simply placed the honeycomb impression mat into the mold! The silicone really grips to the mold. No worry about soap getting underneath it!

Step 8: Check the temperatures using an infrared gun. You should now have a container containing liquid base oils and pumpkin and a container containing lye solution. Take the temperatures using an infrared temperature gun. Be sure to stir each mixture before taking the temp. You want your temperatures to be under 100°F because both honey and pumpkin can heat your soap up. Soap cool! I went with 103°F for the lye solution since my oils were nice and cool at 88°F.
Step 9: Once you have reached the desired temperatures, pour the lye solution into the oil mixture and mix to trace.


Step 10: Pour your soap into your mold!


Step 11: Let your soap harden and saponify for at least 24 hours. If your soap doesn’t gel, it could take another day or two to harden enough to unmold.
Step 12: Unmold your soap, cut, and allow it to cure for 4-6 weeks. Check out how easily that silicone mat peels from the soap! LOVE IT!


Happy Soaping!
Amanda


Leave A Comment