Make your soap mixture as usual using all safety precautions when working with lye. (Don’t know how? Visit our Cold Process Tutorial.) You want your mixture to be at a thick trace, around the thickness of warm pudding.
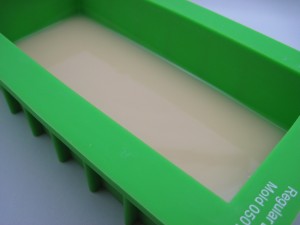
Pour the base layer and smooth if needed. I actually poured my first layer a bit thinner and then let it sit for about 10 minutes. This allowed the layer to pour out smoothly and the set up firmer. You can do it either way.
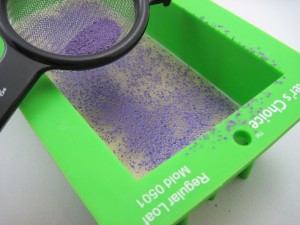
To get our horizon we are going to dust on a layer of mica. To dust on the mica you can use a small hand sifter like what I use or you can use a container (such as a small jar) with pantyhose to sift out the powder.
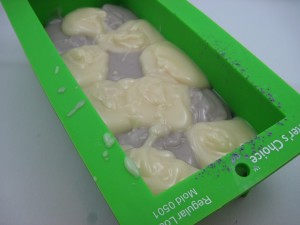
Sprinkle the mica in a thin layer over your first layer of soap. You don’t want it too thick or your soap might separate. That’s about all I used in the picture above. You still want to be able to see some patches of soap peeking through.
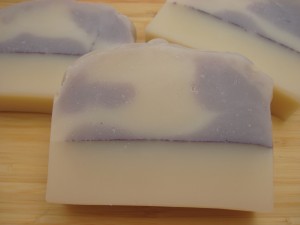
Depending on how many colors of clouds you want, divide your batter and color. I wanted a sky with purple clouds in a white background so I divided my batch in half and colored one of them purple and left one white. Stickblend each divided mixture so you get a pretty thick trace- somewhere around cold thick pudding. You want to be able to make globs and have them hold their shape.
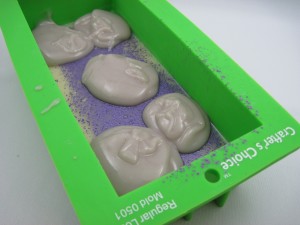
Make sure your first layer is set up enough that it will hold your clouds. You don’t want them sinking into the mica layer. If you’re not sure, simply do a small test glob and make sure it doesn’t sink under. When its ready, start globbing your first color. As you can see above, I started by doing about five purple globs.
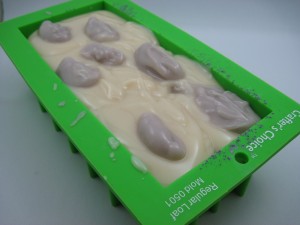
Repeat the same thing with your next color (I used white) and then your first color again. Do this until you’ve used up all of your soap batter.
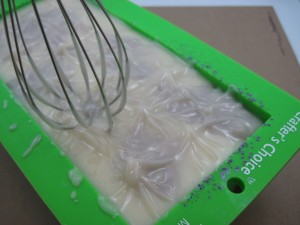
I had a bit more white than purple when I did mine so you can see much more white in my design. After you’ve done all of your clouds you can take a whisk and add some texture to the top of the soap.
Let it sit overnight or as long as your recipe requires and cut!
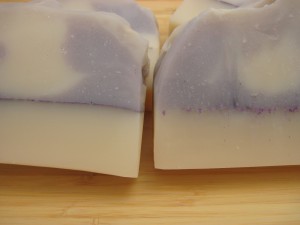
Here’s a tip on cutting soap with mica lines. Look at the picture below and notice the difference in the two lines. The soap on the left was cut with the soap loaf on it’s side. This created a smooth sharp line with no drag of the mica. The soap on the right was cut with the log sitting as normal. Just as the soap is sitting. You can see there is a bit of drag of the mica. The line appears blurry and not as crisp as the first. Depending on what type of line you want, you can cut your loaf of soap either on it’s side or sitting as normal.
Happy soaping!
Amanda



Thanks for the clear instructions!! I’ll have to try this ~
Thanks so much for the tutorial…this is exactly what I was looking for for my rootbeer float soap!!!
Absolutely gorgeous and very creative. Thank you for sharing your creations and knowledge.
Thanks, Hazel! Glad to see you here!
i am going to try this soon!
Hi Krissy! Let me know how it turns out!
Great tutorial! Beautiful soap, too. I’ve never made cold-process soap before, but seeing projects like this one makes me want to try it! 🙂
If you try this, I’d love to see what you come up with!