

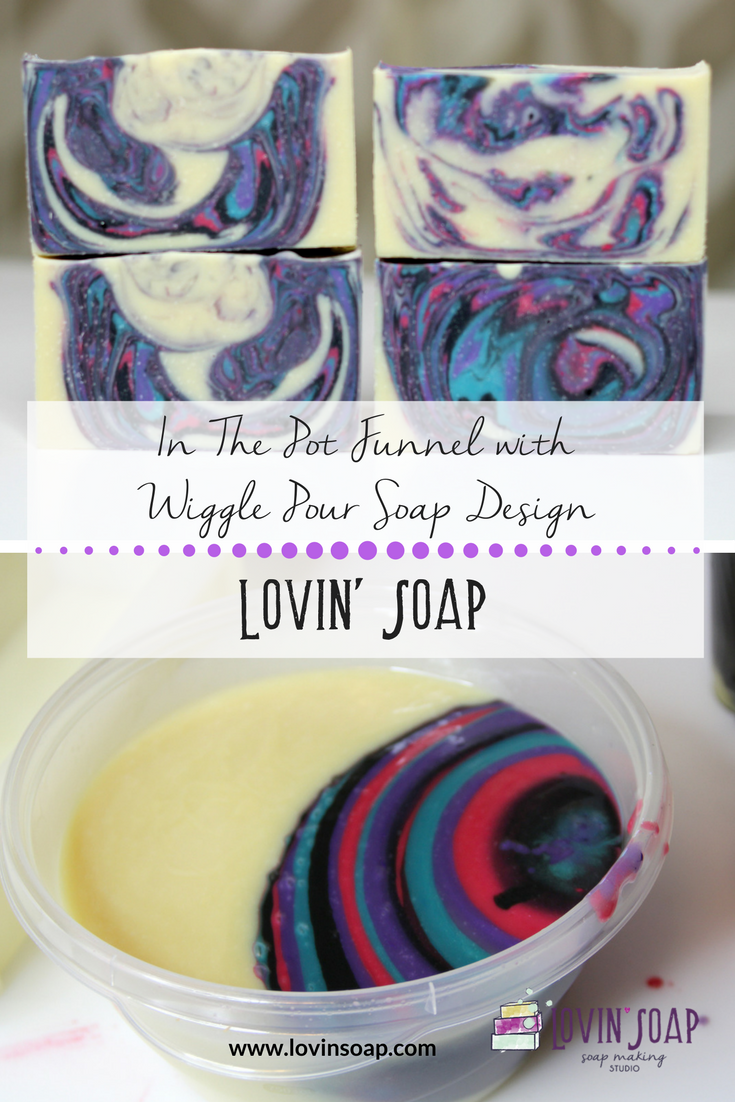
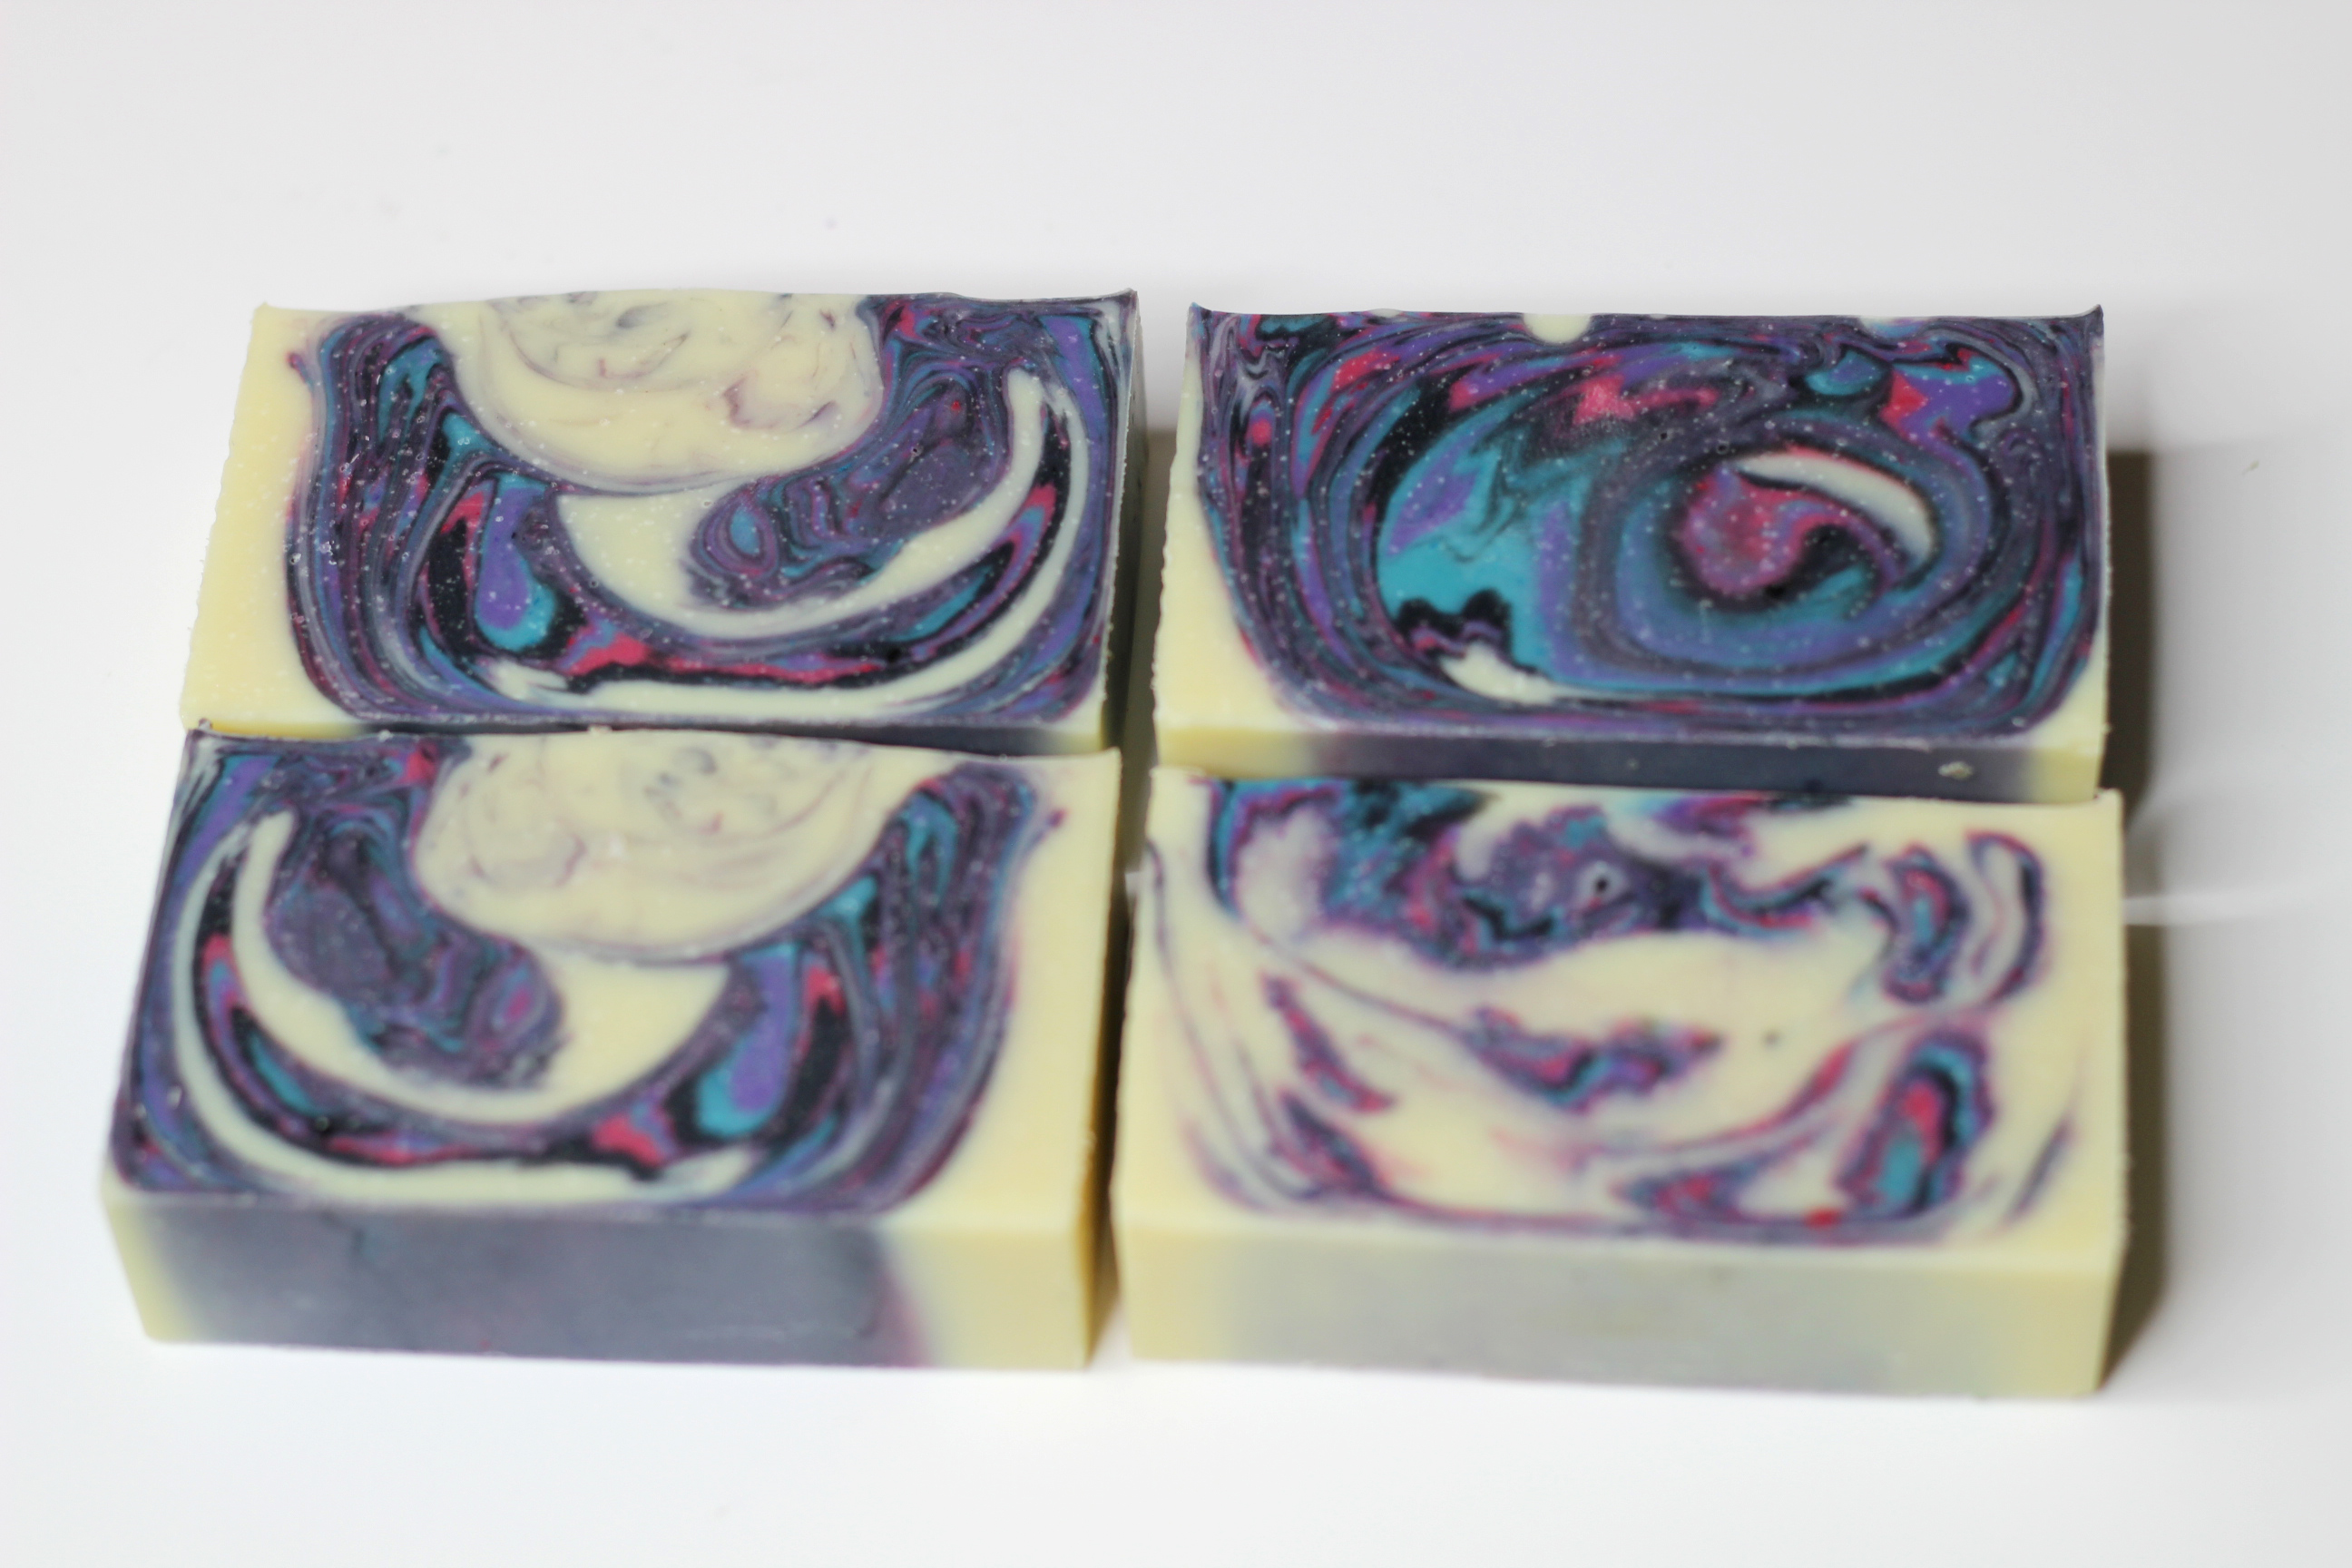
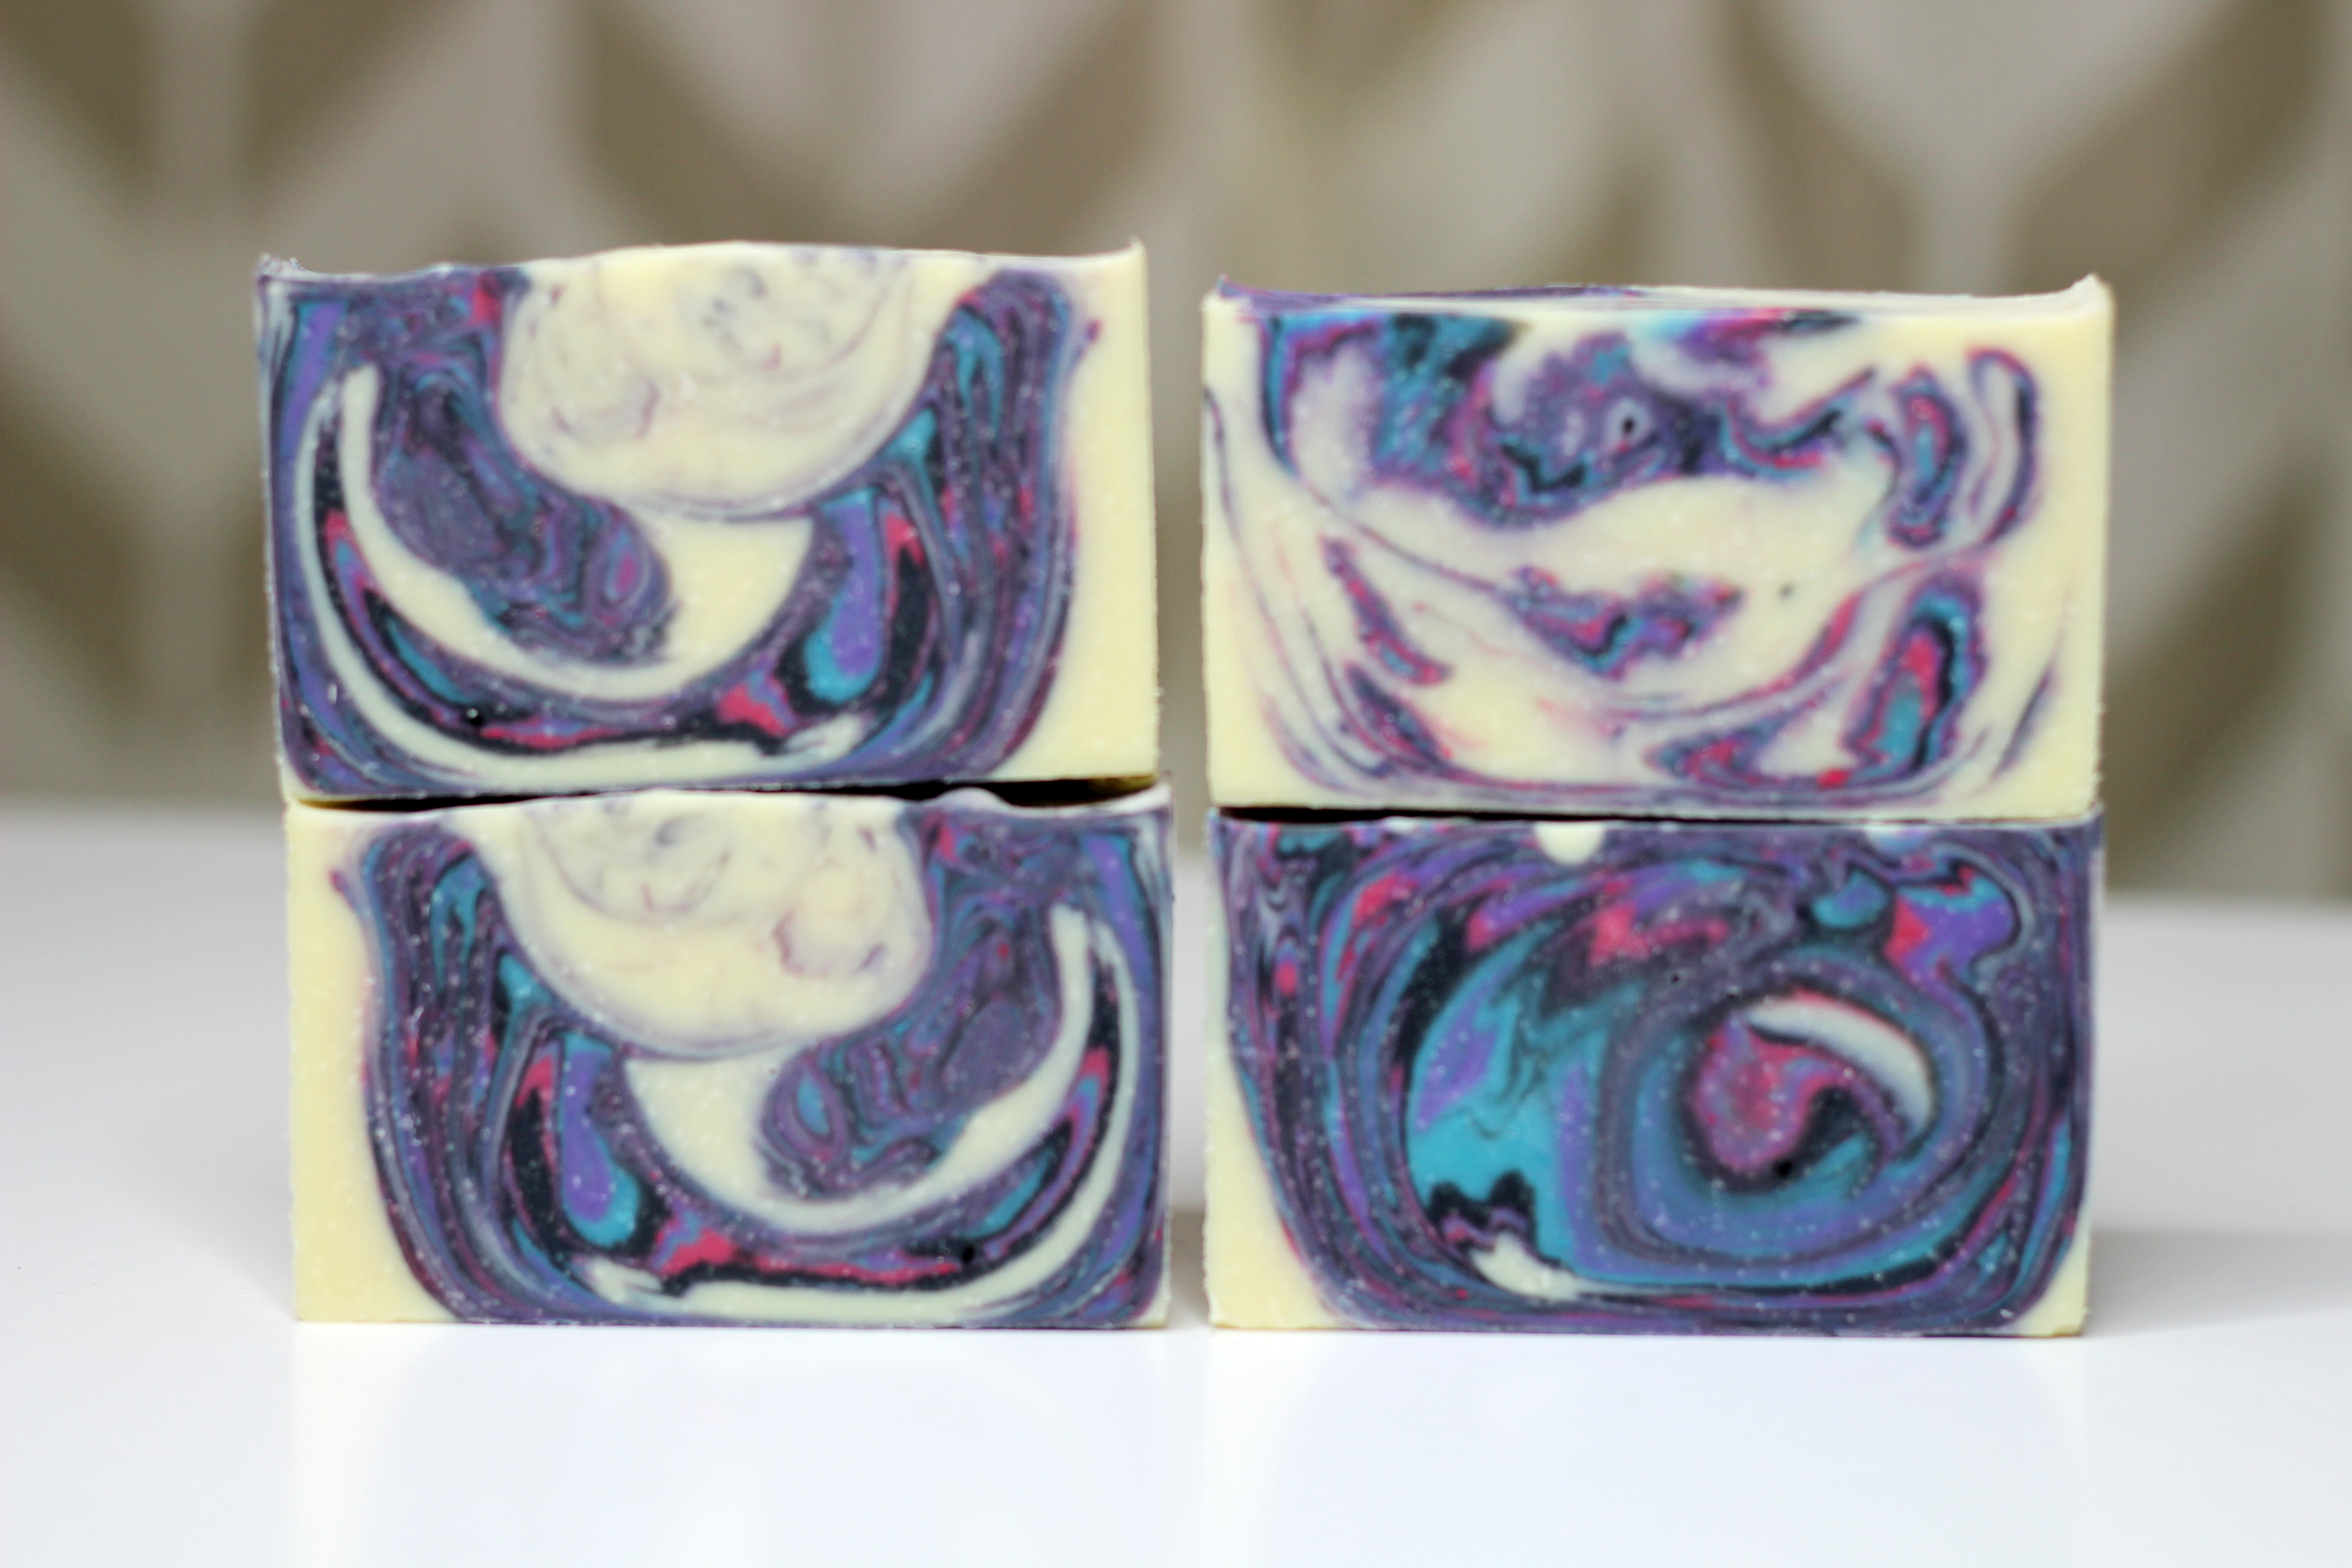
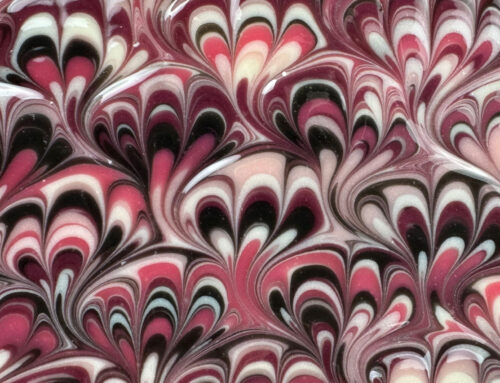
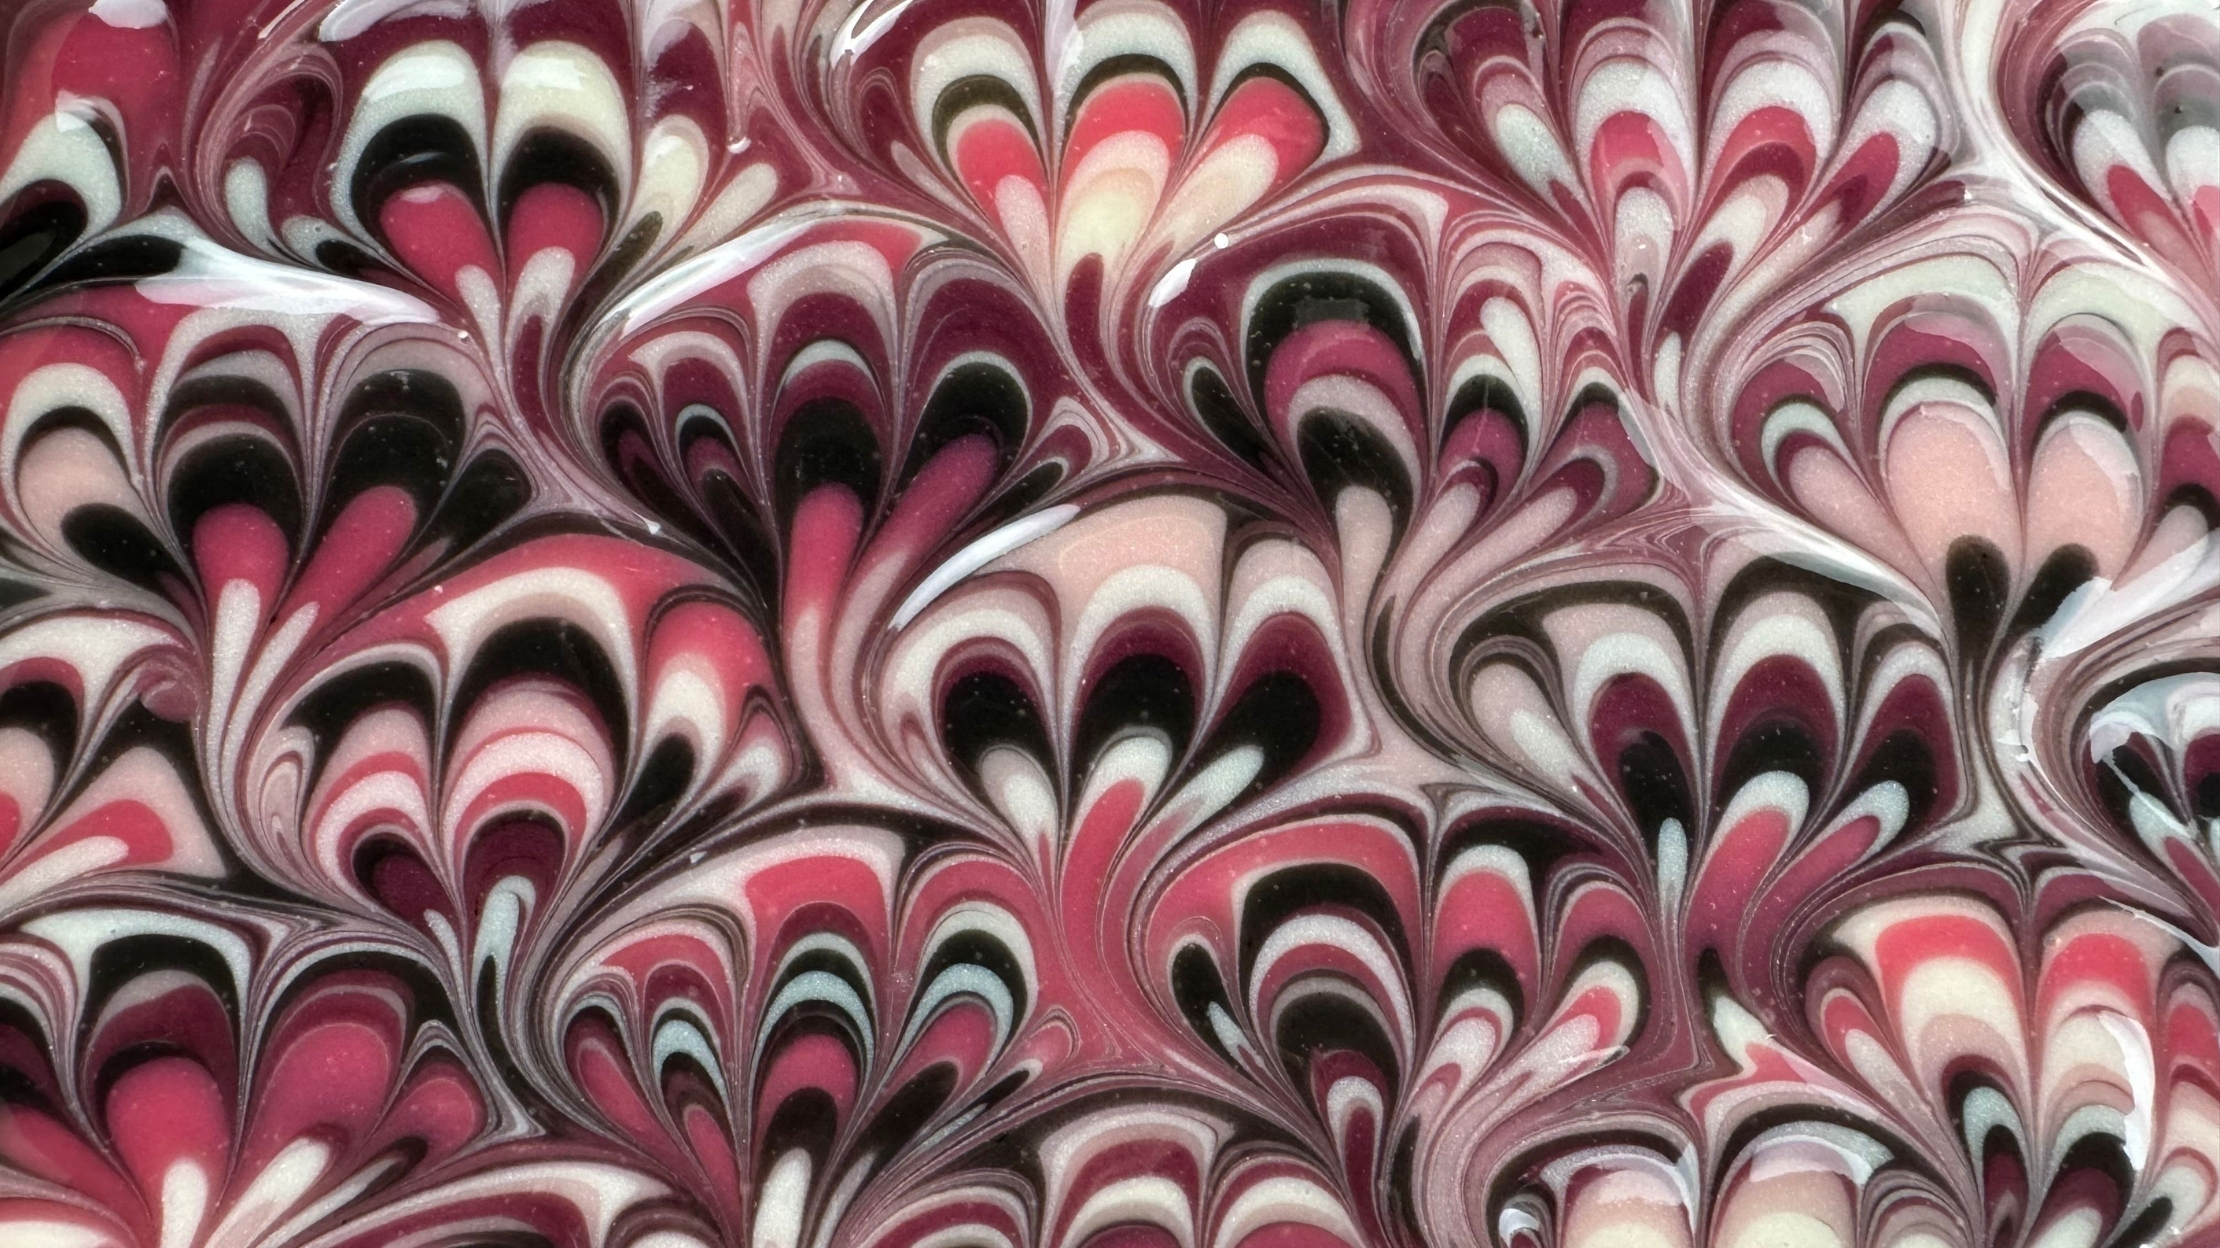
This fun soap uses a funnel pour technique in the pot with a wiggle when you pour. I love giving credit where credit is due, so Clyde Yoshida gets credit for his Clyde Slide technique you can see here. Subscribe to his channel! He posts brilliant soap tutorials and talks a lot about color theory.
SAFETY WARNING! If you’ve never made soap before, be sure to start with our basic soap making guide. This recipe and instructions are for experienced soap makers. Be sure to gear up in your goggles and gloves before you make soap.
This recipe fits in a 10″ silicone loaf mold from Bramble Berry. You can use the recipe below or you can use any slow-moving recipe that you like.
In The Pot Funnel with Wiggle Pour Recipe
- Coconut Oil – 306 grams (34%)
- Shea Butter – 45 grams (5%)
- Olive Oil – 360 grams (40%)
- Avocado Oil – 54 grams (6%)
- Rice Bran Oil – 135 grams (15%)
- Sodium Hydroxide – 128 grams
- Distilled Water – 256 grams
- Essential Oil or Fragrance Oil – Per manufacturer
- Mica, Charcoal Powder for Color
Step 1: Make your lye solution. Weigh the water and lye into separate containers. Pour the lye into the water while stirring. Be sure to mix your lye solution in a well-ventilated area.
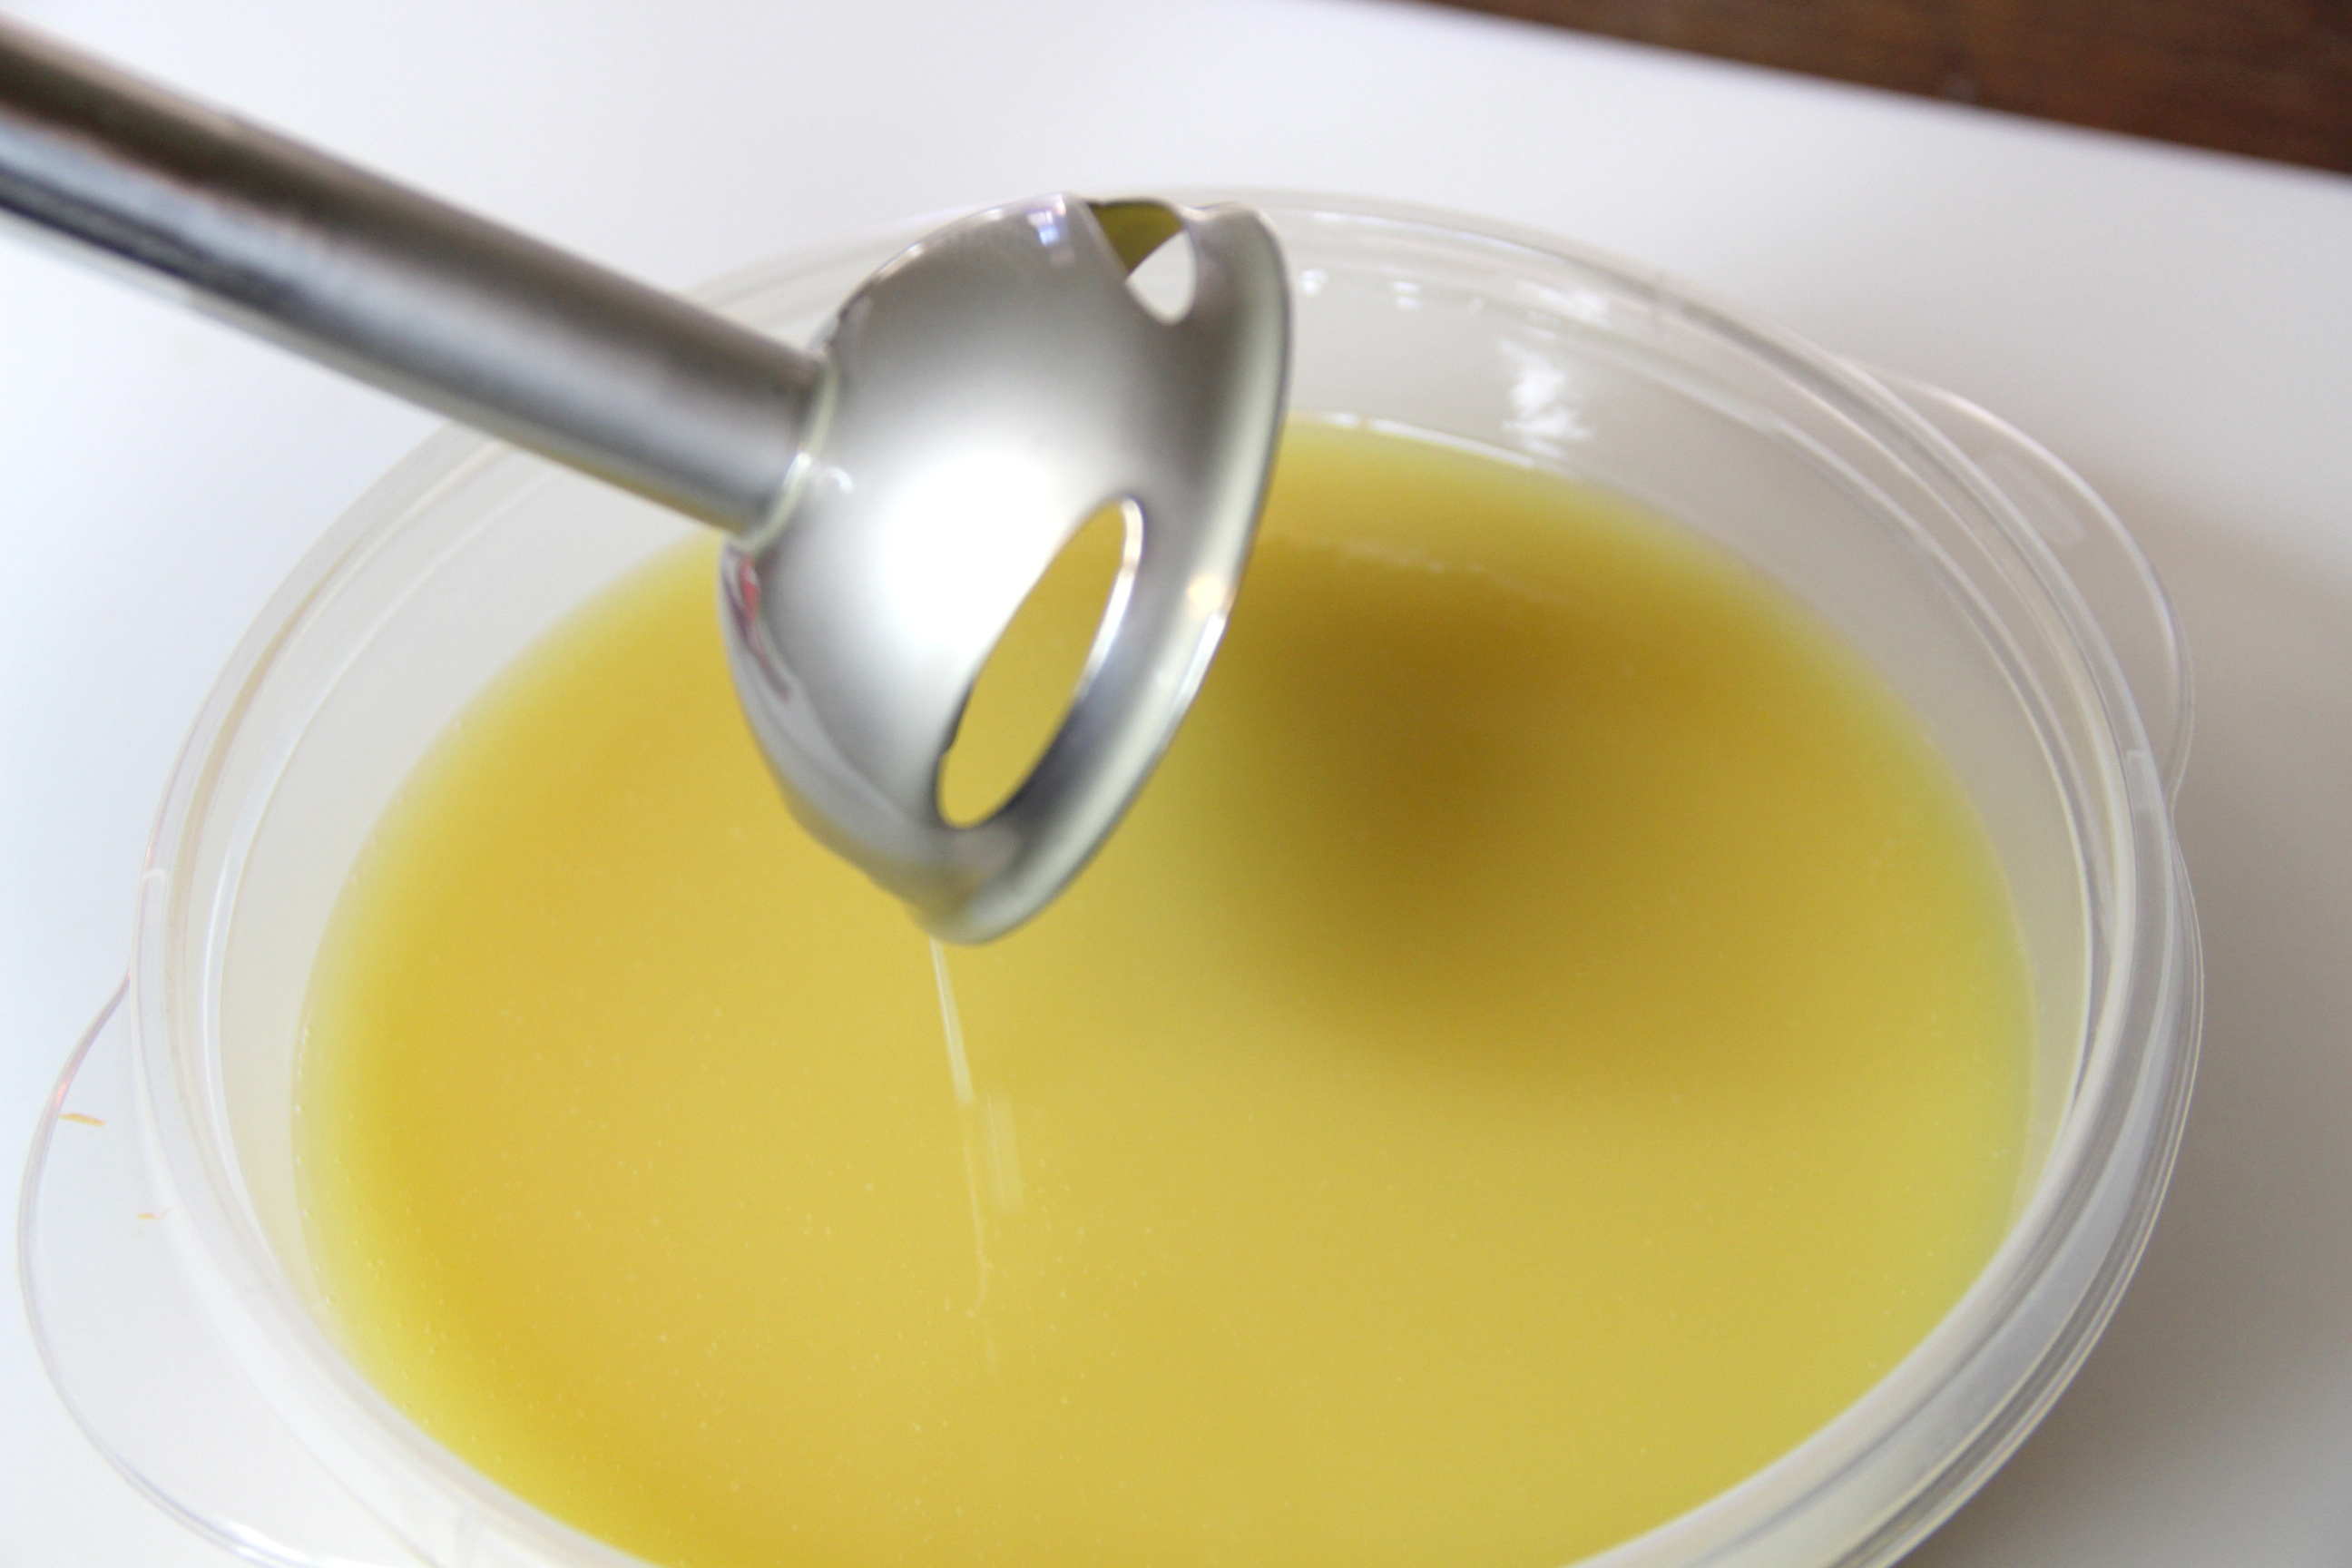
Step 2: Weigh the hard oils/butters and melt, just until melted.
Step 3: Add the liquid oils to the melted hard oils/butters. Add the essential oil to the base oils.
Now, you should have your lye solution and base oils ready to go.

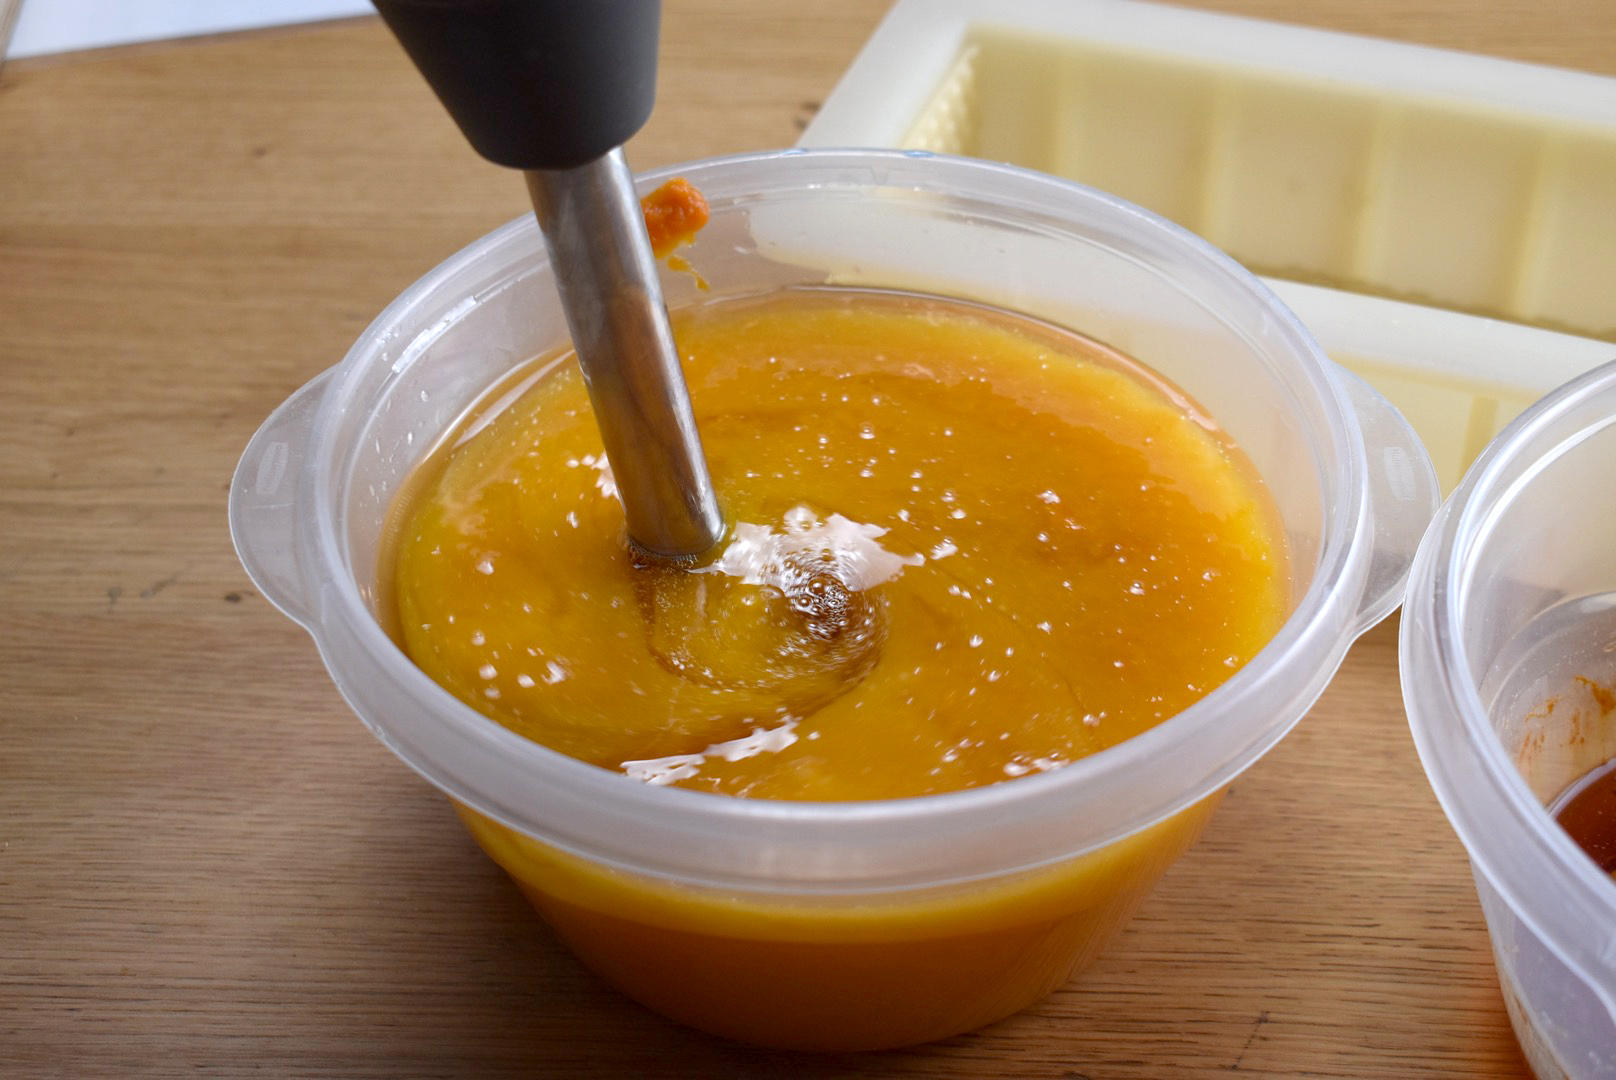
Step 4: Once the temperatures of both the base oils and lye solution have dropped to below 100 degrees F, you can mix your soap to emulsion. Notice that the soap is not traced below. If you get to trace, you might not have time to color your soap.
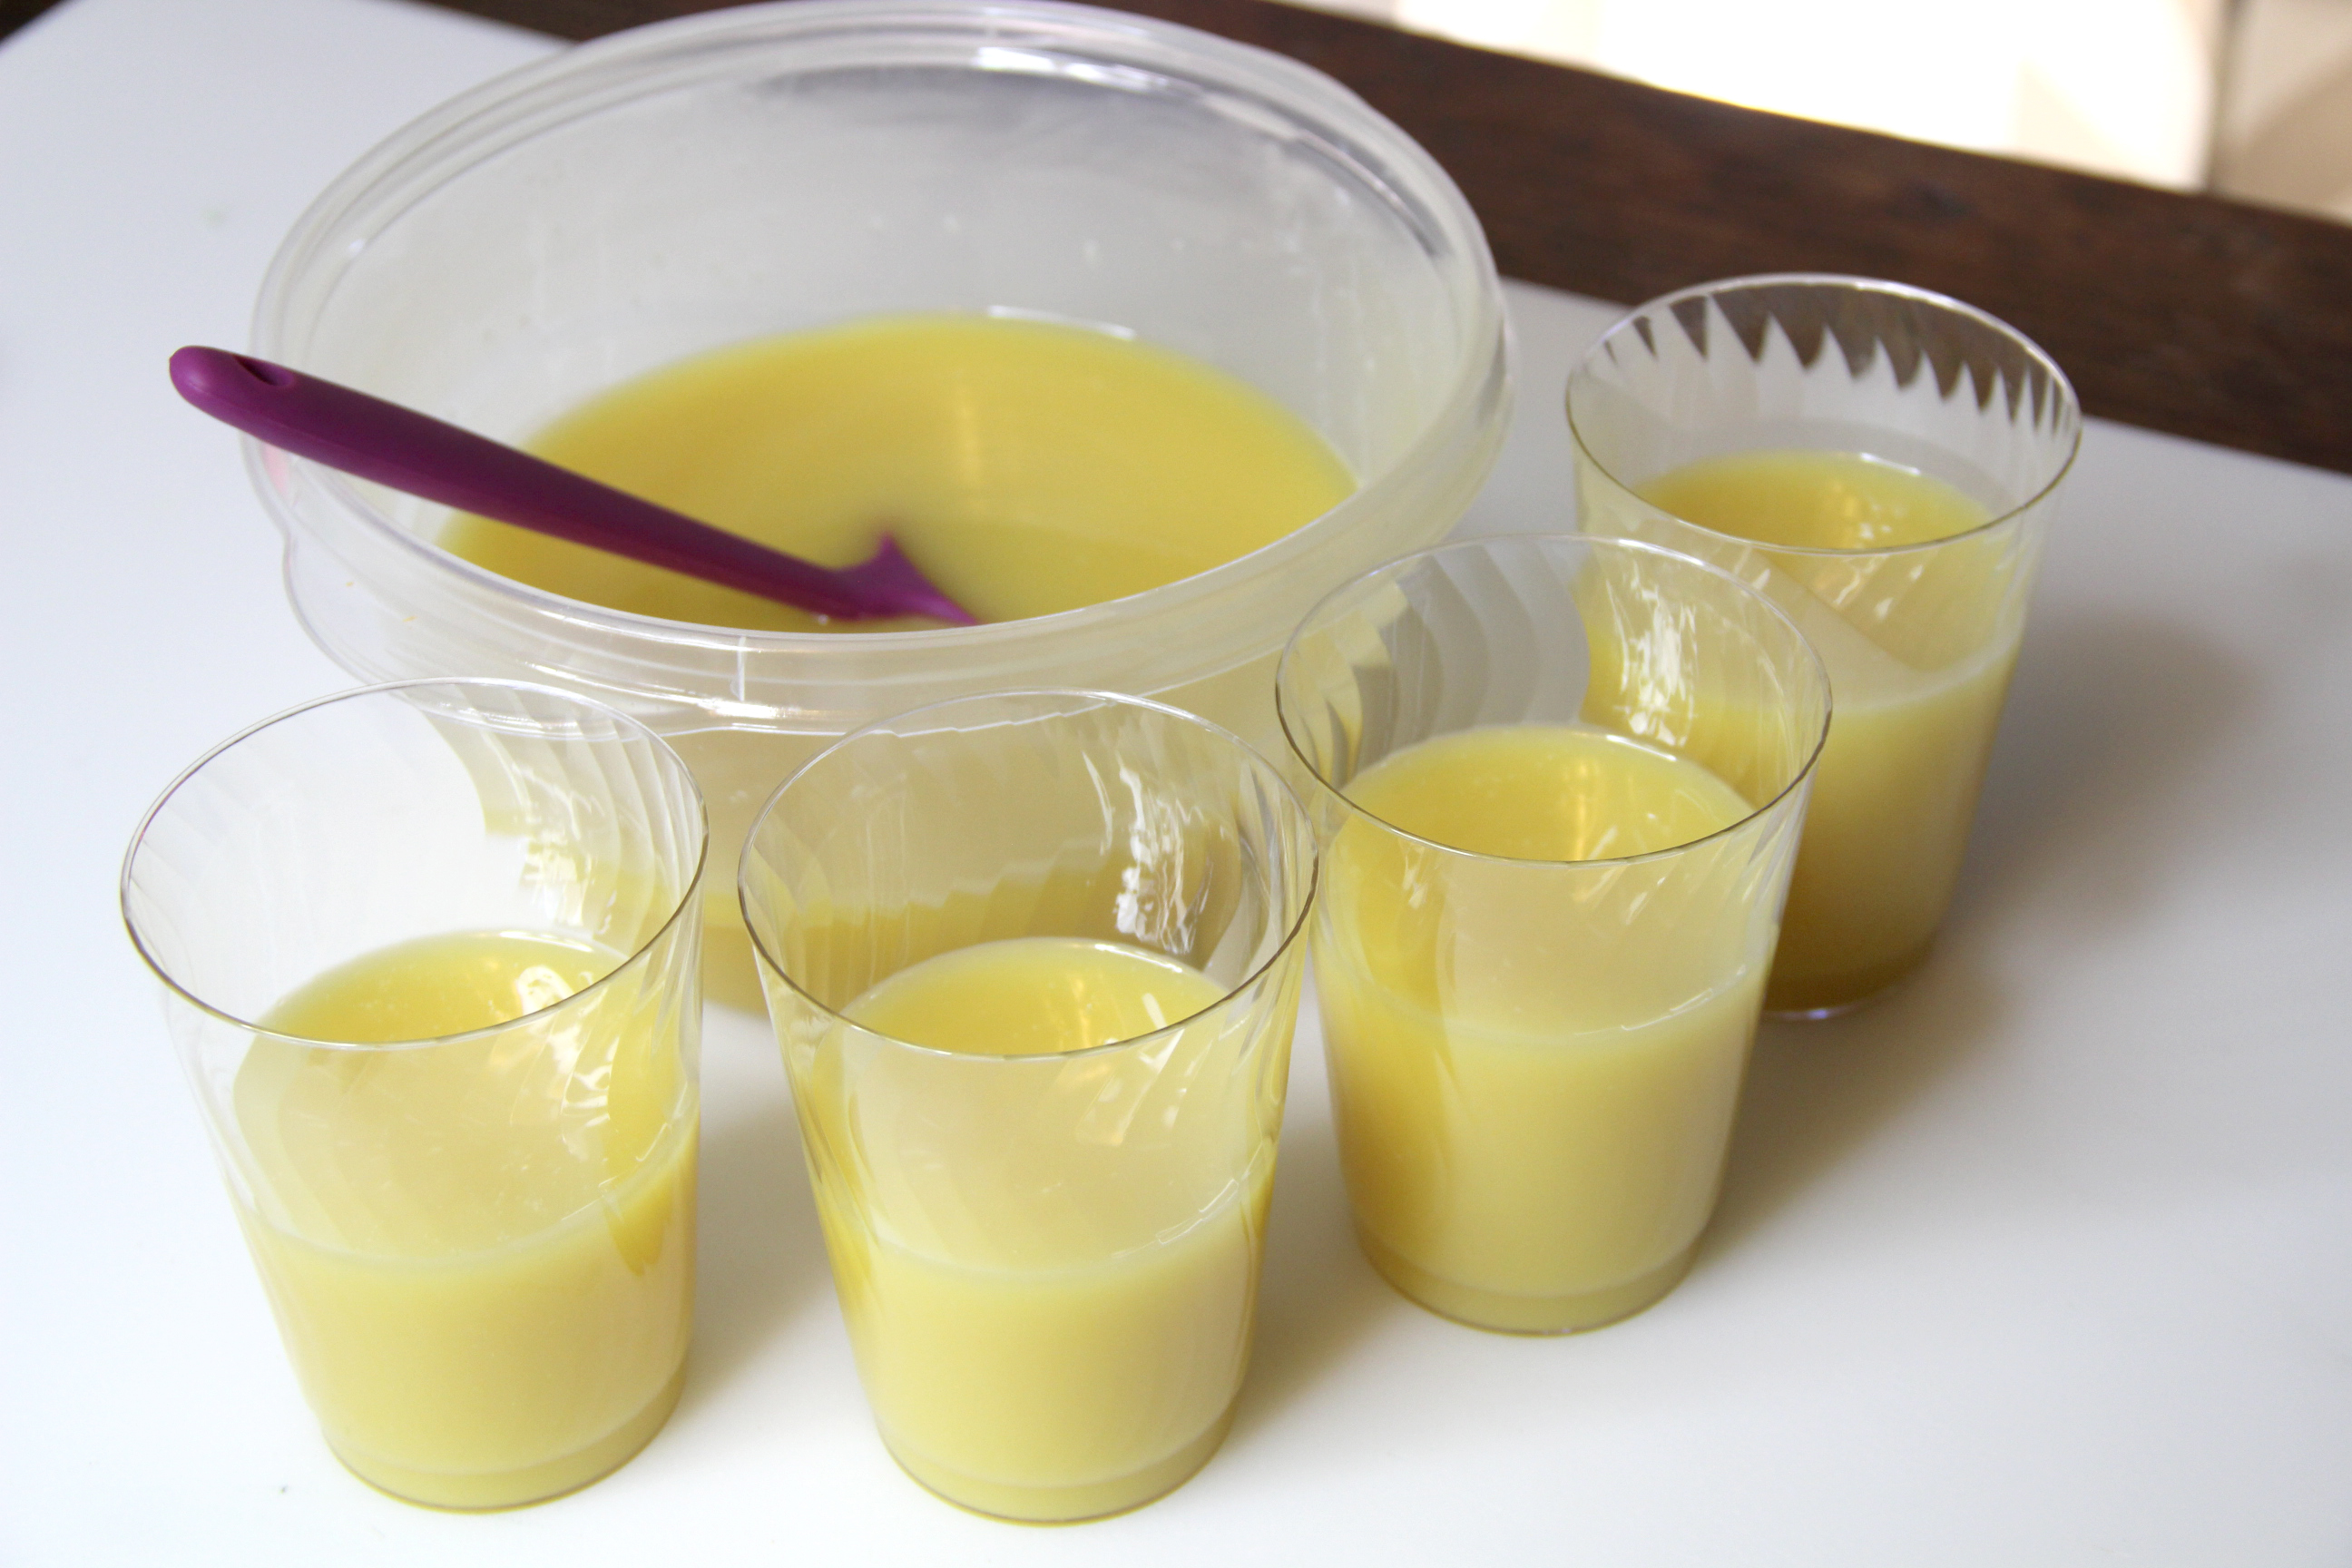
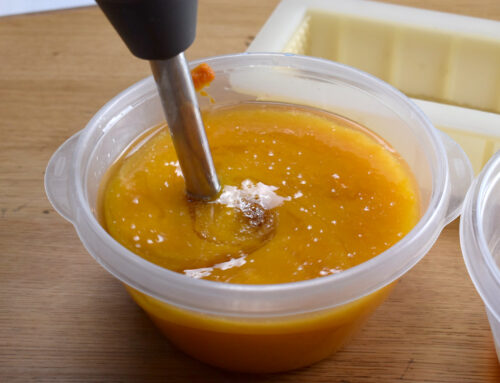
Step 5: Divide your soap out to color.
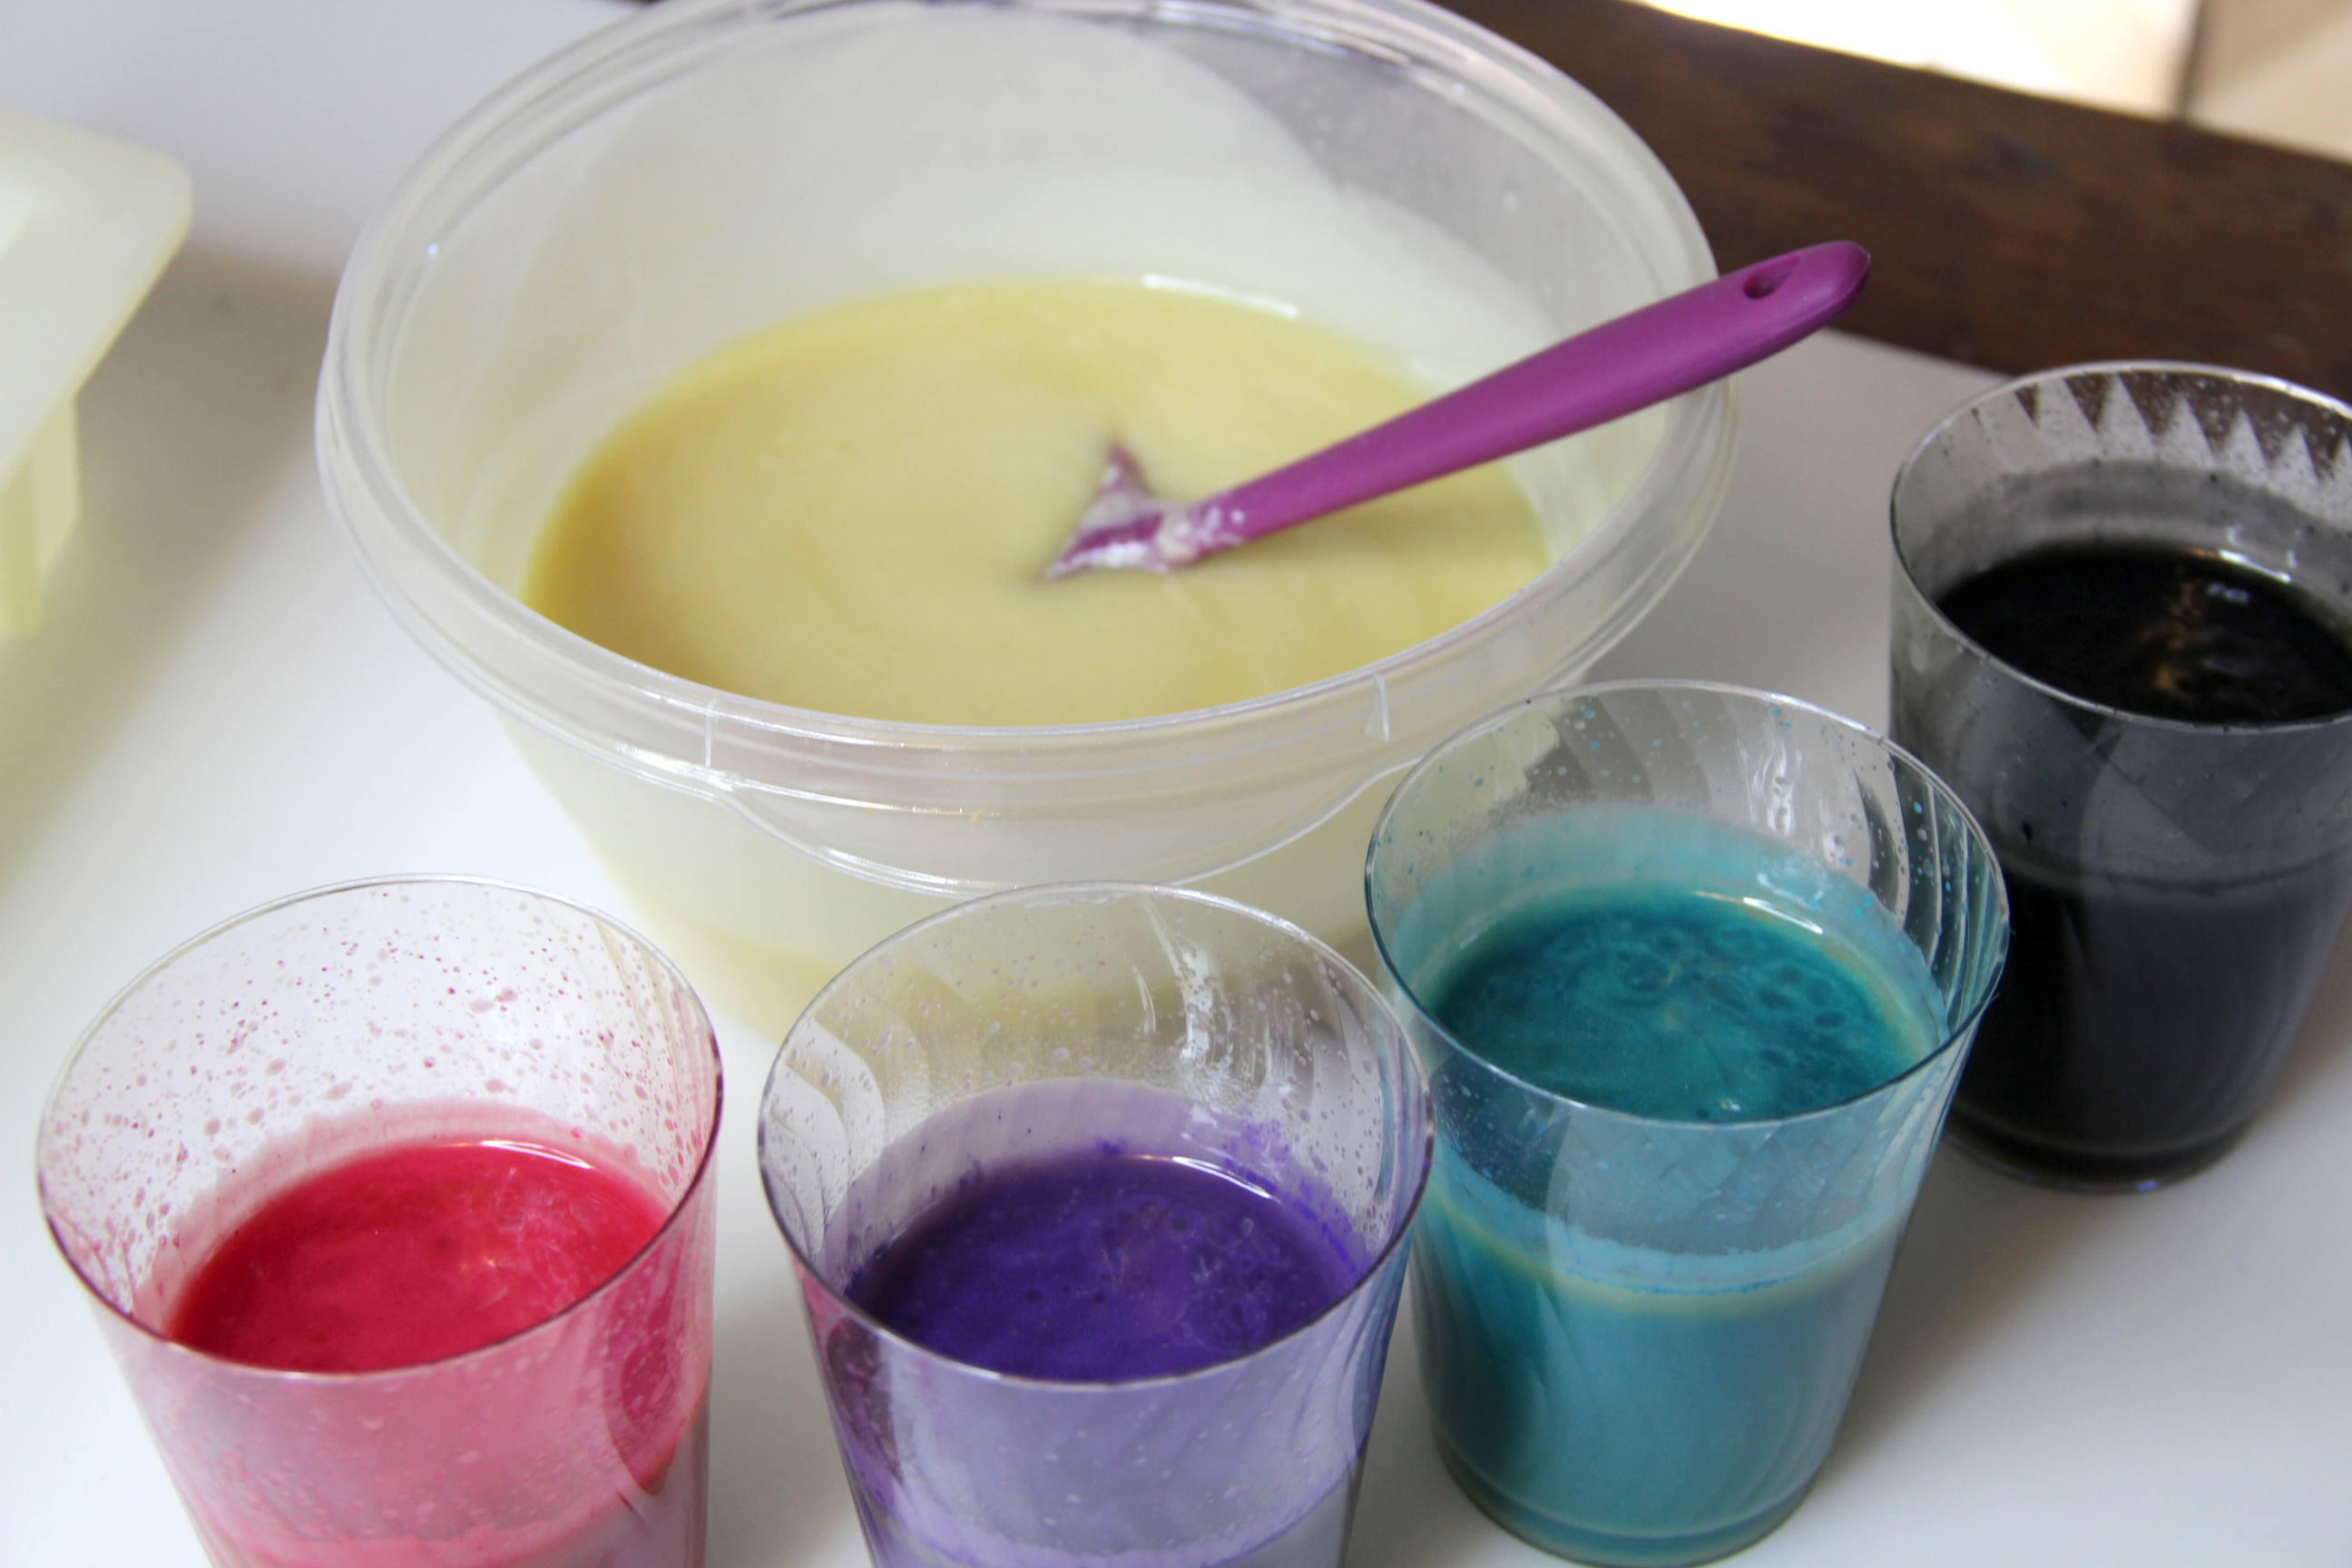
Step 6: Color your soap base. I colored mine using some mica from Nurture Soap Supply, charcoal and white mica.


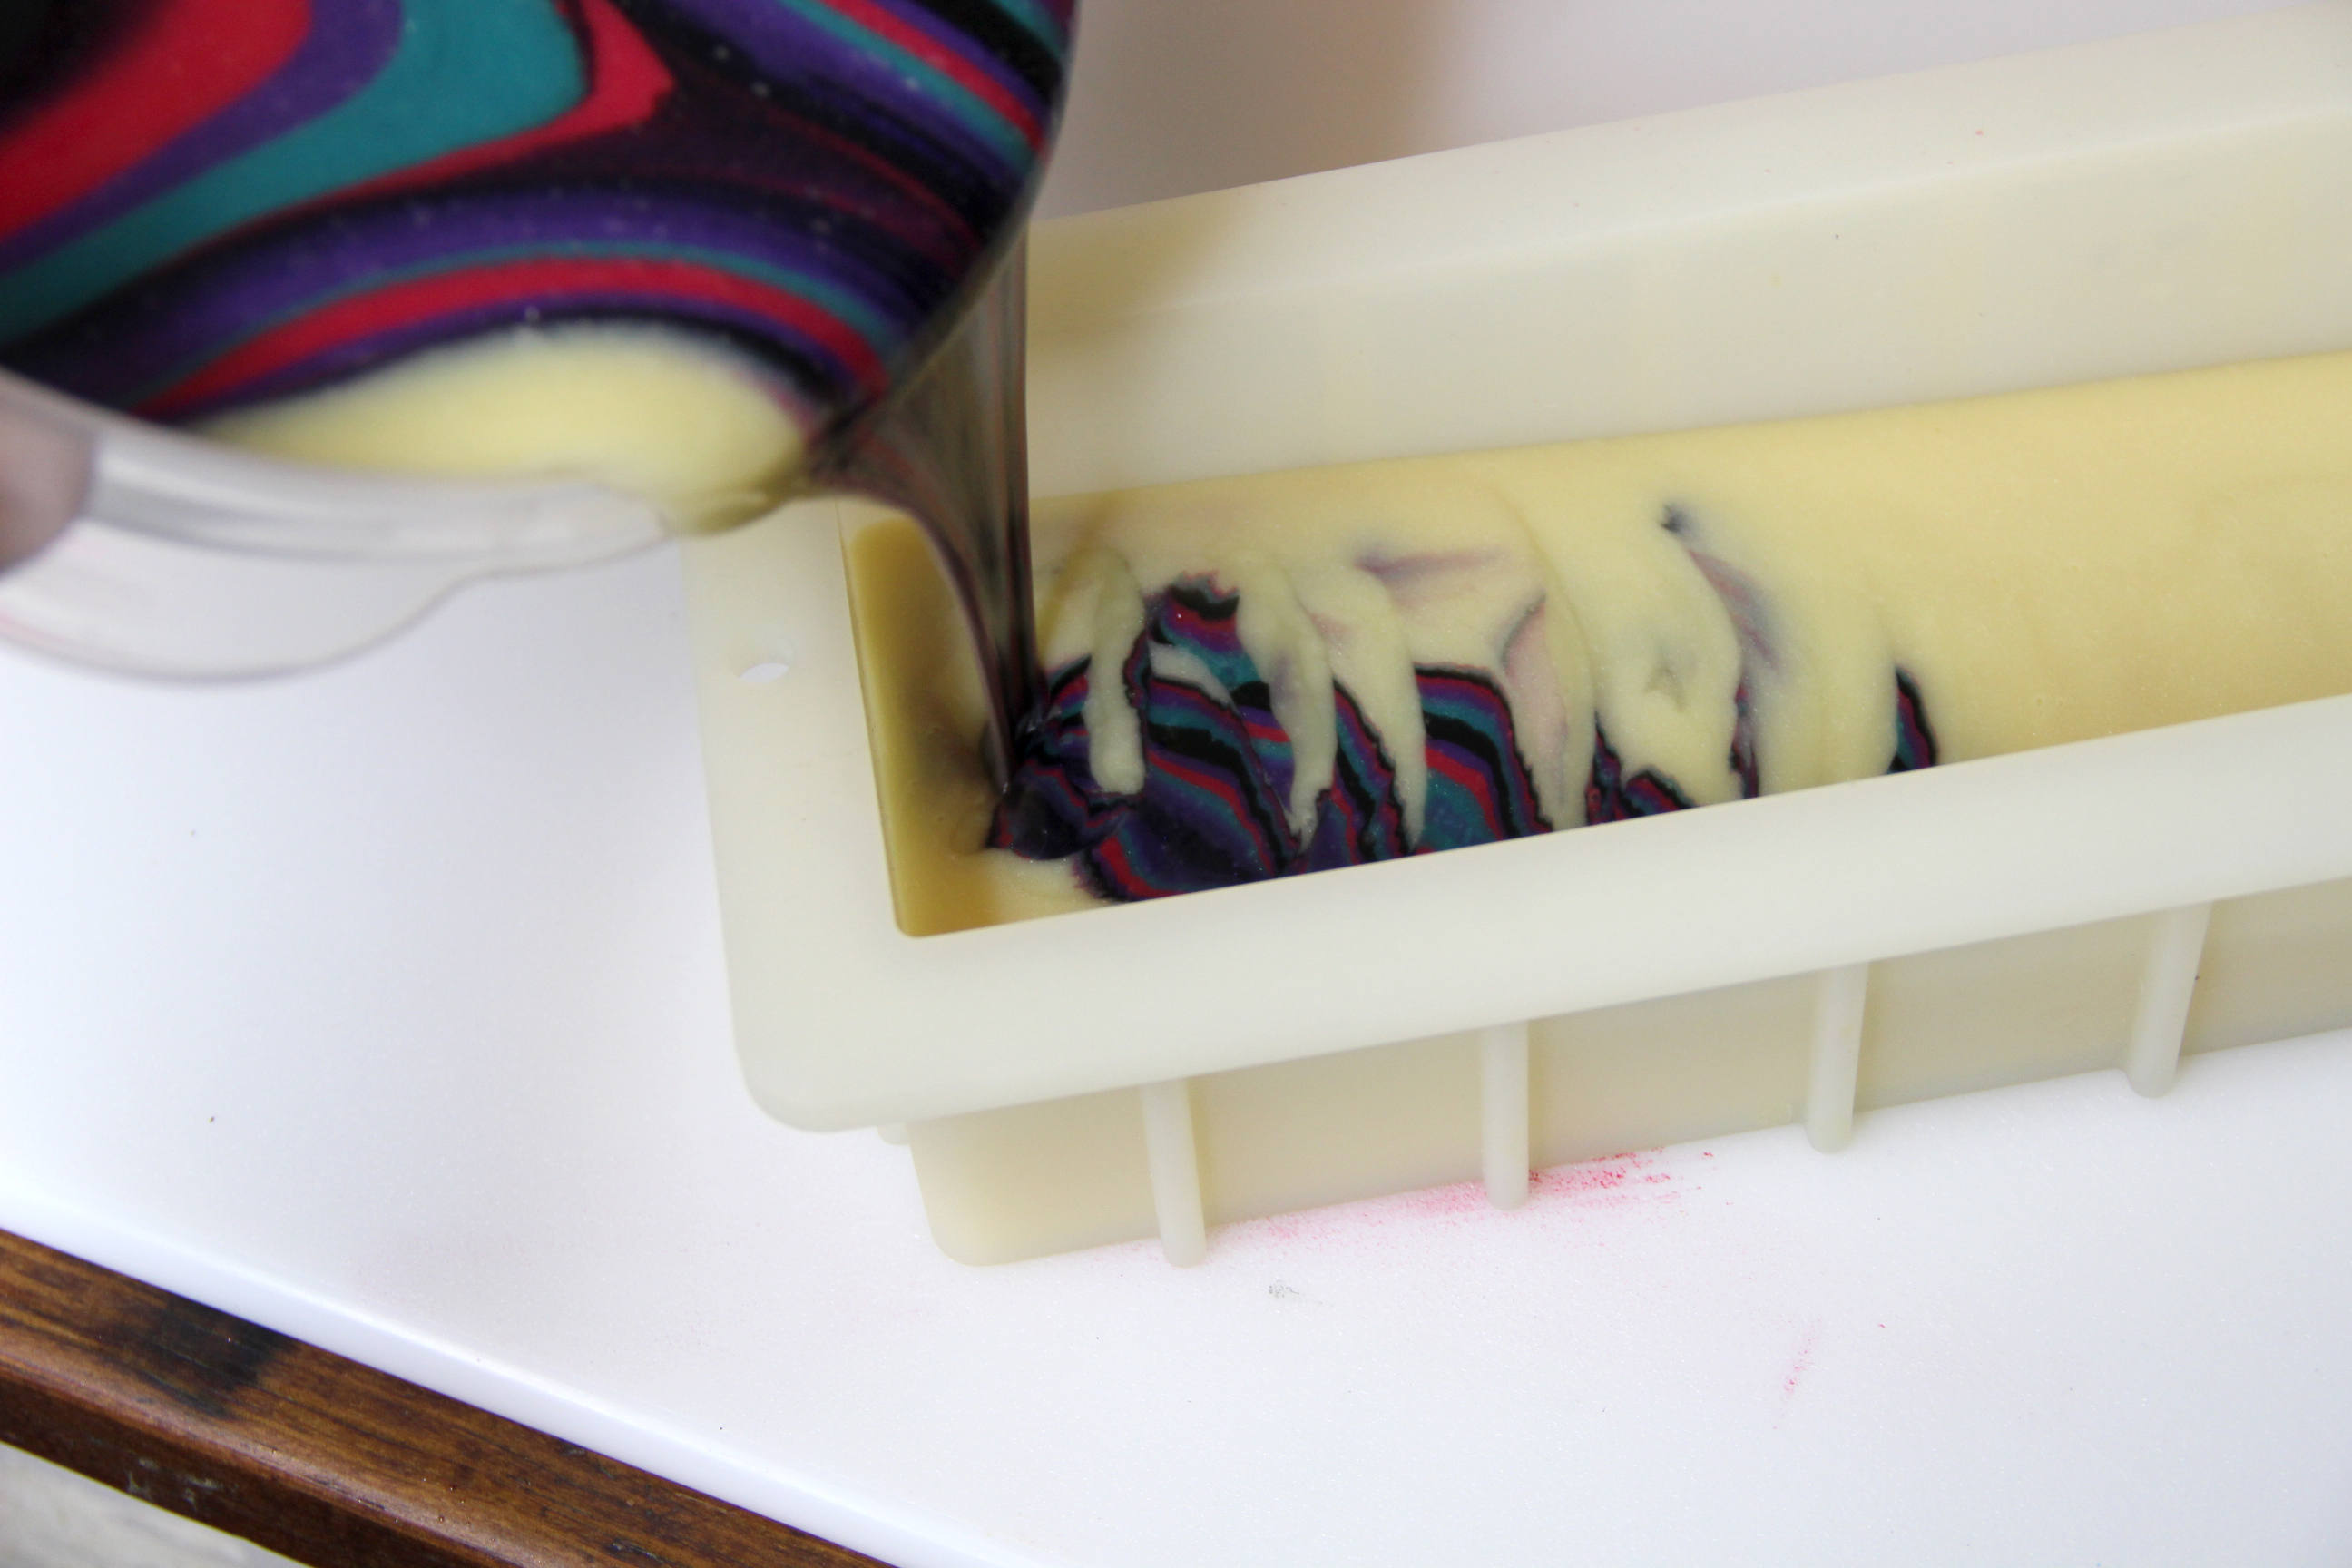
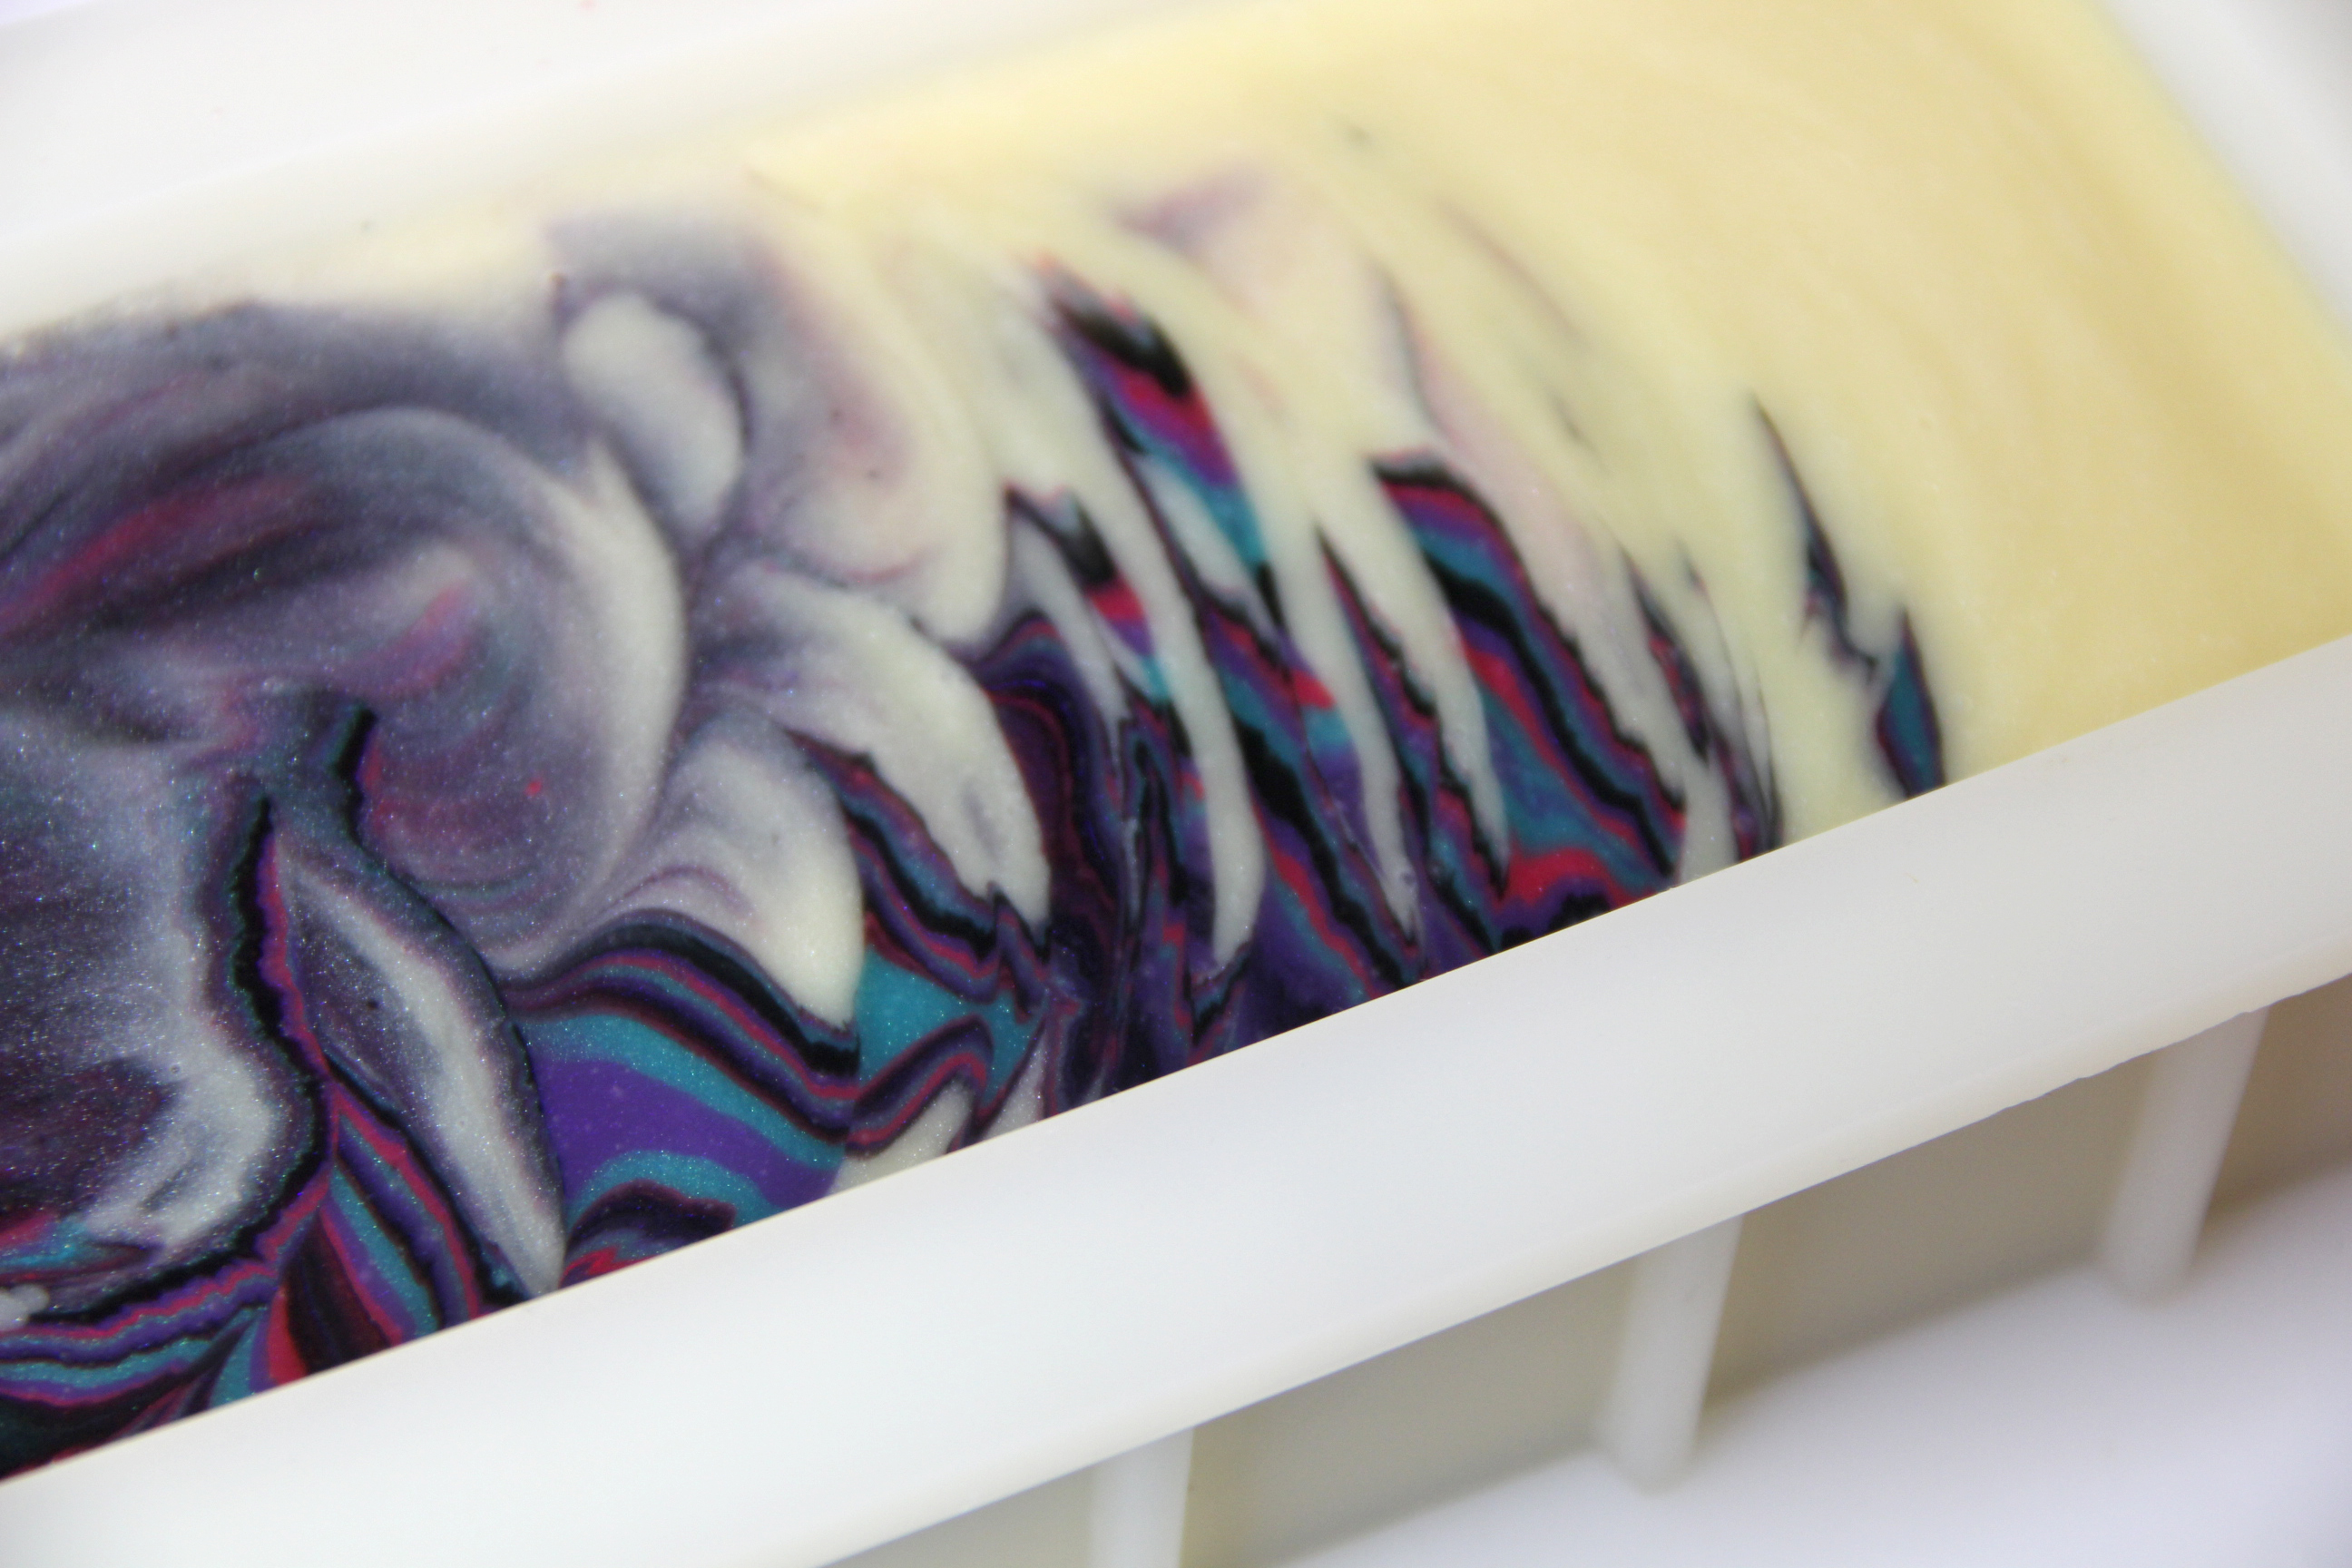
Step 7: Create a funnel pour back into your base. Simply rotate through the colors, pouring about 1/4 each time. Pour each color in the exact spot and it will push the soap out into rings.


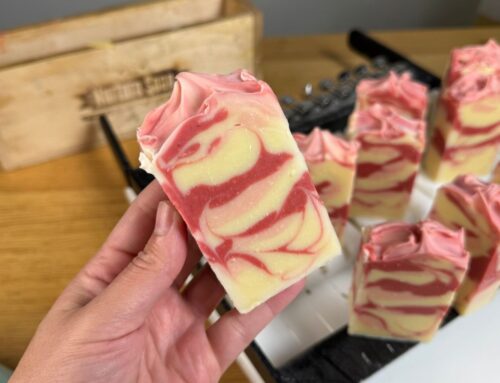
Step 8: Pour the soap into your mold. I wiggled the soap pot back and forth while I poured and got this cool effect!
Step 9: After the soap has set up and becomes dull-looking, spray with alcohol to prevent ash.
Step 10: Let your soap sit for 24 hours to saponify.
Step 11: Unmold and cut your soap. Cure your soap for a minimum of 4 weeks.
Happy Soaping!
-Amanda Gail


I’ll have to give this wiggling method a try. Thank you Amanda for the tutorial!!!
Yay! Let me know how it goes! -Amanda
Love the birds !!
But heavens , the stearic acid spots ?
Oil too hot when melting shea ? Or cooling down too quickly ?
I soap super cool so get stearic spots all of the time! 🙂
Can you briefly explain what is the advantages of soaping cooler? Also what temperature would that be
If I could comment here- I like to soap cooler as it slows down trace and gives you more time to play if you’re doing swirls or other fancy stuff. Also if you have milk or honey added you’ll have more time as sugars speed things up. I soap as low as 12-15 Celsius which is room temp in my lab.
perfect recepis!!!