
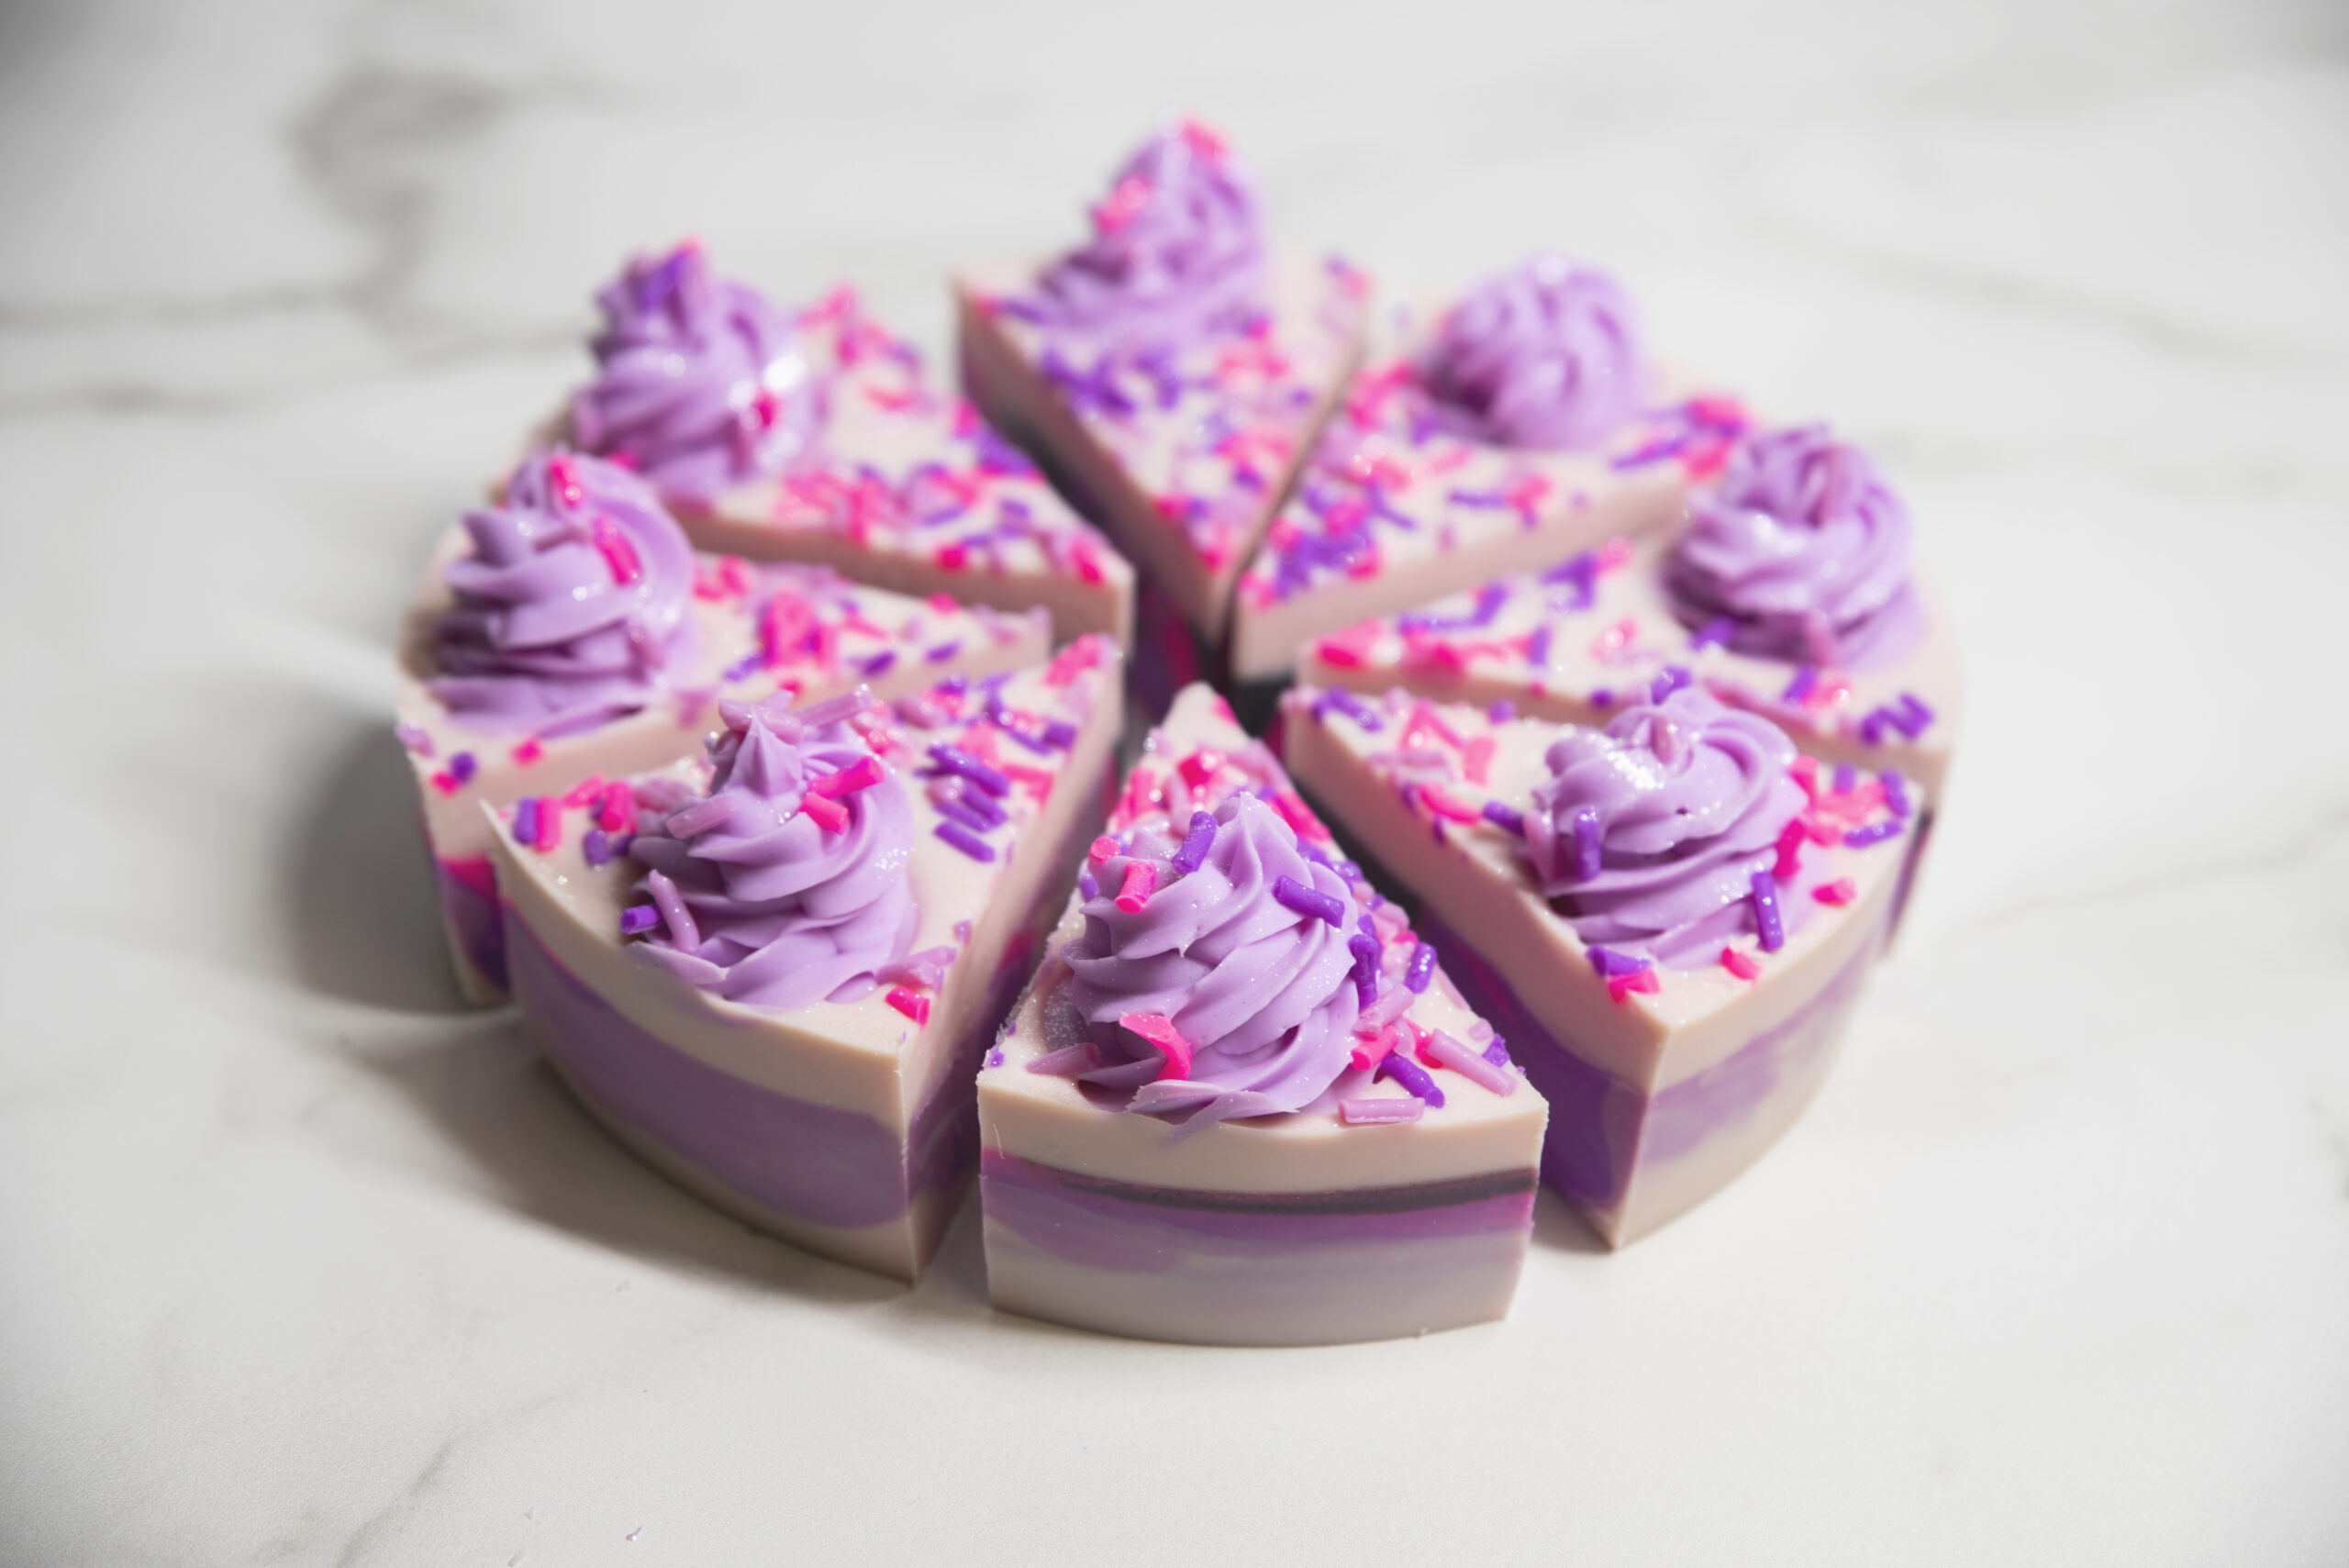
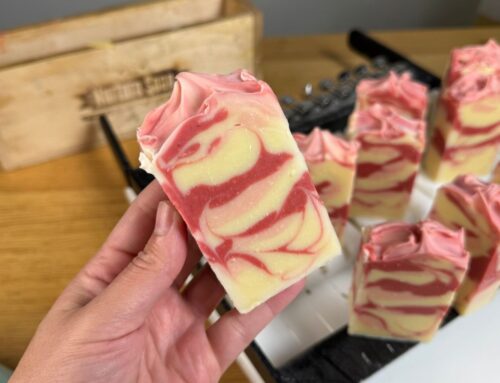
Now that you’ve made sprinkles, it is time to make a soap cake! This adorable soap cake features a swirled bottom and delicately piped frosting.

(Disclosure: Some of the links below are affiliate links, meaning, at no additional cost to you, I will earn a commission if you click through and make a purchase.)
I used an 8″ Silicone Cake Pan from Bramble Berry (no longer available). You can probably find something similar on Amazon.
I made this soap in two separate batches; one for the bottom-cake part and one for the icing piped on top. You can make it in one batch if you’d like. I like to take my time and not have to rush if my soap batter starts setting up quickly.
The Soap Cake Recipe
Base Oils
- Coconut Oil (76 degree) – 270 grams (30%)
- Shea Butter – 90 grams (10%)
- Olive Oil – 360 grams (40%)
- Avocado Oil – 72 grams (8%)
- Rice Bran Oil – 108 grams (12%)
Lye Solution
- Sodium Hydroxide – 127 grams (5% superfat)
- Water – 254 grams (1:2, lye:water ratio)
Scent
Use your favorite slow-moving fragrance or essential oil blend. I share my blend below. If you’re looking for a good place to get essential oils, I HIGHLY recommend Appalachian Valley Natural Products. I love their products and their shipping is super fast!
- Lavender Essential Oil – 10 grams
- Litsea Essential Oil – 5 grams
- Orange Essential Oil – 10 grams
- Patchouli Essential Oil – 5 grams
Colors
- Cosmetic Charcoal
- Neon Purple (Nurture Soap)
- Berry Twist (Nurture Soap)
- Neon Purple + White (Nurture Soap)
Soap Frosting Recipe
Base Oils
- Coconut Oil (76 degree) – 68 grams
- Shea Butter – 22 grams
- Olive Oil – 90 grams
- Avocado Oil – 18 grams
- Rice Bran Oil – 28 grams
Lye Solution
- Sodium Hydroxide – 31 (5% superfat)
- Water – 62 (1:2, lye:water ratio)
I didn’t add scent to the frosting, but you certainly could! I colored it using Neon Purple and White Mica from Nurture.
Let’s make soap! If you are new to soapmaking, be sure to download our free guide, How to Make Cold Process Soap! Gear up in your gloves and your safety glasses.
We’re going to make this soap in two phases. First, the bottom-cake part and then we’ll make the soap to pipe on top. You’ll notice that the piping recipe is a much smaller batch. You’ll make just what you need and not have much extra.
Step 1: Create a lye solution. Weigh the water and lye into two separate containers. Slowly pour the sodium hydroxide into the water while stirring. Stir until completely dissolved and set aside to cool.
Step 2: Prepare the base oils. First, weigh any solid oils and butters into a container and melt. You can melt using the microwave or low heat on a burner. Next, weigh each liquid oil into the melted oils. The liquid oils will cool down the melted oils and leave you with a base oil mixture that is about at the correct temperature to make soap. It might still need to cool down a bit.
Step 3: Weigh your slow-moving essential oil or fragrance oil into a glass or stainless steel container and add to your base oil.
Step 4: Prepare your mold. If you need to line your mold, line it.
Step 5: Check the temperatures. You should now have a container containing liquid base oils and a container containing lye solution. Take the temperatures using an infra-red temperature gun. Be sure to stir each mixture before taking the temp. You want your temperatures to be between 80-100 degrees F.
Step 6: Once you have reached desired temperatures, pour the lye solution into the oil mixture and mix to emulsion.
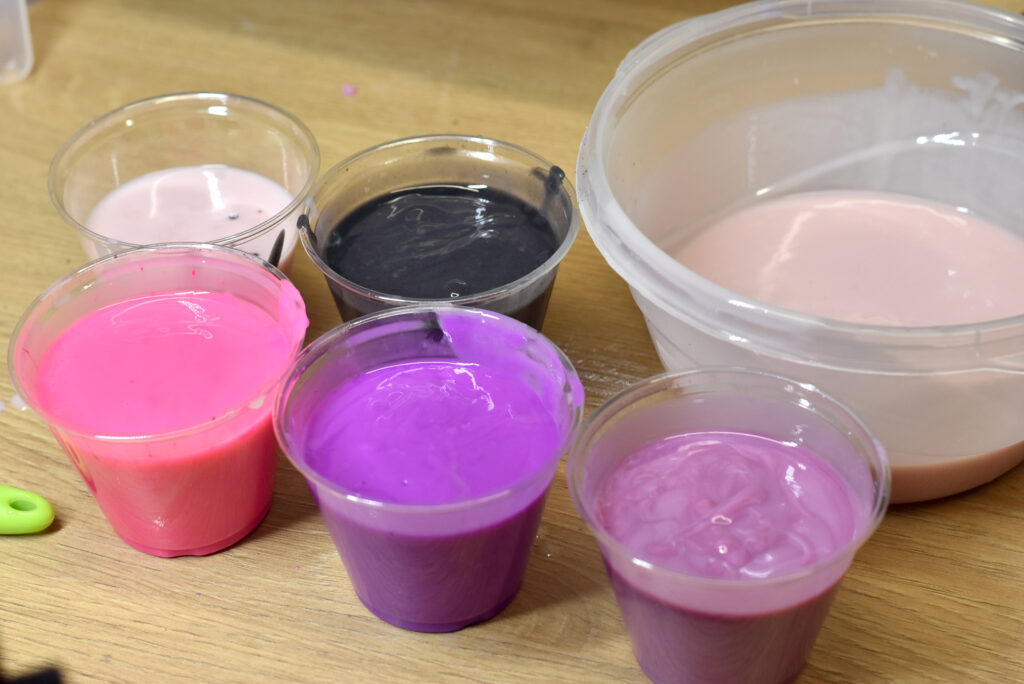
Step 7: Once emulsified, divide your soap to color. I left 1/3 for my top layer and divided the rest into 5 cups to color.
Step 8: Add colorant and mix.
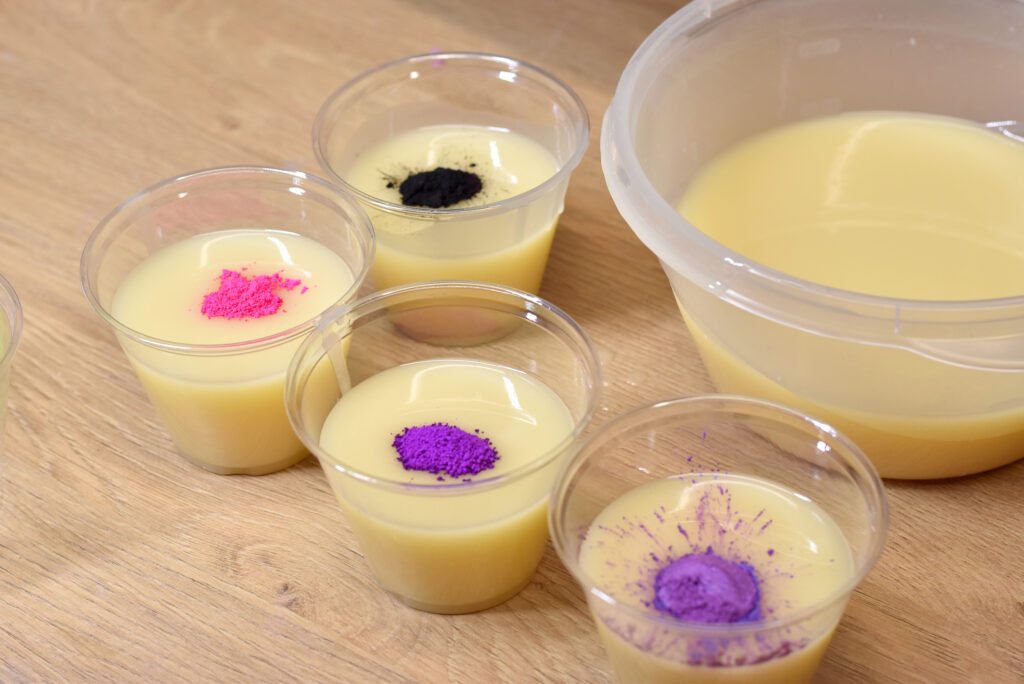
Step 9: Pour your colored soap into the mold in three spots. Rotate through each color at least four times.
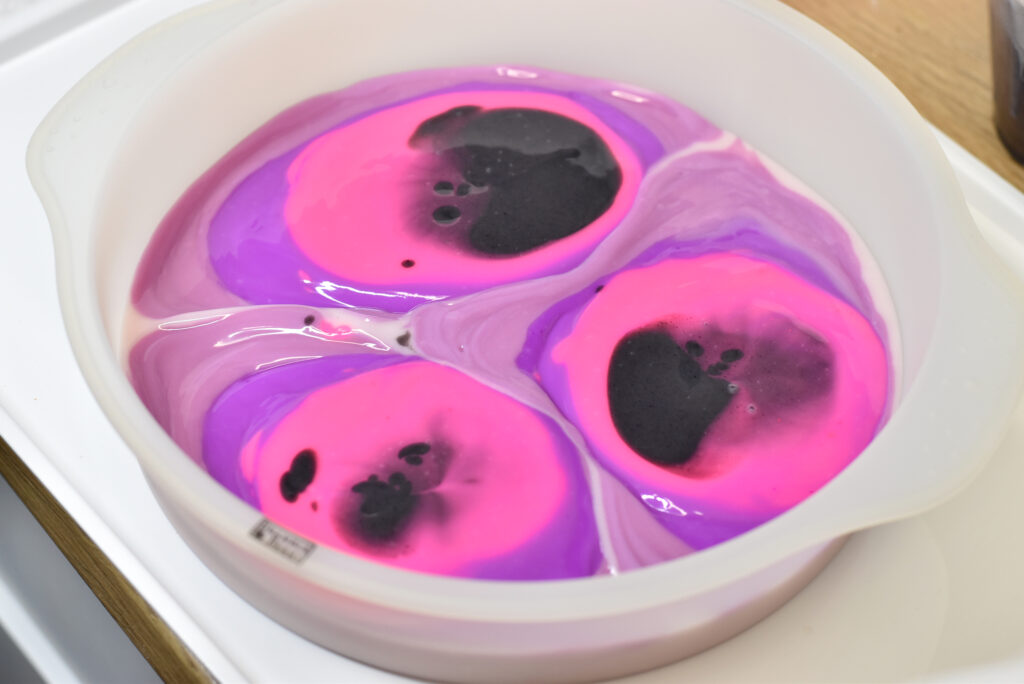
Step 10: Allow this swirled layer time to setup before you pour the top layer.
Step 11: While this soap is setting up, go ahead and create your piping soap. (The piping soap can be made as part of your main batch, but I like to make it separately to give myself plenty of time to pipe.)
Step 12: Keep an eye on your swirled base. Once it is firm enough to support the top layer soap, spoon the top layer on.
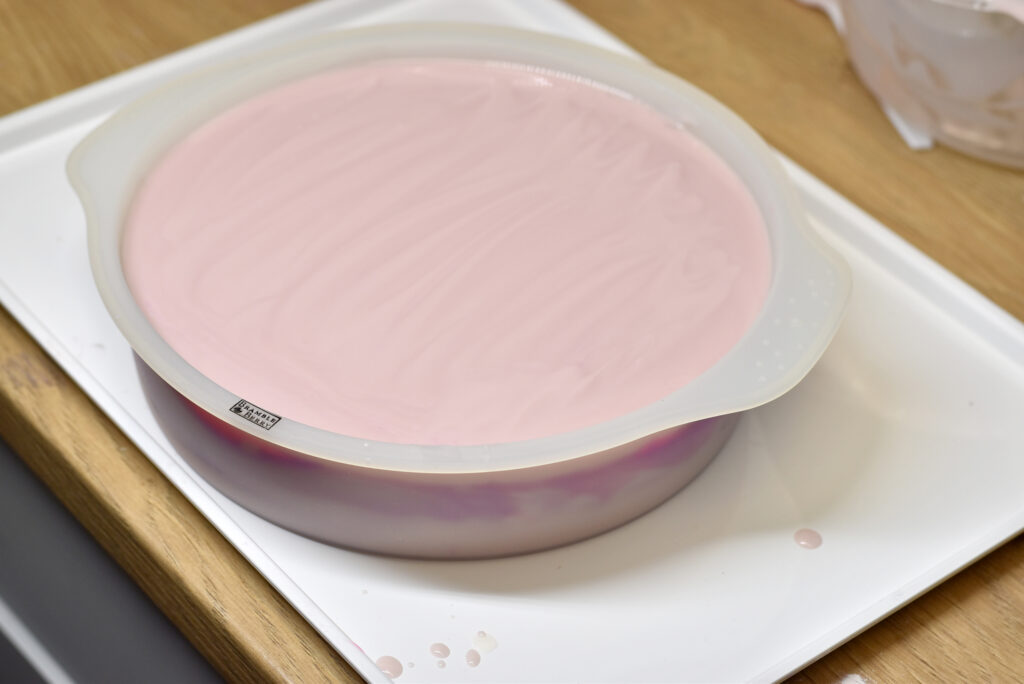
Step 13: Allow the top layer time to setup a bit to support your piping soap.
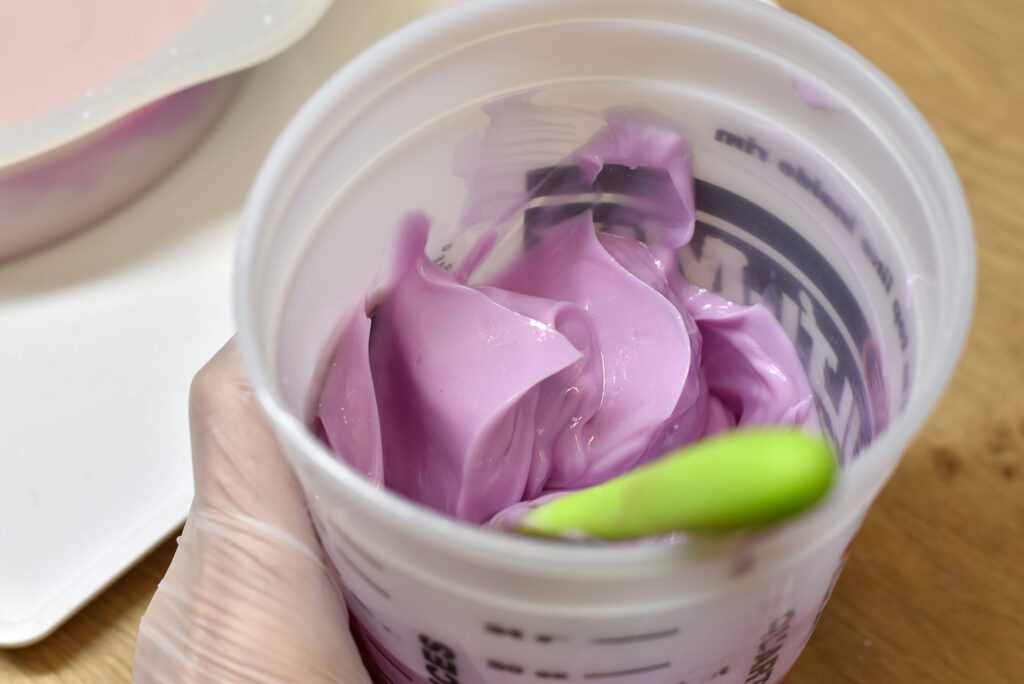
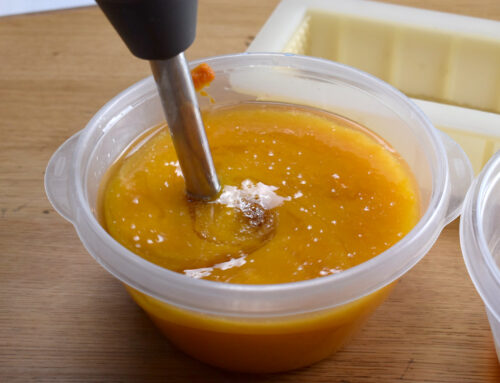
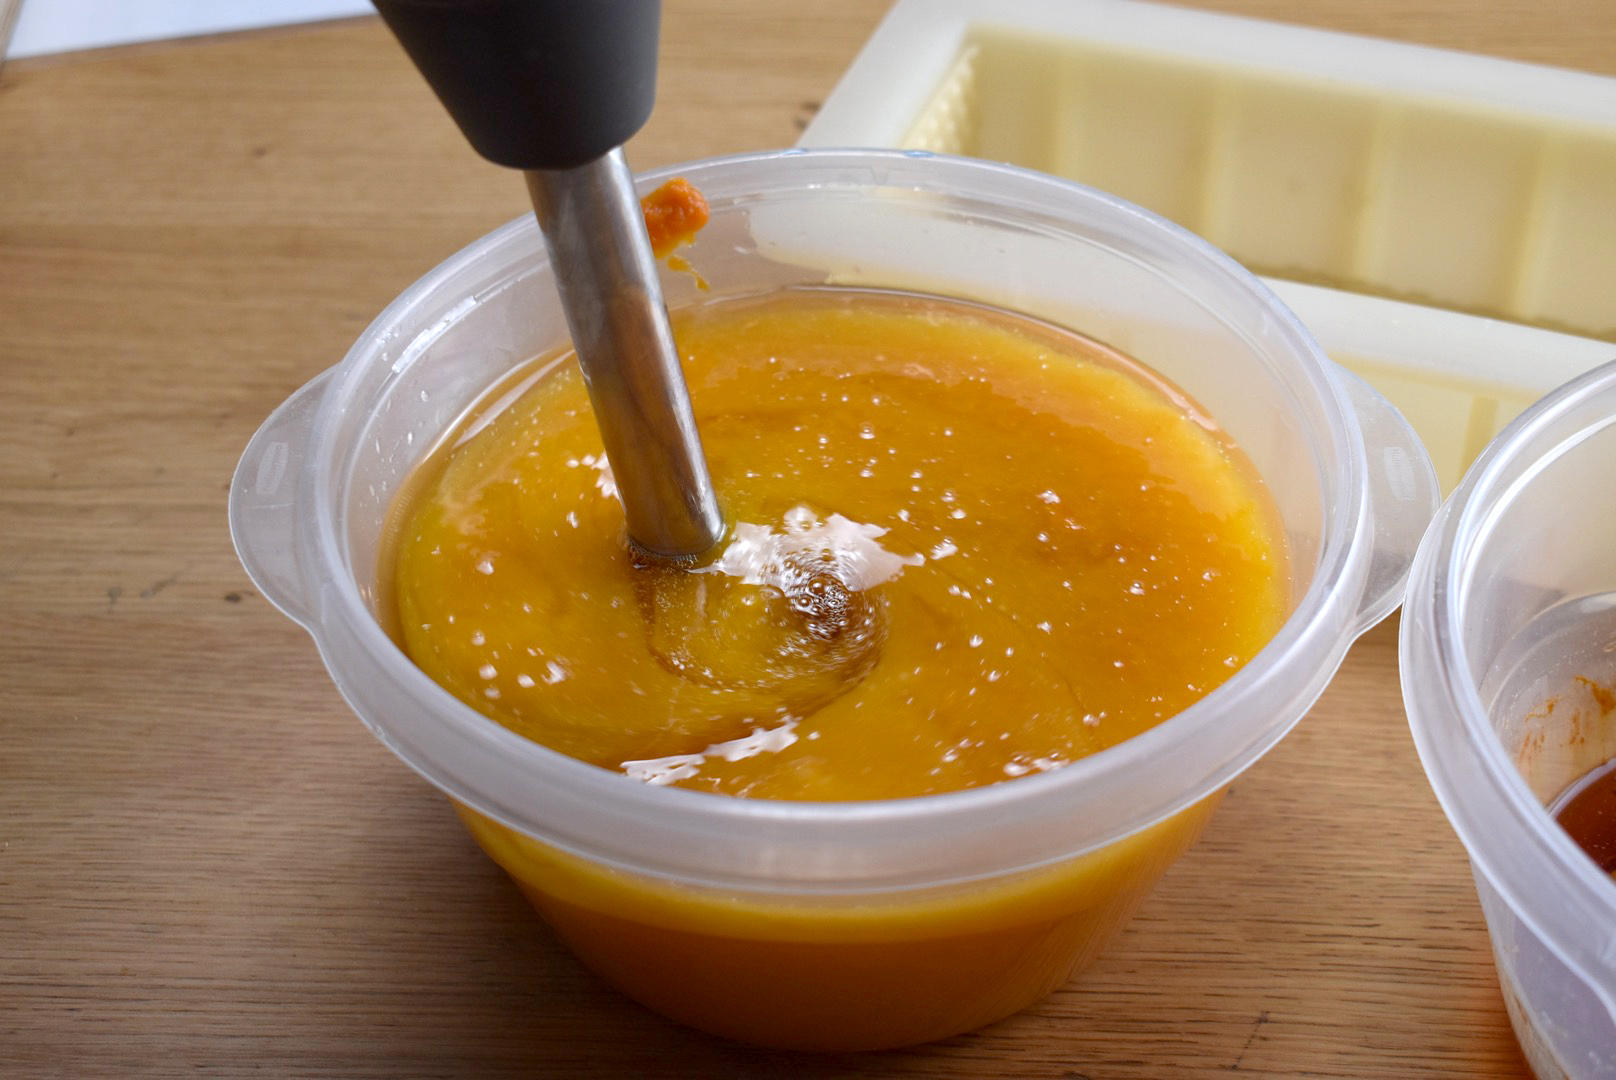
Step 14: Once the top layer is setup enough to support your piping, bring the piping soap to a really thick trace. You might have to rotate mixing with your stick blender and just letting it sit until it is firm enough.
It is firm enough to pipe when you can build peaks with your spatula and the peaks remain upright and don’t slouch.
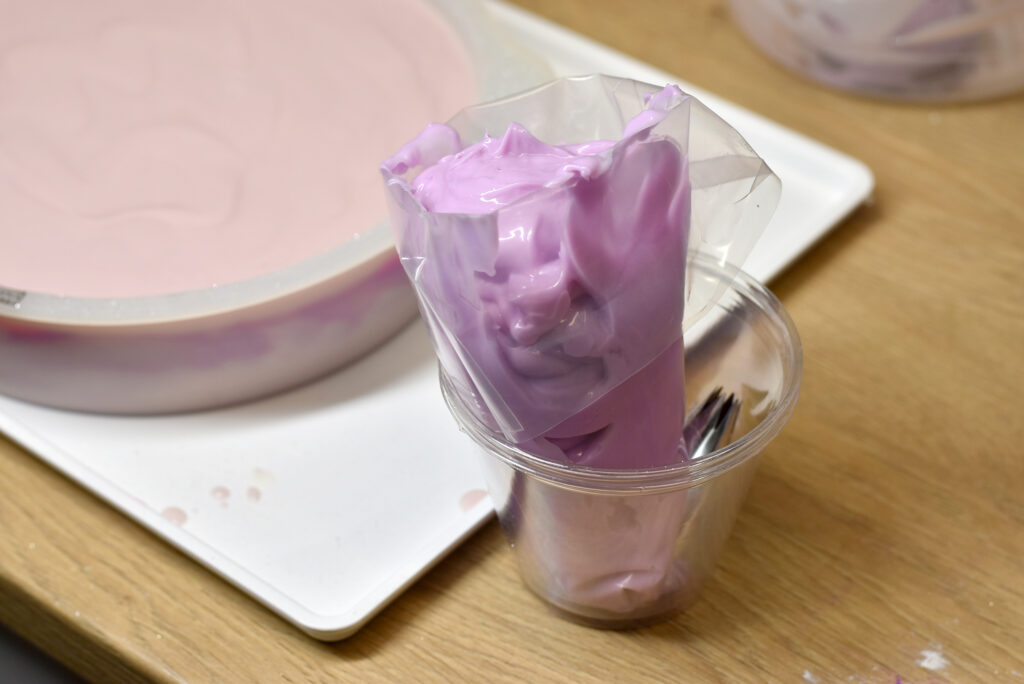
Step 15: Insert your piping tip into your bag, fill with soap frosting and pipe little swirls onto your cake. I knew that I was going to cut my cake into 8 slices so I piped 8 swirls of frosting evenly around the cake. I used a 1M piping tip.
Step 16: Top with soap sprinkles!

Step 14: Allow your soap to saponify and harden for at least 24 hours. After 24 hours, you can unmold and cut. Cure your soap for 4-6 weeks.


I love purple. I will try today OMG.
Looks tasty and sweet. It’s beautiful.